1. Welcome to Tacoma World!

    You are currently viewing as a guest! To get full-access, you need to register for a FREE account.

    As a registered member, you’ll be able to:
    • Participate in all Tacoma discussion topics
    • Communicate privately with other Tacoma owners from around the world
    • Post your own photos in our Members Gallery
    • Access all special features of the site

Pics of my sub and amp installation

Discussion in 'Audio & Video' started by sooner07, Jul 27, 2008.

  1. Jul 27, 2008 at 2:04 PM
    #1
    sooner07

    sooner07 [OP] 1/2 man 1/2 amazing

    Joined:
    Feb 17, 2008
    Member:
    #4783
    Messages:
    1,417
    Gender:
    Male
    First Name:
    A A Ron
    DFW, Texas
    Vehicle:
    Debadged 2008 Rugged Trail
    Toytec ultimate lift kit, light racing UCAs, ARB bumper and full skid plates underneath. Looking into redoing the suspension and maybe repainting the ol' Taco.
    I hope this will help anyone interested in upgrading their stereos. I will post pics of the HU install when I finally do it, same goes for door speakers.

    Equipment installed:
    2 10" IDQ 2ohm DVC
    2 Arc Audio 200.2 KAR series amplifiers
    4 awg power/ground wire from Knukonceptz.com
    2 sets of RCA cables (one set is for future use)
    1 battery terminal
    1 fused power distro block
    1 ground distro block
    1 MrMarv subbox and amp rack (3 peices)

    First, I removed the plastic storage units. They are simple. There are a couple bolts holding each down and then they just snap out (clipped on the sides).

    I then cut the child seat anchors so that the box would fit better. A dremel with ceramic cutting wheels did the trick. Took 1.5 discs per anchor.

    [​IMG]

    Here it is all cleared out:
    [​IMG]

    I then proceeded to run my power wire. This was fairly easy since there is a nice rubber grommet on the driver side. Took some pushing to get the wire through, but it was still better than making my own hole.

    [​IMG]

    Here is the view from under the drive side of the dash board.
    [​IMG]

    I later connected the power wire to my battery with a terminal cap that came with the 4 awg wire kit from Knukonceptz.com (I keep mentioning them because I highly reccomemend them for price quality and customer service for all audio wiring)

    [​IMG]

    After the power wire is pulled through the fire wall, you will need to run it to the back (or where ever you mount you amplifiers. I used the stock cable runs under the door sill trim plates. The trim plates pull up pretty easily. Just get one end up and pop the rest loose. Be careful to line up the tabs into the slots when you go to put it back in place. The tabs can be broken and that is just not cool. I put the power wire on the driver side and the RCAs on the passenger side. I did this only for ease of fitting the large wires comfortably to the rear.

    [​IMG]

    rear door:

    [​IMG]

    Pull it under the seat belt bolt and up the back side of the rear trim peice and it should come out nicely around the rear brace like so:
    [​IMG]

    I was going to run it through the brace but decided against it due to the sharp edges possibly cutting through the insulation over time.

    Next post: THE BOX!!!
     
  2. Jul 27, 2008 at 2:16 PM
    #2
    neontrail

    neontrail ✈ ✈ ✈ ✈ ✈ ✈ ✈

    Joined:
    Apr 9, 2008
    Member:
    #5844
    Messages:
    10,109
    Gender:
    Male
    Idaho
    Vehicle:
    2004 NISSAN XTERRA XE/SE
    De-badged, Tint 20%, Blue 48 LED dome-light, .......
    nice clean work!!!~! Well done! +1
     
  3. Jul 27, 2008 at 2:19 PM
    #3
    sooner07

    sooner07 [OP] 1/2 man 1/2 amazing

    Joined:
    Feb 17, 2008
    Member:
    #4783
    Messages:
    1,417
    Gender:
    Male
    First Name:
    A A Ron
    DFW, Texas
    Vehicle:
    Debadged 2008 Rugged Trail
    Toytec ultimate lift kit, light racing UCAs, ARB bumper and full skid plates underneath. Looking into redoing the suspension and maybe repainting the ol' Taco.
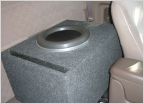
    I can't seem to find the pics I took of the box when it first came in the mail from MrMarv's workshop. Let me just say, he builds some very nice boxes. It was very sturdy and had nice clean lines. He pays attention to detail (no sloppy glue or scuffs). I was very very happy with it. So, thanks again and props to MrMarv!!!! Anyone looking for a box, talk to Marv. He is a super nice dude and he builds some quality stuff.

    I do have pics after I put some fancy clothes on the boxes (two enclosures and an amp rack). The everything fit together perfectly. You can see the other enclosure in the back ground partially carpeted. If you plan to carpet anything with automotive carpet do yourself a favor and get some 3M supper 77 spray adhesive. It is the best stuff on the planet (at least that I have used). Just remember, spray both sides, let it get tacky, and you only have one chance to do it right. :D

    [​IMG]

    [​IMG]

    After everything was carpeted, put my amps on the rack and positioned the distro blocks and subs.

    [​IMG]

    I then srewed everything down and had a refreshing beverage.
    I proceeded to make the mistake of not having anyone around to help me lift this beast into the back seat (its freaking heavy), but I got it in without breaking anything. Here is one side:

    [​IMG]

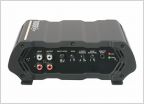
    And the amps:
    [​IMG]

    I forgot to mention where I grounded my amps. I removed a bolt and ground away the paint from here:
    [​IMG]

    I forgot if that was holding something down or not... if it was I hope I put it back. :D

    I haven't switched out the H/U yet so my RCAs aren't actually being used. I cut the speaker leads into the rear door speakers and used that for the high level inputs on one of my amps. So I am only using one of the amps and one of the subs for the time being. Give me a few more weeks and I have a new HU and both subs pounding out the beats.

    Anyway, I'll try and track down more of the pics I took. If anyone has any questions, please let me know. If anyone is curious about the wiring of the voice coils on the subs, I can post that as well.
     
  4. Jul 27, 2008 at 6:45 PM
    #4
    Addicted

    Addicted Well-Known Member

    Joined:
    Jun 22, 2008
    Member:
    #7476
    Messages:
    264
    Greenville, SC
    Vehicle:
    07 DC 4x4 - TRD Off Road - Black
    Nice work! Looks great... :thumbsup:
     
  5. Jul 28, 2008 at 11:44 AM
    #5
    atsaubrey

    atsaubrey Dealer/Sales Rep for Sundown Audio.

    Joined:
    Apr 20, 2008
    Member:
    #6087
    Messages:
    421
    california
    Vehicle:
    blue 2007 double cab
    Sundown Audio 100.4 and 1500D, Pioneer 880PRS, Zapco Refernece 6.5" comps, 2 10" Image Dynamics IDQ, 200ft of Second Skin deadener, Kicker wire
    Nice choice of gear!
     
  6. Jul 28, 2008 at 4:46 PM
    #6
    sooner07

    sooner07 [OP] 1/2 man 1/2 amazing

    Joined:
    Feb 17, 2008
    Member:
    #4783
    Messages:
    1,417
    Gender:
    Male
    First Name:
    A A Ron
    DFW, Texas
    Vehicle:
    Debadged 2008 Rugged Trail
    Toytec ultimate lift kit, light racing UCAs, ARB bumper and full skid plates underneath. Looking into redoing the suspension and maybe repainting the ol' Taco.

    Thanks man. :)
     
  7. Jul 28, 2008 at 5:13 PM
    #7
    sooner07

    sooner07 [OP] 1/2 man 1/2 amazing

    Joined:
    Feb 17, 2008
    Member:
    #4783
    Messages:
    1,417
    Gender:
    Male
    First Name:
    A A Ron
    DFW, Texas
    Vehicle:
    Debadged 2008 Rugged Trail
    Toytec ultimate lift kit, light racing UCAs, ARB bumper and full skid plates underneath. Looking into redoing the suspension and maybe repainting the ol' Taco.
    MrMarv re-emailed me the pics of the box being assembled in his shop. Thanks Marv, you are awesome.

    [​IMG]

    [​IMG]

    [​IMG]
     
  8. Jul 28, 2008 at 6:57 PM
    #8
    Anthony

    Anthony San Antonio Detailer :)

    Joined:
    May 7, 2008
    Member:
    #6464
    Messages:
    859
    Gender:
    Male
    Houston - Spring/Tomball area
    Vehicle:
    06 prerunner access cab 2.7L M5
    Nfabs Afe Pro Dry UWS linex'd toolbox
    good job :D
     
  9. Jul 28, 2008 at 7:02 PM
    #9
    PwRTRIp_Xr

    PwRTRIp_Xr Active Member

    Joined:
    Jul 18, 2008
    Member:
    #8015
    Messages:
    42
    Nice setup bro.....
     
  10. Aug 3, 2008 at 9:38 AM
    #10
    Mr Marv

    Mr Marv 1-831-383-0308 7am-10pm pst Vendor

    Joined:
    Mar 6, 2007
    Member:
    #1009
    Messages:
    992
    Gender:
    Male
    First Name:
    Marv
    Monterey Bay California
    Vehicle:
    Custom Built Enclosures/speaker adapters etc
    Thanks for the props and it looks good! :) BTW, I think I saw an email from you in my mess so I'll get back to you shortly.
     
  11. Mar 23, 2009 at 6:43 PM
    #11
    snackeycakes

    snackeycakes New Member

    Joined:
    Mar 23, 2009
    Member:
    #15062
    Messages:
    2
    Gender:
    Male
    Vehicle:
    1999 Tacoma 4x4

Products Discussed in

To Top