1. Welcome to Tacoma World!

    You are currently viewing as a guest! To get full-access, you need to register for a FREE account.

    As a registered member, you’ll be able to:
    • Participate in all Tacoma discussion topics
    • Communicate privately with other Tacoma owners from around the world
    • Post your own photos in our Members Gallery
    • Access all special features of the site

Slodgetto's Green Dragon 4x4 Conversion Build

Discussion in '1st Gen. Builds (1995-2004)' started by Slodgetto, Mar 29, 2012.

  1. Mar 29, 2012 at 10:57 AM
    #1
    Slodgetto

    Slodgetto [OP] Über Posre

    Joined:
    Jan 18, 2011
    Member:
    #49483
    Messages:
    9,276
    Gender:
    Male
    First Name:
    Silas
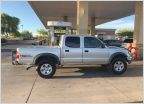
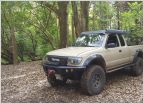
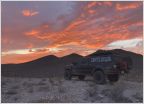
    This is my 99 Tacoma PreRunner.

    [​IMG]
    [​IMG]
    [​IMG]
    IMG_0300_zps1b4672cf_1d6f67dd3d18b62d2bfec84961570a1dcac94888.jpg
    IMG_0329_zpsc554d137_74026a00044594fa88a36a475a61b6ebdbae7ef3.jpg
    [​IMG]
    [​IMG]
    [​IMG]
    [​IMG]
    [​IMG]

    [​IMG]


    The day I bought her. 225/75r15 tires and 22 mpg!!!! :eek::eek:
    [​IMG]


    Specs:
    Tires/Wheels:
    37/1250r17 Goodyear MTR Kevlars
    17x8 BlackRock Vipers
    Full-size Spare

    Suspension:
    Eibach Coils on Bilstien 5100s
    1/4" Top Plate Spacer (Driver Side)
    Anti-Sway Bar Removed
    64" Chevy Leaf Packs (Rebuilt)
    14" 2.0 Fox Pro Series Shox
    Ballistic 2.63" Creeper Joint Rear Shackle Hangers
    4.5" Energy Suspension Rear Bumpstops

    Engine/Performance:
    Flowmaster Super 10 Single Chamber Muffler
    Cold Air Intake
    Capped Silencers

    Drivetrain:
    Extended Diff Breathers
    Rear Extended SS Brake Hose
    E-brake Cable Re-routed For More Travel
    5.29 Nitro Gears w/ Solid Pinion Collars
    Rear 8" E-locker (OE)
    Front ARB Air Locker

    Armor:
    Trail Gear Rock Defense Front Bumper
    Cloudy Fab Sliders
    High-clearance Rear Bumper (Home-made)
    1/4" Plate IFS/Tranny/T-case Skid Plates (Home-made)

    Other Mods:
    13" Bed Bob
    9" Dovetail
    Boxed Frame
    Firewall Tubbed
    ARB Air Compressor (Mounted Under Hood)
    Herculined Bed
    Hi-Left bed mounts
    520xl Uniden CB Radio/PA w/ tuned, 3' Firestik Antenna
    2 100w Spotlights
    LED Rock Lights


    LINKS TO BUILD SECTIONS:
    Lift Install
    4x4 Conversion
    5.29s w/ Solid Collar - 8" TRD
    13" Bob/9" Dovetail
    ARB Locker & 5.29s w/ Solid Collar - 7.5" Clamshell
    35" Tires on 3" Lift :rolleyes:
    37" Tires on 3" Lift :cool:
    64" Chevies + 14" Shocks


    Very first mod was headache rack, then some 31" All-Terrain Tires. :D
    [​IMG]

    Of course I haaad to go mudding with my new off-road tires haha... :D
    [​IMG]

    Deck-Plate Mod
    [​IMG]

    Diff Breather Mod
    [​IMG]

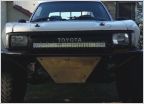
    Bedlinered grill, fender flares, and bumper... Plasti-derped wheels.
    [​IMG]

    Flowmaster Super 10: 6" of single chamber goodness. :D
    [​IMG]

    Stock muffler vs Super 10
    http://www.youtube.com/watch?v=jN1whEO3sPU

    My "open headers" video. :D Just for fun...
    http://www.youtube.com/watch?v=x0jnjYfyon4

    Cloudy Fab Sliders! :woot:
    [​IMG]
    IMG_2040FW_2c611d54d9466f4662a11e00a2032a94a3543002.jpg
     
    Last edited: Apr 10, 2014
  2. Mar 29, 2012 at 10:57 AM
    #2
    Slodgetto

    Slodgetto [OP] Über Posre

    Joined:
    Jan 18, 2011
    Member:
    #49483
    Messages:
    9,276
    Gender:
    Male
    First Name:
    Silas
    Istalled lift - June 2011

    Got some Bilstien 5100s from another member(ended up re-selling the rears)
    [​IMG]

    Then got some used Eibach Coils from BirdTRD (ironically shipped in an OME box! lol)
    [​IMG]

    Got the strut assembled at Desert Rat for $20 each.

    After hours (total n00b) of research on TW I installed the them on my truck. :)
    [​IMG]
    [​IMG]

    Also learned a lesson on "wet torque" vs. "dry torque" :eek: I tried torquing my LBJ bolts to spec while covered in PB Blaster.... Didn't work out to well. haha (Stripped the lug nut from sheer Noobness. :anonymous:)
    [​IMG]

    Bro leanin bad....
    [​IMG]

    After sporting the bro lean for about a week, I got in my Expedition Leaf Packs, 10" Bilstien 5150s and Extended SS Brake Line from All-Pro.

    (Note: I have since completely redone the rear suspension. Click here to see my current set-up.)
    [​IMG]

    Installed the next afternoon after work. (Check out those jackstands!!!! :eek:)
    [​IMG]
    [​IMG]
    [​IMG]

    Got some custom u-bolts from a local suspension shop that specializes in semi-trucks for $30 total. Worked perfectly.
    [​IMG]

    Made a BPV Bracket out of some scrap
    [​IMG]

    Badda bing
    [​IMG]

    Badda boom
    [​IMG]

    The springs settled a good inch or two after a bit of driving.

    While I didn't really like how small the 31s looked, I fell in love with the lift and the look it gave my taco! :)

    While the expos do give a fairly rough ride unloaded, they help out a ton with loads and the ride gets much smoother! That's their purpose anyway.
    [​IMG]
    [​IMG]
    [​IMG]

    In the past few months I've added some much needed 4.5" bumpstops:
    [​IMG]
    and 6" shackles (Outlaw 1.5" lift)
    [​IMG]
    [​IMG]
     
    Last edited: Mar 11, 2013
  3. Mar 29, 2012 at 10:57 AM
    #3
    Slodgetto

    Slodgetto [OP] Über Posre

    Joined:
    Jan 18, 2011
    Member:
    #49483
    Messages:
    9,276
    Gender:
    Male
    First Name:
    Silas
    4x4 Conversion -- Dec 2011 to Current


    Parts I've bought for the conversion.

    A340E Transmission w/ J-shift Trasfer Case - 90k Miles (99 Taco): $400
    7.5" Clamshell w/ Grenaded Ring and Pinion (02 Taco): $50
    Manual Hub Spindles (96 Taco): $110
    Inner Hub Seal (O'Rielly's): $19.98
    OEM Upper Ball Joints (Dealership): $85.45
    Front Drive Shaft (98 4Runner): $40
    Rear Driveshaft (Front Section) w/ CB (96 Taco): $20
    AISIN Lockouts w/ Hardware (00 Taco): $30
    Transmission Mount (96 4Runner) : $20
    T-case Shifter Boot (00 Taco): $10
    Tan Center Console w/ Cloth Boot (00 Taco): $ 17.61
    Refurbished Manual Hub CV Axles w/ Liftime Warrenty (Napa): $164.38
    Non-ADD Diff Output Tube w/ Breather Hose (00 Taco): $20
    Total: $987.42


    PreRunner Stuff I've Sold:
    Spindles: $80
    Transmission (150k miles) for Scrap Metal: $25

    Total: $105.00

    Total cost of my 4x4 conversion = $883.42 (Does not include the new 5.29 Nitro Gears, and the ARB locker that went in the front third.)


    Obtained a transmission and j-shift transfercase on January 23, 2012 :woot:
    [​IMG]


    Dropped the pan to check everything and nothin but nice, red, tranny fuild drained out! :D Also replced the main seal while it was accessable.
    [​IMG]


    February 4, 2012 -- After getting a tranny mount, the correct length driveshaft, and all the needed fluids, it was time to do the swap!

    After a coupled of hours disconnecting/unbolting everything, I finally dropped the 2wd tranny down. Broke the plastic bracket for the kick down cable in the process... :mad: Those things are extremly fragile!!!
    [​IMG]
    [​IMG]
    [​IMG]

    Started getting ready to install the new tranny the next morning
    [​IMG]


    Took a couple tries getting the torque convertor in all the way (got kinda frustrated trying to keep it in all the way while jacking the tranny up! It just kept slipping out.)


    Crossmember back on. Torqued to spec and Blue Lock-tite on every bolt!
    [​IMG]


    Ended up just using duct tape to keep the kick-down cable bracket in place!!! lol :eek: Hasn't popped out since then, but it is temporary.

    It was much easier to install the tranny with the trasfer case off, so that was the next step. Cut out the shifter plate and it went on no problem. :)
    [​IMG]
    [​IMG]
    [​IMG]


    Started putting on the drive shaft and decided I wanted to test out the tranny real quick! :D So I put in some fluid and started her up. So far so good.... Shifted into reverse and I hear CLUNCK CLUNK CLUNK!!!! Quickly shifted back to park and tried again clunking was even worse! I was in despair!!! Hours and hourse of work and I screwed it up! :frusty: Didn't realize until about 5 min later that it was the partially bolted on drive shaft that was clunking around!!!!!! :rofl: Felt like an idiot lol. Tried it again and it was perfect! Took it for a spin and the shifting and everything was perfectly normal. :woot: One of the most satisfying feelings I ever had! Even used "2lo" on a recent off-road trip, and it works great. :yay:


    Before:
    [​IMG]
    [​IMG]


    After:
    [​IMG]
    [​IMG]


    Since then I've aquired the interior pieces. Looks much better, and it's A LOT quiter with that rubber boot! lol
    [​IMG]


    Update: May 14, 2012

    Finally finished outfitting the front diff with 5.29s and an ARB locker, so it was time to swap in the rest of the 4x4 parts. :) :woot:

    Pulled off the tires, put the calipers to the side, took off the spindles and prepared to put eveything in when it started to HAIL. lol :( Normally it wouldn't be a big deal but I was on a veeery tight timeline to get ready for Moab... lol)
    [​IMG]
    [​IMG]
    [​IMG]

    Thankfully it only lasted for about 2 hours and I wasn't to far behind schedule...

    Popped in the freshly re-geared clamshell (i put electrical tape over the ARB brass fitting just to kep things clean...)
    [​IMG]

    NAPA CV axles went in w/o a hitch...
    [​IMG]

    Had an interesting time with the spindles, since they came off of a 96 taco that had been sitting for a while... the dust covers are bent all to high heaven, but who cares about that... :rolleyes: The little lockout studs were also a bit tweaked so I had to use a brass hammer to coax the manual hub body on. Also, the NAPA CV had a hard time fitting into the O'Reilly inner spindle seal so I had to get creative getting the passenger axles all the way through the hub. Other than that, everything went in smoothly.
    [​IMG]
    [​IMG]

    Popped the tires back on, hooked up the front driveshaft, filled up the front diff and went down to a dirt lot to test things out. I discovered that 4LO IS AMAZING!!!! :goingcrazy: lol everything worked great! :D

    My PreRunner is now 4x4. :)
     
    Last edited: Apr 15, 2013
  4. Mar 29, 2012 at 10:57 AM
    #4
    Slodgetto

    Slodgetto [OP] Über Posre

    Joined:
    Jan 18, 2011
    Member:
    #49483
    Messages:
    9,276
    Gender:
    Male
    First Name:
    Silas
    AISIN Manual Hub rebuild...
    [​IMG]

    Started with this. The one on the left had almost ZERO grease and the one on the right was PACKED with way too much grease! :eek: Very satisfying to re-build them! :D
    [​IMG]

    Coated all inside moving parts with some high temp sythetic grease. On the ouside face and dial, I used Loctite Naval Jelly Rust Remover, scrubbed, then scrubbed with dishsoap, rinsed, wiped down with gasoline, used about 5 coats of paint, sanded down the lettering for some contrast, then about 10 coats of clear coat to finish them off.
    [​IMG]
    [​IMG]

    And bam, final result. I'm using the orange ones on my truck and the OEM looking ones as spares.
    [​IMG]
     
  5. Mar 29, 2012 at 10:58 AM
    #5
    Slodgetto

    Slodgetto [OP] Über Posre

    Joined:
    Jan 18, 2011
    Member:
    #49483
    Messages:
    9,276
    Gender:
    Male
    First Name:
    Silas
    Fitting 35s on a 3" lift. (Note: I have since redone this job to fit 37s and clean-up my first firewall tub. Click here to see the current set-up.)

    My interest in fitting 35s sorta started by accident when my buddy, (Ghost...) got some tires from his neighbor down the street and offered them to me since I was still on 31s and looking for bigger tires. Turns out the tires were 315/70r17s and I had no idea if they would fit. So I started a thread about it... did some searching of my own, and my world was opened to the idea that you don't HAVE to put on a 33" tire or smaller on your 3" lifted Tacoma!! :eek: lol

    I ended up findin 6 of the same exact tires in the "dead tires" pile at work which my boss let me have for free. :p So I was able to give Ghost his tires back, bought some cheap 17x9" 3.5" BS ProComp steel rims to fit the tires (which had to be special made and took 5 months to get here! :mad: but that's another story...), and finally got to work...
    [​IMG]

    Had to modify the soft 8 steels a bit in order to clear the caliper. A very fine flap disc on the grinder worked well.
    [​IMG]

    Decided to cut 2" out of my fenders in preperation for bigger tires in the future... 1" would've been plenty to fit the 35s though.

    I wanted to get as clean of a look that I could, so I decided against just taking a sawzall to them. I also didn't want the sharp edges that would have been the result of using a sawzall. So I decided to make perpendicular cuts to the edge the fender, 2" long and an inch or so wide, to make little tabs that I could bend under. This let me keep the same original line that the fenders had from the factory and it gave a nice round edge to the edge of the fender.

    I used painters tape for 2 reasons: 1) To keep the paint from chipping and flaking while cutting and bending. 2) It made for a nice surface to mark my cuts...
    [​IMG]
    [​IMG]
    [​IMG]
    [​IMG]
    [​IMG]
    [​IMG]
    [​IMG]
    Overall I'm very happy with this method and how it turned out. The only bummer is that the paint did flake a bit at all my bends... so i may apply a strip of Bedliner or something similar on the edges to cover that up... but we'll see. It hasn't bothered me yet, because you can only notice it up close, or if someone points it out, so I'll probably just leave it like it is for now.

    Tubbing the firewall.

    First order of business was getting an alignment and pushing the caster as far forward as possible.
    Before:
    [​IMG]

    After:
    [​IMG]

    Put the front end on jackstands, and removed the driverside strut. Removing the strut allowed me to control all available travel with a floor jack, so I could see exactly where I needed to cut. I also removed the fenders so I had more room to operate the grinder and welder.
    [​IMG]
    On the bumpstops--full stuff.
    [​IMG]
    Ended up cutting a bit more than what this line indicates...
    [​IMG]
    Just hit this in h the 2lb sledge, and that yielded plenty of room.
    [​IMG]
    On the inside, I removed the plastic trim that was in the way, pulled the carpet back from where I was going to be cutting/welding, and tied up all the wires out of harms way. Than cut away with the grinder and sometimes the sawzall and beat in some areas with the hammer
    [​IMG]

    Still needed to be cleaned up a bit...
    [​IMG]
    I'm worried about the cab mount if i ever go to a bigger tire... but it should be ok for now.
    [​IMG]
    [​IMG]
    Once all the grinding was done, I made some cardboard templates to cover the openings and then used those to trace the shape i needed on to a 16g steel sheet. The 16g was very easy to bend into place. Tacked it (as best i could) into place with my Harbour Freight 110volt 80amp STICK welder...... lol :( Only had a couple of flames poof up inside the cab. :eek: hahahahahaha

    Did't get many pictures after this, because I was supposedly leaving for Moab the next morning at 4am!!! so I wasn't thinking about taking pictures at that time. However, you can see how much room the tub gave me in this picture:
    [​IMG]
    [​IMG]
     
    Last edited: Mar 11, 2013
  6. Mar 29, 2012 at 10:58 AM
    #6
    Loudpedal

    Loudpedal Mind = Blown

    Joined:
    Oct 2, 2009
    Member:
    #23661
    Messages:
    1,596
    Gender:
    Male
    First Name:
    Blair
    Not really New, not really Mexico
    Vehicle:
    02 SR5-Hole 4x4
    Andres Devil Horns, Goodyear Duratracs, Accidental Tailgate Delete (x2), Billy 5100s, OME 881 coils, Wheeler's 5-leafs, BAMF Sliders with kickouts, Box Rocket Fab Bedrack.
  7. Mar 29, 2012 at 11:00 AM
    #7
    Konaborne

    Konaborne Pineapples on pizza Hawaiian does not it make.

    Joined:
    Nov 21, 2010
    Member:
    #46536
    Messages:
    31,906
    Gender:
    Male
    First Name:
    Cody
    Kealakekua, Hawaii
    Vehicle:
    Lifted 00 TRD Off-Road
    fox extended travel remote resivoir coilovers, 14" eibach 600lb coils, All Pro tubular chromoly 1" uniball upper control arms, All Pro expedition leaf packs, 10" bilstein 5150 piggyback reservoir shocks 265/75r16 Goodyear wrangler MT/R kevlars wrapped around 16" Helo 791 gloss black, Mini H1 retrofits with 6000k bulbs, 18" magnaflow w/custom exhaust reroute various decals, Sockmonkey retro hood stripes
  8. Mar 29, 2012 at 11:02 AM
    #8
    Slodgetto

    Slodgetto [OP] Über Posre

    Joined:
    Jan 18, 2011
    Member:
    #49483
    Messages:
    9,276
    Gender:
    Male
    First Name:
    Silas
    pass the popcorn....
     
  9. Mar 29, 2012 at 11:05 AM
    #9
    45acp

    45acp Paint me back in Wyoming again...

    Joined:
    Aug 9, 2009
    Member:
    #20861
    Messages:
    6,704
    Gender:
    Male
    First Name:
    Jonathan
    Boring, Wisconsin
    Vehicle:
    1981 Long bed 4x4
  10. Mar 29, 2012 at 2:42 PM
    #10
    steve o 77

    steve o 77 braaap

    Joined:
    Nov 29, 2009
    Member:
    #26726
    Messages:
    19,924
    Gender:
    Male
    First Name:
    Steven
    In a corn field, OH
    Vehicle:
    1990 Chevy Siveraydo
    245k+ miles, rust, working AC, bald eagles
  11. Mar 29, 2012 at 3:39 PM
    #11
    Jsimp

    Jsimp WV, VA, NC places i roam in the Yota

    Joined:
    Feb 9, 2012
    Member:
    #72476
    Messages:
    470
    Gender:
    Male
    First Name:
    Justin
    Winchester VA
    Vehicle:
    02 4runner
    E-Locker swapped! Limited swapppppp
    is your hood black? if so can you post more pictures? and if not can you still post pictures :)
     
  12. Mar 29, 2012 at 3:41 PM
    #12
    Fiolo

    Fiolo Senior member

    Joined:
    Sep 10, 2011
    Member:
    #63227
    Messages:
    4,381
    Gender:
    Male
    Vehicle:
    1998 Tacoma, 2022 Tacoma, 2019 L5P Duramax
    Lost track many mods ago
    Looks great
     
  13. Mar 30, 2012 at 8:34 AM
    #13
    Slodgetto

    Slodgetto [OP] Über Posre

    Joined:
    Jan 18, 2011
    Member:
    #49483
    Messages:
    9,276
    Gender:
    Male
    First Name:
    Silas
    Yes. and Yes. :) lol I'll post more stuff after work tonight... The hood is plasti-derped for now, but I'll be removing that and Raptor Lining it soon.
    Thanks!
     
  14. Mar 30, 2012 at 8:21 PM
    #14
    Slodgetto

    Slodgetto [OP] Über Posre

    Joined:
    Jan 18, 2011
    Member:
    #49483
    Messages:
    9,276
    Gender:
    Male
    First Name:
    Silas
    Updated lift section. On to the next one...
     
  15. Mar 30, 2012 at 10:10 PM
    #15
    bellassaiw10

    bellassaiw10 Formally afroman5015

    Joined:
    Jun 16, 2010
    Member:
    #39032
    Messages:
    5,527
    Gender:
    Male
    Currituck NC
    Vehicle:
    09 LMM 2500HD Duramax
    How much lift did you get outta this setup ? and noob question but what does larger shackles do ??
     
  16. Mar 31, 2012 at 7:38 AM
    #16
    Slodgetto

    Slodgetto [OP] Über Posre

    Joined:
    Jan 18, 2011
    Member:
    #49483
    Messages:
    9,276
    Gender:
    Male
    First Name:
    Silas
    Unfotunately, I didn't get exact measurements.... :( But right now, It's right at a full 3" in the front and about 5" in the rear unloaded. I can get some measurements later today..

    And the larger shackles give more lift. Unfortunately, they'll also kill your shackle angle if you don't re-mount the rear spring hanger a few inches forward. You want the shackles to be at a 40-45 degrees angle, and as you can see from the pics, mine are way to steep. :( IF You get longer shackles and make sure they're at a 40-45 degree angle, another benifit will be a lot more droop in your articulation. More flex.... :cool: However you don't want to go too long because the longer the shackle, the less stability you'll have on roads, since the rear as more play to sway sideways. (Not a very nice thought....)
     
  17. Mar 31, 2012 at 7:36 PM
    #17
    Slodgetto

    Slodgetto [OP] Über Posre

    Joined:
    Jan 18, 2011
    Member:
    #49483
    Messages:
    9,276
    Gender:
    Male
    First Name:
    Silas
    Added the tranny swap I did a few weeks ago and a price list of the 4x4 conversion so far. Still got a lot of pics to sort through! Hopefully I can get it all caught up by tomorrow....
     
  18. Apr 3, 2012 at 8:18 PM
    #18
    Slodgetto

    Slodgetto [OP] Über Posre

    Joined:
    Jan 18, 2011
    Member:
    #49483
    Messages:
    9,276
    Gender:
    Male
    First Name:
    Silas
    Got this in the mail today!!! :yay: Now all I have to wait for is a little solid preload spacer before I can install this bad boy in the front diff the 5.29s sitting on my bedroom floor...
    [​IMG]

    Also, updated some above posts a bit with my AISIN Lockout re-builds...
     
  19. Apr 3, 2012 at 8:18 PM
    #19
    45acp

    45acp Paint me back in Wyoming again...

    Joined:
    Aug 9, 2009
    Member:
    #20861
    Messages:
    6,704
    Gender:
    Male
    First Name:
    Jonathan
    Boring, Wisconsin
    Vehicle:
    1981 Long bed 4x4
    Soooo :jellydance:
     
  20. Apr 3, 2012 at 10:05 PM
    #20
    Slodgetto

    Slodgetto [OP] Über Posre

    Joined:
    Jan 18, 2011
    Member:
    #49483
    Messages:
    9,276
    Gender:
    Male
    First Name:
    Silas
    lol dude, don't be!! I'll be really lucky if I can get skids and bumpers by Moab!!!:( And forget a winch.... I'm :jellydance: of all your beautiful armor!!!
     

Products Discussed in

To Top