1. Welcome to Tacoma World!

    You are currently viewing as a guest! To get full-access, you need to register for a FREE account.

    As a registered member, you’ll be able to:
    • Participate in all Tacoma discussion topics
    • Communicate privately with other Tacoma owners from around the world
    • Post your own photos in our Members Gallery
    • Access all special features of the site

From Stock to..... Nic914AZ - 02 Prerunner

Discussion in '1st Gen. Builds (1995-2004)' started by Nic914AZ, Aug 10, 2013.

  1. Aug 10, 2013 at 8:23 PM
    #1
    Nic914AZ

    Nic914AZ [OP] Well-Known Member

    Joined:
    Aug 8, 2013
    Member:
    #110084
    Messages:
    292
    Gender:
    Male
    First Name:
    Nic
    Tempe, AZ
    Vehicle:
    02 White Prerunner
    None
    I'm brand new here. I've owned my Tacoma for about 5 years I think. Bought it with 68k miles on it. I've washed it about 4 times. I changed the plugs after 90k miles (@160k) after it developed a slight miss. The total gap on the split ground plugs was over 1. Spec is 0.42... sorry truck. Did brakes at maybe 90k (170k on the clock now).

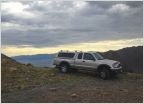
    Here it was a few days ago.

    IMG_3156_4ac5b69222e8526701a4ac1cfa8cf6418fb57bfc.jpg

    The first thing I did to improve the truck other than maintenance was buy some 2011 Wheels and Tires on Craigslist and throw them on. Then I got a Leer Topper for it. I removed the jumpseats in the back and built a flat platform in their place. I will take pictures of the setup when I redo it with MDF so I can counter sink the access doors. I used OSB to mock it up but it's worked as is for a while now. It levels that back floor for my 2 dogs and gives me a good amount of hidden storage without compromising recline of the front 2 seats.

    I recently bought:
    5100's front and rear - Down South
    Adjustable Shackles - Toytec
    Exhaust drop bracket - Toytec
    Red Poly Upper and Lower Control arm bushings, Upper front Spring bushings, and steering rack bushings. - EnergySuspensionParts
    Inner and outer Tie Rods & Upper and lower ball joints - RockAuto
    Center Driveshaft Support bearing/bushing - OReilly AutoParts

    Today I put on the rear shocks and shackles and the new driveshaft center support.
    IMG_3152_6052a67f7747144725d11e3ddc3d3012f67a7e0e.jpg

    IMG_3193_2504b70cdb24775fd2eebaddf65d357333e69350.jpg


    https://picasaweb.google.com/108205821736118943103/Tacoma?authuser=0&feat=directlink
     
    Last edited: Aug 13, 2013
  2. Aug 10, 2013 at 8:57 PM
    #2
    OH-MAN

    OH-MAN Well-Known Member

    Joined:
    Apr 23, 2009
    Member:
    #16324
    Messages:
    2,305
    Gender:
    Male
    First Name:
    Steve
    Sunny Az.
    Vehicle:
    10 4X4 O.R. White
    TRD skid painted black,
    Looks good,
    I put a set of 2nd gen sport wheels on my sons 02 prerunner and it looked great as well.
    Just watch your tire choice as the wheels offset move the tires in about a 1/2 inch closer to the coilovers.
    Nice work indeed.

    Get that timing belt changed to save you some problems in the future!!
     
  3. Aug 10, 2013 at 10:29 PM
    #3
    JuansTaco

    JuansTaco JuanInAMillion

    Joined:
    Nov 18, 2012
    Member:
    #91397
    Messages:
    8,908
    Gender:
    Male
    First Name:
    Juan
    gilbert az
    Vehicle:
    2004 PreRunner SR5 stormtrooper
    ESB long travel kit, Deaver f67s with DTF 12 inch shackles.
    lookimg good man
    looks like you need some new black fenders like the take offs let me know i have my fronts sitting in the shed and rears im taking off
     
  4. Aug 13, 2013 at 8:50 AM
    #4
    Nic914AZ

    Nic914AZ [OP] Well-Known Member

    Joined:
    Aug 8, 2013
    Member:
    #110084
    Messages:
    292
    Gender:
    Male
    First Name:
    Nic
    Tempe, AZ
    Vehicle:
    02 White Prerunner
    None
    got the new shocks in. 103 in the garage. Lots of gatorade today. F.


    HOW TO REPLACE STRUTS WITHOUT A SPRING COMPRESSOR. (couldnt get this to show as embedded, not sure how)
    http://youtu.be/vkVLBOnAifc


    That's the way I did it. Just to be safe I used a ratchet strap to hold the spring to the frame in that rare occasion that the jack slips off the bottom control arm/balljoint mount.

    It worked flawlessly. I discussed this with a rat rod guy at an OReilly auto around the corner on Mclintock. He's got a few pretty sweet old cars and seemingly a good amount of wrench time. He warned against this method but after discussing it for a bit and referring to older vehicles without coilovers... this is exactly how you released tension on the springs so... I don't see the big deal.

    At no point was I in fear for my life and if it did fly i was in front of the truck with the jack and I can only assume the spring would attempt to exit out the side of the truck if it did somehow get away.

    It worked. I'm glad I did it this way.

    IMG_3272_03e33f3e72f516db1701c26ebd9a895145088c3c.jpg

    One thing! And I can't believe this but the new Moog/555 lower ball joint on the driver's side... one of the 4 bolts stripped out in the spindle while torquing to only 42ft/lbs. WTF!?

    When I take it to a shop for the alignment I think I'm going to have to have them cut off the rear drivers lower control arm alignment bolts - they're seized. Might as well then have them install my lower poly bushings on both sides. I got the uppers in on the driver's but with the trouble I had with the upper ball joint releasing I decided not to attempt the passenger side upper poly bushings. PTA!

    I didn't end up doing the tie rods, they felt tight as can be and the ball joints felt good too but all the boots are blown out. I only did the shock on the passenger side.

    So still left to do:
    Lower control arm bushings
    Upper passenger control arm bushings
    Steering Rack bushings

    Upper ball joints (I destroyed the boot on my driver side and couldn't get it pressed out. had to put it back together just to be able to get it to a shop.so... yes, another job for a real shop!)

    Passenger lower ball joint.

    I think I'll send the tie rods back to RockAuto unless anybody here needs them.
     
    Last edited: Aug 13, 2013
  5. Aug 13, 2013 at 9:59 AM
    #5
    Nic914AZ

    Nic914AZ [OP] Well-Known Member

    Joined:
    Aug 8, 2013
    Member:
    #110084
    Messages:
    292
    Gender:
    Male
    First Name:
    Nic
    Tempe, AZ
    Vehicle:
    02 White Prerunner
    None
    Drove the truck finally with the new shocks - WHY DIDN'T I DO THIS A YEAR AGO!

    I thought, no big deal, Phoenix is flat. I don't need to drop the money on this truck when I drive a half mile to work and back.

    I'm an idiot. I should have replaced them the minute I thought they were going out.
    2nd idiot feeling - I bought inner and outer tie rods and upper and lower ball joints - after getting in there I don't think I needed either. I think I just needed an alignment because everything feels tight - no wobble on any of them.

    I might be able to do this stuff on my own, but diagnosing - I am lacking.

    I spent way more on extra parts and tools than I should have. Some of the tools are going back - especially the 3 arm puller that broke on me from HarborFreight. The 2 ball joint pullers I bought I think are smaller than what I've seen used and modified over at bajataco.com so those are going back. (I got one to cut to larger opening as he shows on his site, and one to keep as is). The larger wrenches I didn't open that I bought for the larger nuts on the tie rods will go back. The parts to Rock Auto - I got to shock bushings from RockAuto that I thought were the top plate bushings (that I got from Toytec) but they were actually the metal sleeved bottoms that the shocks already came with. My top plate bushings I ordered from ToyTec certainly did not need replaced, they looked perfect as did the rear shock bushings but those came with new ones so I used the new ones. If anyone needs some, I have my perfectly good old ones. I probably didn't need the poly control arm bushings, but eventually I think I'll like having them. The steering rack poly bushings and upper spring plate bushings? Did I really need those? No. I need to keep away from the computer ordering of parts when I get ambitious and want to do a project in the middle of summer!

    Lets see... what else. I think I could have gotten away with not replacing the center bearing.

    Really... I think I could have just replaced the shocks and got an alignment and been happy here. I just assumed that if my shocks were that bad (like i can fully compress them in and out by hand with no resistance) that everything else must be shot at 170k miles too. Well, this is not an old Chevy I'm used to. Not everything needs replaced every 50k miles that is for sure.

    And so starts my saga of no longer having a stock Tacoma. I'm sure this will lead to many more changes now and additions.
    Lessons learned.
     
    Last edited: Aug 13, 2013
  6. Aug 14, 2013 at 7:42 PM
    #6
    Nic914AZ

    Nic914AZ [OP] Well-Known Member

    Joined:
    Aug 8, 2013
    Member:
    #110084
    Messages:
    292
    Gender:
    Male
    First Name:
    Nic
    Tempe, AZ
    Vehicle:
    02 White Prerunner
    None
    It is really frustrating for me to not have been able to knock this out but between the heat, my smaller garage, and a few unforseen hiccups (which always happen)... I broke down and took it to a local shop. I just didn't really feel like I was going to manage the upper and lower ball joints - I tried. For the one upper that I did try, I couldn't get itto press out with the 3 arm puller and the pitman arm press - I wasn't in the mood to modify and then potentially not have it work out. The lower seemed easy except that 1 bolt closest to the drivers door stripping out. I think perhaps the Moog kit does not come with longer bolts as there should be for the outer 2 going into the steering knuckle?

    So for that, which I'm still a little miffed about but I'll get over it...

    I took it to a place on Priest in Tempe called - Yota Pros.
    http://yotapros.com/about-us/

    I actually heard from Mike 3 times today with progress updates. Absolutely great customer service. Truly seem like an honest couple of owners who are down to earth guys just trying to do right and still make money, also a really clean looking facility.

    Cost = $475 (75 was the alignment) total to install the upper poly bushings on the passenger side, replace both upper ball joints, replace the passenger lower ball joint and fix the bolt on the drivers. I would have argued for a bit lower but I give 'em credit for doing something out of the usual where I'm sure it was a real hour that it probably took to torch out and wire wheel the sleeves that stay in for the upper poly bushings.
    Also considering I brought in my own parts so they didn't make anything there. I'll take it. It turns out he was able to break loose the cam bolts without having to do anything major. The benefit of being under the truck with the right tools I think.

    Desert rat's hourly was 10 bucks cheaper but they couldn't get to until Friday and I didn't get a total quote from them as my plan was to head out of town this weekend. Now I'm not so I really could have wasted another 2 days of my life with this in my 103 degree garage. No thanks. Glad it's done.

    All in all... I'm happy with the work done and the same shop originally quoted 950 in labor for all the original items (shocks, shackles, tie rods and center support) without the alignment. I got about half of what I originally wanted done on my own I guess. I could have figured out the uppers ball joints eventually. The lower was cake except for that bolt stripping out - I think they thought they were going to have to heli-coil that when I discussed it on the phone but then he mentioned just getting a longer bolt in there for it so I think that's what was actually done.

    O I really wish my garage had air con, and was big enough to have left it in there taken apart over a few days - hell, 500 is 1/4 the cost of a fair four post lift! I was out of patience and I thought out of time. I also had no further desire to do another upper poly bushing install on the passenger side, that was not fun. The lowers are staying rubber until the next alignment. I will replace the steering rack bushings when the Devil's a$$ leaves AZ.


    I think I've got most of my steering shake gone at 65.

    The shocks - again - WOW. Love the ride. Feels like a brand new truck, Not too stiff, definitely NOT harsh, but not too soft and steering feels tight and precise, almost too precise from what I'm used to! haha.

    I can feel the brake's pulsing a tiny bit. If it isn't one thing it's another. I also think going about a thousand miles on these new tires with a bad alignment might have worn them funky a bit. What do you think? I might throw them on the rear and put the rears up front now.

    They mentioned doing the valve cover gaskets, Timing belt and water pump, and rear drums. More stuff I can do myself later when it's cooler. Maybe the front discs are probably due for a turning now that I feel the slight pulse almost 70k miles since the last brake job I did ... or possible warp of the aftermarket crossdrilled rotors put on by the previous owner. Front pads still look new.

    My final comment: This is not as Chevy. I will never again assume anything on this truck needs replaced because it has a lot of time/miles on it.
     
  7. Jul 28, 2014 at 9:05 PM
    #7
    Nic914AZ

    Nic914AZ [OP] Well-Known Member

    Joined:
    Aug 8, 2013
    Member:
    #110084
    Messages:
    292
    Gender:
    Male
    First Name:
    Nic
    Tempe, AZ
    Vehicle:
    02 White Prerunner
    None
    I feel like the springs shouldn't look like this with only the weight of the topper and a hundred lbs or so in the bed. Anyone? Time for new springs and bail on the 2" shackle lift?
    ysy4a2e2_7ce142de4834ca0e64405bba583dadf7dc16c2d6.jpg
     
  8. Jul 28, 2014 at 9:06 PM
    #8
    JuansTaco

    JuansTaco JuanInAMillion

    Joined:
    Nov 18, 2012
    Member:
    #91397
    Messages:
    8,908
    Gender:
    Male
    First Name:
    Juan
    gilbert az
    Vehicle:
    2004 PreRunner SR5 stormtrooper
    ESB long travel kit, Deaver f67s with DTF 12 inch shackles.
    ya they seem a bit old haha. time for some allpro leafs!
     
  9. Nov 30, 2014 at 1:38 PM
    #9
    Nic914AZ

    Nic914AZ [OP] Well-Known Member

    Joined:
    Aug 8, 2013
    Member:
    #110084
    Messages:
    292
    Gender:
    Male
    First Name:
    Nic
    Tempe, AZ
    Vehicle:
    02 White Prerunner
    None
    Awning. Cheap!

    1284b453f72e4b7986edea5e7704f8f1_50d0756854ebcd2ca2eed31c145d7d5ae827312b.jpg

    091e3a4b43376f9e8dcdb86dd69799f3_e381e63c7e94b4603af4ac13505f25f9d017d8f5.jpg
     
  10. Nov 30, 2014 at 1:40 PM
    #10
    Nic914AZ

    Nic914AZ [OP] Well-Known Member

    Joined:
    Aug 8, 2013
    Member:
    #110084
    Messages:
    292
    Gender:
    Male
    First Name:
    Nic
    Tempe, AZ
    Vehicle:
    02 White Prerunner
    None
    3" memory foam. 2 inch carpet padding. The mem foam sinks to hard without the pad. Leds in. Dimable. Patform about to gey redone. Once the toppet lift is done Ill add it here.

    896a42c7d75519e5b797f9231728c220_fd9204b4263b7551b4aca79a172202070553ebc7.jpg
     
  11. Jan 18, 2015 at 11:04 PM
    #11
    Nic914AZ

    Nic914AZ [OP] Well-Known Member

    Joined:
    Aug 8, 2013
    Member:
    #110084
    Messages:
    292
    Gender:
    Male
    First Name:
    Nic
    Tempe, AZ
    Vehicle:
    02 White Prerunner
    None
    9a1c57004c20e05b13077766aec10add_a36ca610612ddc525a41f2bc368435d635551e59.jpg

    4cd03cfe901bbf1468cd9c62d830b7f3_5281b836f54cd27b2b6d28d1ab962418514483a0.jpg

    f7c145ed32fa45924e4087df9edd1c9e_833f9f9c4c9730dc229ad5707ba6428141bcb713.jpg

    Lift idea from Boxrocket's trailer and the mount idea from topperezlift

    Still debating toggle clamps to pull the topper back to tight when down. For Up I think Ill use limit straps or maybe just let them go all the way. There are pins now just a few inches before max extension I used to test. I still have some figuring out to do.

    Not a lot of binding but 75# struts are prob too strong. It was work to pull it back down.
     
  12. May 9, 2015 at 9:19 PM
    #12
    Nic914AZ

    Nic914AZ [OP] Well-Known Member

    Joined:
    Aug 8, 2013
    Member:
    #110084
    Messages:
    292
    Gender:
    Male
    First Name:
    Nic
    Tempe, AZ
    Vehicle:
    02 White Prerunner
    None
    40438deb07008e1c7fdfa22cd47452f6_09633e64ef8d7960132abdd0cf4ca83ad92c214d.jpg

    b3e9678ea4d7d7c6ec5c71bb791d1c63_184adcac74f908577e8d8e55838e39a28e2845ce.jpg
    Like daylight on the tailgate. Its 9pm!


    Some 8 dollar leds strips from Amazon zip tied to the topper rear window struts. They light up the whole garage!
     
  13. May 9, 2015 at 9:22 PM
    #13
    Nic914AZ

    Nic914AZ [OP] Well-Known Member

    Joined:
    Aug 8, 2013
    Member:
    #110084
    Messages:
    292
    Gender:
    Male
    First Name:
    Nic
    Tempe, AZ
    Vehicle:
    02 White Prerunner
    None

Products Discussed in

To Top