1. Welcome to Tacoma World!

    You are currently viewing as a guest! To get full-access, you need to register for a FREE account.

    As a registered member, you’ll be able to:
    • Participate in all Tacoma discussion topics
    • Communicate privately with other Tacoma owners from around the world
    • Post your own photos in our Members Gallery
    • Access all special features of the site

MedicMutt's (sickenly) Slow 1st Gen Build

Discussion in '1st Gen. Builds (1995-2004)' started by MedicMutt, Oct 22, 2013.

  1. Oct 22, 2013 at 12:25 PM
    #1
    MedicMutt

    MedicMutt [OP] Purveyor of Useless Information

    Joined:
    Oct 2, 2013
    Member:
    #113680
    Messages:
    792
    Gender:
    Male
    First Name:
    Josh
    Baton Rouge, LA
    Vehicle:
    '03 DC PreRunner TRD OR
    OME suspension, Whiteline bushings, Line-X'd Jason topper, GoRhino "Grille Guard", many more...
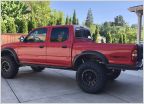
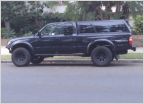
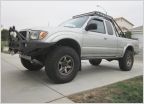
    As it sits right now
    20190416_134611.jpg

    Current Mod list

    Vital Components:
    -Tundra S13WE brake upgrade
    -Braided Stainless brake lines
    -Long LPD 4454 transmission cooler
    -Complete OME suspension upgrade
    -Whiteline Polyurethane LCA bushings
    -Light Racing UCAs

    Engine Bay:
    -Auxiliary electrical box w/40A feed
    -BeeRadd engine bay lighting http://www.tacomaworld.com/forum/an...hting-kits-1st-2nd-gen-ongoing-group-buy.html (Failed after a few years. Looking for a replacement)

    Exterior:
    -GoRhino Grille Guard (also known as a Push Bumper when applied to police vehicles)
    -Jason Groove topper w/ Line-X premium uv protected coating
    -AVS bug deflector
    -CG blacked out headlight and corner housings
    -Full set of 5 16" 16 hole steelies, powder coated "satin black"

    Interior:
    -LED panel light mod
    -Ignition ring light mod
    -Walmart front rubber mats/Toyota rear rubber mats
    -UltraGauge w/ custom hinge mount
    -Wet Okole seat covers, both rows
    -Kenwood KMM-BT325U/Custom wireless charging tray
    -A118C dash camera
    -Mobius rear camera in topper
    -LED topper interior lights

    Extra bits:
    -Various tools
    -Folding chair
    -Folding table
    -5 lb ABC extinguisher
    -100 ft utility rope
    -2 3" trucker style ratchet straps
    -Warn 3" x 30' Recovery strap

    Planned:
    -Topper roof rack
    -Modular bed platform

    Compared to the other rigs I've seen on here, mine is not nearly as impressive; but it's mine, it's paid for, and I love it.

    The Story:
    I saved money from the age of 12 for a vehicle. I knew one would be needed at some point, so unlike most of my friends, I usually didn't blow cash that could be saved.

    At 19, I had enough money stashed away to cover a decent down payment on this little guy.

    [​IMG]

    Bought it with 43,XXX on the Odometer. It was an interesting process: Pops crawling all around it checking mechanical, Mom owning the salesman (She's like a pitbull. I have learned a lot from her).

    From '06 to '08, not much was done to the little guy, except for regular maintenance and switching motor oil brands to Royal Purple.

    After completing college and getting a full-time job, I thought I would do something a little frivolous, so I added a Westin Safari Light Bar and KC Daylighters.

    [​IMG]

    Didn't want 20 amps of current running to a switch in my cab, so Pops and I engineered an auxiliary electrical box for a relay and fuses, I also had some emergency lighting I wanted to add, and do it right.

    [​IMG]

    A video of the setup:
    http://youtu.be/smA3oxOCdYk

    Around this time, I also added an ARE cover so that I could tote my fire gear and tools around without having all the carcinogens and smell in the cab.

    In the video, you can see that the Bolt decal has been added to the back window. I had always just called it my truck, but a friend of mine made me watch a movie with her called "Bolt", and I thought "That fits my truck. It's tiny, but thinks it's super!" From there on, "It" became "He".

    And he cleans up nicely.

    [​IMG]

    [​IMG]

    [​IMG]

    Even got my Pop's '93 pickup (the reason I got hooked on Yota's) and younger brother's '06 Tundra in on the photo shoot.

    [​IMG]

    Had a little oops moment while out one day, slid right into a parked GMC. Thankfully it wasn't bad, and I was able to get him repaired out of pocket. Took this opportunity to replace my well worn Westin bar (which had taken a couple of hits instead of the truck) with a Go Rhino! "Grille Guard". Where I used to work building police vehicles, we called them "Push Bumpers". I also mothballed the KC Daylighters, and replaced the funky original headlights for good measure.

    2022 plans:

    Add auxiliary panel to bed (i.e. Blue Sea)
    Add storage drawer/platform to bed?
    Roof rack for topper (And maybe the cab?)
    Refresh plastics?

    Storm trooper-ish?
     
    Last edited: Dec 25, 2021
    SilverGhost likes this.
  2. Dec 6, 2013 at 8:51 PM
    #2
    MedicMutt

    MedicMutt [OP] Purveyor of Useless Information

    Joined:
    Oct 2, 2013
    Member:
    #113680
    Messages:
    792
    Gender:
    Male
    First Name:
    Josh
    Baton Rouge, LA
    Vehicle:
    '03 DC PreRunner TRD OR
    OME suspension, Whiteline bushings, Line-X'd Jason topper, GoRhino "Grille Guard", many more...
    Lost some of my instrument cluster lighting the other day,

    [​IMG]

    which gives me an excellent chance to make some improvements!

    Big thanks to OMAC4 http://www.tacomaworld.com/forum/member.php?u=62789 and all of the other guys that offered great info on his LED upgrade thread. http://www.tacomaworld.com/forum/showthread.php?t=175584

    Started ripping into it earlier today to do a little recon. Wanted to be sure I ordered all the bulbs I need.

    [​IMG]

    Found a few extra bulbs hiding in different places.

    [​IMG]

    [​IMG]

    One problem so far: It SUCKS trying to remove the orange paint from the back of the Heater Control Bezel! I suggest not even trying! Gonna order a bezel for an '02 4Runner ASAP, since they should be the exact same, and don't have the orange paint.

    Going to order from superbrightleds.com as soon as I finish this post. Parts break down is as follows:
    74 style bulbs, 1-Glove Box, 1-Gear Shifter, 1-Cigarette Outlet. 194 Style bulbs, 4-Instrument Cluster.

    Edit: Got the instrument cluster finished, and it is dead sexy! (You can see a pic of it in the Ultragauge install post, below) Still working out the Heater Control lighting. I was able to pick up a used Control unit out of a wrecked 2002 4Runner, and it functions flawlessly. Will post when the job is completed!
     
    Last edited: Mar 12, 2014
  3. Dec 20, 2013 at 6:54 AM
    #3
    MedicMutt

    MedicMutt [OP] Purveyor of Useless Information

    Joined:
    Oct 2, 2013
    Member:
    #113680
    Messages:
    792
    Gender:
    Male
    First Name:
    Josh
    Baton Rouge, LA
    Vehicle:
    '03 DC PreRunner TRD OR
    OME suspension, Whiteline bushings, Line-X'd Jason topper, GoRhino "Grille Guard", many more...
    My other trucks.

    The First one tends to live at the Cummins shop more than at the station, we keep finding it with a high oil level. This last time, the mechanic found it three GALLONS over!

    Now, if Toyota started producing fire trucks....

    Update: Apparently the DEF/Exhaust regen was messed up (For anyone who wanted to know...)

    WP_20131020_009.jpg
     
    Last edited: Jan 26, 2014
    SilverGhost likes this.
  4. Feb 13, 2014 at 9:48 PM
    #4
    MedicMutt

    MedicMutt [OP] Purveyor of Useless Information

    Joined:
    Oct 2, 2013
    Member:
    #113680
    Messages:
    792
    Gender:
    Male
    First Name:
    Josh
    Baton Rouge, LA
    Vehicle:
    '03 DC PreRunner TRD OR
    OME suspension, Whiteline bushings, Line-X'd Jason topper, GoRhino "Grille Guard", many more...
    So, after pondering how I wanted to mount this little bugger for a few days, I finally figured out where I wanted it: to the left of my steering column, by the instrument panel, but not in the way.

    I spent a little more time thinking about what I would use for a bracket, and thought, "Maybe a hinge?". So one day in Home Depot I found myself looking at hinges, and decided to buy this:
    [​IMG]

    After a quick sizeup I made some marks on the hinge and decided a bench vice would be needed for the, eh hem "Modifications" I would be making to the hinge. The only place I have easy access to a bench vice is at work. So I waited to work on it on my next shift.

    With access to the vice and a meaty rubber mallet, I was able to produce this (I also imparted a slight twist to the bit that the Ultragauge would mount to, so that it would aim at mah face!:cool:):
    [​IMG]

    After adding a small hole to the hinge and UG mount, I wound up with this:
    [​IMG]

    Threw some flat black rattle can paint on it, and since it was cold and humid here in LA at the time, I took it inside and encouraged it to dry:
    [​IMG]

    To wind up with this:
    [​IMG]

    [​IMG]

    Removed the lower dash panel, ran the wire, and mounted up my UG!
    [​IMG]

    Check out the neat little feature I got from using a hinge:
    [​IMG]

    [​IMG]

    I'm 6' 3", and keep my tilt wheel at the third stop from absolute bottom. I have a very clear view of the UG and all of my dash panel.

    Material list:
    3" Strap Hinge
    1 M4 zinc coated wedge head machine screw w/ nut
    3M Automotive weatherstrip adhesive tape

    Cheers:proposetoast:, and happy modding!
     
    Last edited: May 26, 2014
  5. Feb 14, 2014 at 8:40 AM
    #5
    Holy schmidt

    Holy schmidt Well-Known Member

    Joined:
    Dec 27, 2013
    Member:
    #119308
    Messages:
    3,507
    Gender:
    Male
    First Name:
    Wyatt
    Nebraska
    I like the mount! where did you put your switches for the lights?
     
  6. Feb 14, 2014 at 8:46 AM
    #6
    MedicMutt

    MedicMutt [OP] Purveyor of Useless Information

    Joined:
    Oct 2, 2013
    Member:
    #113680
    Messages:
    792
    Gender:
    Male
    First Name:
    Josh
    Baton Rouge, LA
    Vehicle:
    '03 DC PreRunner TRD OR
    OME suspension, Whiteline bushings, Line-X'd Jason topper, GoRhino "Grille Guard", many more...
    Thanks!

    I'll see about posting a pic of the switches after a while. At work right now, and my phone is weird with how it uploads pics.

    Edit: As requested, here is a photo. Nothing earth shatteringly cool, but it does what I need it to do, and it's not too obtrusive.

    The two grouped switches are for emergency lighting, and the single switch is a control for a 20 Amp circuit running to the front bumper for extra forward lighting.

    [​IMG]
     
    Last edited: Feb 14, 2014
  7. Feb 14, 2014 at 9:05 PM
    #7
    Holy schmidt

    Holy schmidt Well-Known Member

    Joined:
    Dec 27, 2013
    Member:
    #119308
    Messages:
    3,507
    Gender:
    Male
    First Name:
    Wyatt
    Nebraska
    Thanks man! I would do something like that but for me that's like an extra ash tray :rolleyes: I think I'm gonna use that Mount for the ultraguage when I get one!

    And by extra ash tray its a slot idk what for?
     
    Last edited: Feb 14, 2014
  8. Feb 14, 2014 at 9:14 PM
    #8
    MedicMutt

    MedicMutt [OP] Purveyor of Useless Information

    Joined:
    Oct 2, 2013
    Member:
    #113680
    Messages:
    792
    Gender:
    Male
    First Name:
    Josh
    Baton Rouge, LA
    Vehicle:
    '03 DC PreRunner TRD OR
    OME suspension, Whiteline bushings, Line-X'd Jason topper, GoRhino "Grille Guard", many more...
    It's just molded into the plastic to make room for hands to open the ashtray. Not really sure why it's as big as it is, though. :notsure:

    Glad you're inspired by my setup! That's what I love about this forum: so much shared experience and knowledge here!
     
  9. Feb 14, 2014 at 9:24 PM
    #9
    Holy schmidt

    Holy schmidt Well-Known Member

    Joined:
    Dec 27, 2013
    Member:
    #119308
    Messages:
    3,507
    Gender:
    Male
    First Name:
    Wyatt
    Nebraska
    Mines like another tray its not molded over Maybe cause its a different year idk? Haha and yeah its a great place!
     
  10. Mar 23, 2014 at 9:54 PM
    #10
    MedicMutt

    MedicMutt [OP] Purveyor of Useless Information

    Joined:
    Oct 2, 2013
    Member:
    #113680
    Messages:
    792
    Gender:
    Male
    First Name:
    Josh
    Baton Rouge, LA
    Vehicle:
    '03 DC PreRunner TRD OR
    OME suspension, Whiteline bushings, Line-X'd Jason topper, GoRhino "Grille Guard", many more...
    I installed my Wet Okole seat covers the day after they arrived. I'm used to the smell of neoprene, since my dad was into scuba diving when I was younger, and kept his gear in the house. That smell brings back so many memories...

    I decided to remove all of the seats for the install, since I wanted to detail the interior anyway.

    [​IMG]

    I made a wreck of the inside of the house that day. There were boxes everywhere since I also received my Warn recovery strap, and my intake gaskets from Rock Auto!

    [​IMG]

    I took my time stretching the covers in place, and after buckling the straps, tied up the excess material in various hitch knots.

    End result?

    [​IMG]
    I realized that the headrest covers were on backwards, and flipped them later on.

    [​IMG]

    Very happy with what I've got. The interior of the truck is so dressed up now!
     
    lakeroadster likes this.
  11. Mar 23, 2014 at 9:54 PM
    #11
    PcBuilder14

    PcBuilder14 Well-Known Member

    Joined:
    Jun 19, 2011
    Member:
    #58522
    Messages:
    23,312
    Gender:
    Male
    First Name:
    Brent
    Southern New Mexico
    Vehicle:
    2018 Tacoma TRD Off Road 4x4
    Looks good! :thumbsup:
     
  12. May 12, 2014 at 9:42 PM
    #12
    MedicMutt

    MedicMutt [OP] Purveyor of Useless Information

    Joined:
    Oct 2, 2013
    Member:
    #113680
    Messages:
    792
    Gender:
    Male
    First Name:
    Josh
    Baton Rouge, LA
    Vehicle:
    '03 DC PreRunner TRD OR
    OME suspension, Whiteline bushings, Line-X'd Jason topper, GoRhino "Grille Guard", many more...
    Being lazy. I don't feel like redoing all of this...

     
  13. Jun 10, 2014 at 1:39 PM
    #13
    Len04Taco

    Len04Taco Well-Known Member

    Joined:
    Mar 14, 2014
    Member:
    #125318
    Messages:
    46
    Gender:
    Male
    First Name:
    Len
    Stow, MA
    Vehicle:
    04 SR5 Red
    :)

    Nice work Josh. I am following with great interest. My first task will be the Ultragauge. I like your location. Improved fuel mileage is my goal. 25 mpg w V6, 4WD & stick and AC on.

    Len

    :)
     
  14. Aug 1, 2014 at 8:14 PM
    #14
    MedicMutt

    MedicMutt [OP] Purveyor of Useless Information

    Joined:
    Oct 2, 2013
    Member:
    #113680
    Messages:
    792
    Gender:
    Male
    First Name:
    Josh
    Baton Rouge, LA
    Vehicle:
    '03 DC PreRunner TRD OR
    OME suspension, Whiteline bushings, Line-X'd Jason topper, GoRhino "Grille Guard", many more...
    Just coughed up $110 for a project that I suddenly became interested in.

    There are some incredibly stupid drivers in my region of the US and, although uncommon, some cases of insurance fraud. I decided to drop some coin on a Mobius Action Cam. Full review and specs here-->http://youtu.be/7wmIyD1fM4M

    I'd like to attempt a remote install like the fellow in the video above does here:http://youtu.be/9qx5fgy8f28

    Updates will come as I progress.
     
    Last edited: Aug 1, 2014
  15. Aug 23, 2014 at 10:02 AM
    #15
    Creole Knight

    Creole Knight Man's got to know his limitations.

    Joined:
    Apr 26, 2012
    Member:
    #77701
    Messages:
    448
    Gender:
    Male
    First Name:
    Ulysses
    So. Cal
    Vehicle:
    05 Super White PreRunner
    gear shift knob and other things.
    I am watching this I think I will be purchasing this one thank you for the write up.
     
  16. Oct 3, 2014 at 10:05 PM
    #16
    MedicMutt

    MedicMutt [OP] Purveyor of Useless Information

    Joined:
    Oct 2, 2013
    Member:
    #113680
    Messages:
    792
    Gender:
    Male
    First Name:
    Josh
    Baton Rouge, LA
    Vehicle:
    '03 DC PreRunner TRD OR
    OME suspension, Whiteline bushings, Line-X'd Jason topper, GoRhino "Grille Guard", many more...
    Forgot to add this in. I'm currently working on the Tundra brake upgrade, and am hoping to add the transmission cooler next.

     
  17. Apr 2, 2015 at 5:34 PM
    #17
    MedicMutt

    MedicMutt [OP] Purveyor of Useless Information

    Joined:
    Oct 2, 2013
    Member:
    #113680
    Messages:
    792
    Gender:
    Male
    First Name:
    Josh
    Baton Rouge, LA
    Vehicle:
    '03 DC PreRunner TRD OR
    OME suspension, Whiteline bushings, Line-X'd Jason topper, GoRhino "Grille Guard", many more...
    Edit: Not sure what happened to my photos. I'll try and find them, and re link them into the post.

    I think this upgrade was performed in January '15.

    As of my writing this post, I am nearing the end of a training academy for the fire department I started working for. It has been a whirlwind of a time, and I'm in the best physical shape of my life!

    On to the subject material:

    [​IMG]

    After what felt like forever, the parts are all gathered and ready for install.

    [​IMG]

    The old. This caliper looks especially funky due to the fact that it is a cheaply produced NAPA knockoff, and not a remanufactured original part. I never liked how the system felt after replacing the original, which was necessary at the time. This side always ate pads and rotors faster than the stock caliper.

    [​IMG]

    Surgery in progress!

    [​IMG]

    Test fitting the new (to me, and the truck) calipers. These S13WE calipers were rescued from a salvage yard 2002 Tundra; they were completely torn down, and had all pistons and seals replaced. The calipers were then painted with G2 Gloss Black 2 part epoxy paint (This stuff is no joke!).

    [​IMG]

    [​IMG]

    Some comparison between the rotors.

    [​IMG]

    The new kit all mounted up, and ready for plumbing. The dust shield did not require any cutting for this setup, and only needed to be pushed and bent slightly towards the center line of the truck in a couple of places; to avoid rubbing the rotor.

    [​IMG]

    All plumbed and ready for tires!

    This upgrade is magnificent, and it was extremely easy to perform, since everything was bolt-on compatible. The braking power is surprising, but not over the top; and my confidence in my truck's ability to stop in an emergency has been boosted 100%!

    A suggestion: If you have around $600 available (It is tax season, as I write this), and have toyed with the idea of this upgrade, DO IT! I am thoroughly pleased with the performance returns, and the added safety margin that I now have.

    Special thanks to Dusty T. for his help and the wonderful write-up on his brake mods! Without your help, sir, I would still be scratching my watch and winding my nether regions!

    His thread: http://www.tacomaworld.com/forum/1st-gen-tacomas/334072-banjo-fitting-seal-tundra-brake-upgrade.html
     
    Last edited: Jul 7, 2019
  18. May 21, 2017 at 3:01 PM
    #18
    MedicMutt

    MedicMutt [OP] Purveyor of Useless Information

    Joined:
    Oct 2, 2013
    Member:
    #113680
    Messages:
    792
    Gender:
    Male
    First Name:
    Josh
    Baton Rouge, LA
    Vehicle:
    '03 DC PreRunner TRD OR
    OME suspension, Whiteline bushings, Line-X'd Jason topper, GoRhino "Grille Guard", many more...
    I've had an intermittent rough idle and run for a few months now that went away once the motor warmed up. Reading all kinds of threads, I looked into throttle body issues, water temperature sensor issues, fuel injector issues and all kinds of other nonsense that may have been the problem. Over time, my Ultra Gauge popped up a pending code for cylinder 4 misfire (P0304) at intermittent times, especially when the weather got really humid.

    Finally, after my poor little truck had a rough time getting me from one station to another this morning, I decided to investigate some different areas under the hood. Maybe, just maybe, I would get some kind of indication as to what the problem may be.

    Behold, the remains of my #4 ignition wire, severed right at the top of the insulator crimp. 20170521_154508.jpg 20170521_154454.jpg

    That thing stayed on the spark plug after I had pulled the boot free from the valve cover. Whatever may have been holding the wire together clearly had gone. Thankfully, I was able to find a replacement wire set and get it swapped over in short order.

    Glad that issue has been resolved!:woot:
     
  19. Jul 7, 2019 at 12:53 PM
    #19
    MedicMutt

    MedicMutt [OP] Purveyor of Useless Information

    Joined:
    Oct 2, 2013
    Member:
    #113680
    Messages:
    792
    Gender:
    Male
    First Name:
    Josh
    Baton Rouge, LA
    Vehicle:
    '03 DC PreRunner TRD OR
    OME suspension, Whiteline bushings, Line-X'd Jason topper, GoRhino "Grille Guard", many more...
    It's been about two weeks since doing this, and it's been performing flawlessly. I'm very pleased with the outcome. I know I got the idea from somewhere on TW, but have no idea what thread it was. (Edit: Got my inspiration from @Abbottgs on the 1st gen unique mod thread!)

    I wanted to make something that appears and functions almost OEM, and wound up finding most of the parts I needed on Amazon, aside from a 600 ohm 1/2 watt resistor that I ordered from Mouser electronics.

    Ripped apart a brand new Anker wireless charging pad.20190618_071325.jpg

    Much smaller package.20190618_071352.jpg

    Made myself a working area at the FD one day.20190625_154314.jpg

    One of my Amazon finds; an aluminum momentary pushbutton with white LED light. Wound up needing to add a resistor to the LED to drop input voltage from around 14 VDC (Engine running, alternator charging) to about 2.8 VDC.20190625_154342.jpg

    The plastic on this tray is easily thin enough to allow wireless charging to pass through it.20190625_195433.jpg

    The most surprising Amazon find for this project. I was able to find a "Steady state, self latching relay" circuit, ready-to-go. This made everything so easy. Well, as easy as this over-complicated set up could get... (Edit: I wound up having to move this board because it was blocking the radio's antenna port! :annoyed:) 20190625_195508.jpg

    Placed vinyl tape on the PCB to keep too much crap from contacting the sensitive bits, and taped it to the plastic tray with some glass high-heat electrical tape. The zip-tie is just me being overly cautious.20190625_195531.jpg

    Finished product!20190626_071808.jpg

    End result: toss the phone into the tray (in the right spot), push the button and let the angry pixies flow!WIN_20190707_14_04_31_Pro.jpg
     
    Last edited: Jul 7, 2019
    Bridge4 and Area51Runner like this.
  20. Jun 17, 2020 at 11:28 AM
    #20
    MedicMutt

    MedicMutt [OP] Purveyor of Useless Information

    Joined:
    Oct 2, 2013
    Member:
    #113680
    Messages:
    792
    Gender:
    Male
    First Name:
    Josh
    Baton Rouge, LA
    Vehicle:
    '03 DC PreRunner TRD OR
    OME suspension, Whiteline bushings, Line-X'd Jason topper, GoRhino "Grille Guard", many more...
    I FINALLY added a transmission cooler! And not a moment too soon! Two days later, I wound up moving a 5x16 tandem axle trailer with a golf cart on it around 60-70 miles. All total, I think I was around 2.5-3k lbs trailer weight.

    Towing with OD off and the ECT in normal found my engine temps hovering around 197°F while cruising, and peaking at 204°F on the Huey P. Long bridge in Metairie, LA (Not sure what % grade). I didn't have a way to monitor transmission temps, but have a new Ultragauge MX 1.4 on order to rectify that. (Thanks to @GLR for posting up trans temp code instructions!)

    My dad and I wound up spending an afternoon mostly on mounting the cooler itself, and then plumbed it using the supplied hose that shipped with the cooler. The mounts only required two brackets to be modified, cutting one into two pieces for upper mounts, and one whole piece for the lower.

    Applied some leftover silicone vacuum hose as a bumper to keep this AC line away from the new cooler. It was clear, but barely. This setup has hardly any pressure between the two, and makes me feel better about it. If I'm wrong, please feel free to let me know.
    20200613_125354.jpg

    Fab process. We wound up cutting down this bracket piece and making it more permanent. The nylon spacer may wind up being replaced with something more robust.
    20200613_125400.jpg

    20200613_171226.jpg

    The lower mount actually extends past the radiator crossmember, and has upper and lower bolts and nuts with washers acting like a clamp. We found this to be the easiest way to wrap up the mounting as the day was wearing on.
    20200613_171240.jpg

    We used old trans oil line to make this grommet.
    20200613_171250.jpg

    Finished product, sans grill.
    20200613_171304.jpg

    I still want to paint the brackets to help it disappear even more. Overall, fairly easy project with amazing peace of mind.

    I have to give a HUGE shout-out to @gearcruncher for all of the information he has passed on to this forum, it was absolutely invaluable.
     

Products Discussed in

To Top