1. Welcome to Tacoma World!

    You are currently viewing as a guest! To get full-access, you need to register for a FREE account.

    As a registered member, you’ll be able to:
    • Participate in all Tacoma discussion topics
    • Communicate privately with other Tacoma owners from around the world
    • Post your own photos in our Members Gallery
    • Access all special features of the site

CascadesTacoma 2001 TRD Build

Discussion in '1st Gen. Builds (1995-2004)' started by CascadesTacoma, Nov 26, 2013.

  1. Nov 26, 2013 at 8:45 PM
    #1
    CascadesTacoma

    CascadesTacoma [OP] Well-Known Member

    Joined:
    Oct 28, 2013
    Member:
    #115414
    Messages:
    115
    Gender:
    Male
    Seaside, CA
    Vehicle:
    '14 DCSB TRD OR
    2014 DCSB TRD OR
    As I bought the truck:
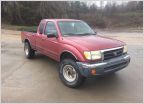
    2001 Extra Cab Silver Tacoma
    TRD 3.4L V6
    In-coil spacer (front)
    Shackle (rear)
    Westin Ultimate Bull Bar
    Stock wheels
    Bolt on rock sliders

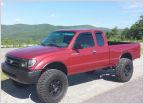
    Modification and Upgrades:
    Topper (traded up from a mid to a high)
    Rock Crawlers 15x8 (ordered from 4wheelparts)
    BFGoodrich A/T 33x12.5x15 (DiscountTire $766, slight trimming on bumper)
    Replace deck with aftermarket (had a single DIN from another car)
    Hella 500ff (ordered from 4wheelparts)
    Satoshi grill ($25 metal sheet from local supplier)
    Replaced front suspension - Camburg uni-ball UCA, OME 882 struts and shocks (All from Wheelers - $1197 w/ diff drop and 10mm strut spacers)
    1.25" wheels spacers in front (from 4wheelparts)
    Toytec Diff Drop
    Upgraded front break rotors and pads (EBC rotors and pads ($162 / $ 54) )
    Auxiliary Battery (mounted, CS-144 Alternator), Optima Yellowtop
    Warn M8000-S ($699: $799 total from eBay, free shipping, $100 rebate)


    Wish list / To do list:
    Front bumper (Fabricating it myself - Ongoing build thread here)
    Rear bumper w/ swingout and fuel rack (Fabricating it myself))
    Platform in bed with sliding drawer (want to build this so I can slide the whole system in and out of the bed, toying with the idea of doing sheet metal and square tubing with some welding and some riveting... or going all wood since I have several sheets of plywood lying around which would save some money)
    Replace rear suspension (thinking OME Dakar spring pack with AAL and new shackles)
    Wide flares - Jungle wide flares Reduce some of the spray from the 1.25" spacers
    IFS Skid Plate (I'll fabricate this myself - Have the metal just waiting to finish bumper)
    RAAMmat in the cab to reduce the road noise
    On-board Water (Shower and faucet in the bed)
    Awning (I'll make this myself)

    As I work through the list, I'll add as many DIY pictures as possible with prices and vendors.. For example, the Satoshi grill (or whatever you call an aftermarket mesh-type grill) I'll be doing myself as there are plenty of metal dealers in the area.

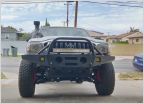
    Truck as it sits 02-15-14
    [​IMG]
     
    Last edited: Mar 31, 2014
    This site contains affiliate links for which the site may be compensated.
    #1
  2. Nov 27, 2013 at 8:11 AM
    #2
    Fiolo

    Fiolo Senior member

    Joined:
    Sep 10, 2011
    Member:
    #63227
    Messages:
    4,381
    Gender:
    Male
    Vehicle:
    1998 Tacoma, 2022 Tacoma, 2019 L5P Duramax
    Lost track many mods ago
    Good looking truck !
     
  3. Nov 29, 2013 at 9:22 PM
    #3
    CascadesTacoma

    CascadesTacoma [OP] Well-Known Member

    Joined:
    Oct 28, 2013
    Member:
    #115414
    Messages:
    115
    Gender:
    Male
    Seaside, CA
    Vehicle:
    '14 DCSB TRD OR
    2014 DCSB TRD OR
    Thanks.

    Question: I'm about to order some C/O and new UCA with some of the online deals being pretty decent this weekend. When I remove the old front assembly, would it just be easier to take it to a local shop to have decompressed or is there a reason I need to rent some spring compressors and do it soon after I remove them? I don't intend to keep the old struts and shocks.

    EDIT: suppose I should clarify after reading some other threads. Are there parts on my old strut assembly I'll need in order to install the coilovers? (Random small parts, etc)

    Also, most of the 4x4 websites mention their C/O and UCA setup (or combinations thereof) work great with 16x8 wheels. I'm running 15x8 with 33x12.5x15 tires; the new UCA should increase my clearance (I may be getting a slight intermittent rub on my current OEM UCA) but is there a reason they don't list 15x8 on the webpages? Example of what I'm talking about: http://store.sdhqoffroad.com/955-04toyotatacomaicontubularuniballuppercontrolarms.aspx

    Thanks fellas.
     
    Last edited: Nov 29, 2013
  4. Nov 30, 2013 at 10:39 PM
    #4
    CascadesTacoma

    CascadesTacoma [OP] Well-Known Member

    Joined:
    Oct 28, 2013
    Member:
    #115414
    Messages:
    115
    Gender:
    Male
    Seaside, CA
    Vehicle:
    '14 DCSB TRD OR
    2014 DCSB TRD OR
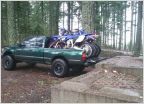
    Went hiking up in Mount Si today and had to put my canopy on prematurely. The DupliColor BTY-1602 doesn't match my silver as well as I thought it would. I'll smooth it out tomorrow and apply another coat.

    [​IMG]
     
  5. Dec 2, 2013 at 6:52 PM
    #5
    CascadesTacoma

    CascadesTacoma [OP] Well-Known Member

    Joined:
    Oct 28, 2013
    Member:
    #115414
    Messages:
    115
    Gender:
    Male
    Seaside, CA
    Vehicle:
    '14 DCSB TRD OR
    2014 DCSB TRD OR
    DIY custom grill

    Made my custom grill today. I bought the perforate sheet from Pacific Grating and chose a carbon steel (not stainless) Side Staggered Slot sheet. The 4ft x 4ft sheet cost $25 and I used spray on plasti-dip to paint as carbon steel will rust fairly easily.

    Build and Install:

    1. Cutting out the sheet:
    I used a Dewalt cordless grinder/cutter/sander to cut out a rough match to fit the grill. I then used tin snips to do the finishing trimming just prior to painting. The perforated sheet is fairly thin and cuts well with the tin snips though thicker gauge you'd need to use a jig saw with metal fitting.
    [​IMG]

    2. I removed the grill assembly by removing the two top screws (Great talk through with pics) which are just to the right and left of the tops of the headlights. I then squeezed the six black plastic connectors between the OEM grill and the truck. If you look down between the grill and the radiator you can see all six. Then you just need to disconnect (tricky part) the connectors behind the painted plastic strip under each headlight. The best way is to reach under each headlight and feel around for the clip.
    [​IMG]

    3. The chrome portion of the grill and the black plastic OEM grill are glued together. I used a flat head screw driver to break off as much of the epoxy as I could while saving the clips because some would match nicely with the perforated grill. Once the plastic grill was off, I measured up the new grill with the chrome frame and made my final trims before spraying both sides with plastic (gives it a nice textured look).
    [​IMG]

    4. Because the new grill does not sit completely flat inside the chrome/plastic, I first applied some hard sealing epoxy and then zip tied the grill to a broom handle on the outside/front of the chrome/plastic to force the new grill to bend and conform with the natural concavity of the plastic/chrome. The grill needs to sit like that for 24 hours or the full curing time to ensure the epoxy is set because once you remove the zip ties, the metal mesh will want to flatten and unglue and will be assisted by every bump in the road and the force of the wind against the front while driving.

    5. Cut out a TRD stencil for the front.

    Complete project is my 12-5-13 picture at the top.
     
    Last edited: Dec 5, 2013
    This site contains affiliate links for which the site may be compensated.
    #5
  6. Dec 5, 2013 at 8:53 PM
    #6
    CascadesTacoma

    CascadesTacoma [OP] Well-Known Member

    Joined:
    Oct 28, 2013
    Member:
    #115414
    Messages:
    115
    Gender:
    Male
    Seaside, CA
    Vehicle:
    '14 DCSB TRD OR
    2014 DCSB TRD OR
    Got these in the mail today. Going to attempt the marathon install tomorrow. It'll be the first time installing either for me so may take some serious effort.

    [​IMG]
     
  7. Dec 5, 2013 at 9:03 PM
    #7
    yote

    yote Washington State University

    Joined:
    Jul 25, 2012
    Member:
    #83444
    Messages:
    4,634
    Gender:
    Male
    First Name:
    Mark
    Tacoma, WA
    Vehicle:
    2002 Ext Cab TRD Off-Road
    Curious why ya chose Camburg UCAs over the other brands?
     
  8. Dec 5, 2013 at 9:13 PM
    #8
    davidpick

    davidpick NWXPDTN

    Joined:
    Jan 21, 2010
    Member:
    #29760
    Messages:
    2,380
    Gender:
    Male
    First Name:
    David
    Leavenworth, WA
    Vehicle:
    1988 Pickup 22R 5sp 2wd
    Weber 32/36, RV Cam, LCE exhaust headers, Desmogged
    nice! looks like you got the coils/shocks preassembled, which will save you a ton of time on the install. i'd remove your old coilovers as one unit too.

    Pro tip: getting the upper ball joint to separate from the stock UCA can be a huge pain. i tried all sorts of methods on my old tacoma -- pickle fork, cursing, 3-jaw puller, cursing, heat... did i mention cursing? ended up purchasing a 4 lb maul from home depot and i kid you not, 4 good whacks later, job done. other side was just as easy with the maul.
     
  9. Dec 5, 2013 at 10:21 PM
    #9
    CascadesTacoma

    CascadesTacoma [OP] Well-Known Member

    Joined:
    Oct 28, 2013
    Member:
    #115414
    Messages:
    115
    Gender:
    Male
    Seaside, CA
    Vehicle:
    '14 DCSB TRD OR
    2014 DCSB TRD OR
    Went with the Camburg UCA mainly because after reading through pages and pages on the suspension section no one had anything bad to say about the Camburg brand (as opposed to Light Racing) and it is cheaper than ICON or Total Chaos. The off-roading do is more expedition off-roading than rock crawling so I don't need absolute top of the line stuff.

    We'll see how it feels when I'm done. Anything will be better than my current crappy ride quality.

    As for installation, I've got access to a decent shop so I'll be able to leverage several tool options to get the ball joint separated. I've seen a few guys on here that did just what you did (David) and applied a few solid hits.
     
  10. Dec 5, 2013 at 10:34 PM
    #10
    yote

    yote Washington State University

    Joined:
    Jul 25, 2012
    Member:
    #83444
    Messages:
    4,634
    Gender:
    Male
    First Name:
    Mark
    Tacoma, WA
    Vehicle:
    2002 Ext Cab TRD Off-Road
    Gotcha! :thumbsup:
    Suspension upgrade has been on my mind lately, so that is why I ask :)
     
  11. Dec 5, 2013 at 10:40 PM
    #11
    davidpick

    davidpick NWXPDTN

    Joined:
    Jan 21, 2010
    Member:
    #29760
    Messages:
    2,380
    Gender:
    Male
    First Name:
    David
    Leavenworth, WA
    Vehicle:
    1988 Pickup 22R 5sp 2wd
    Weber 32/36, RV Cam, LCE exhaust headers, Desmogged
    i'm also running camburg uniballs, seattlecoug, for pretty much the exact same reasons as cascades here. i've got nearly a year on them and have been extremely happy.
     
  12. Dec 5, 2013 at 10:54 PM
    #12
    yote

    yote Washington State University

    Joined:
    Jul 25, 2012
    Member:
    #83444
    Messages:
    4,634
    Gender:
    Male
    First Name:
    Mark
    Tacoma, WA
    Vehicle:
    2002 Ext Cab TRD Off-Road
    These were the suspension mods I was talking about that are getting me anxious all at once...
     
  13. Dec 5, 2013 at 11:00 PM
    #13
    FLtaco24

    FLtaco24 Just a man and his truck

    Joined:
    Apr 20, 2012
    Member:
    #77302
    Messages:
    255
    Gender:
    Male
    First Name:
    JJ
    Daytona Beach/South FL
    Vehicle:
    09 PreRunner SR5
    Stock for now
  14. Dec 7, 2013 at 5:29 PM
    #14
    CascadesTacoma

    CascadesTacoma [OP] Well-Known Member

    Joined:
    Oct 28, 2013
    Member:
    #115414
    Messages:
    115
    Gender:
    Male
    Seaside, CA
    Vehicle:
    '14 DCSB TRD OR
    2014 DCSB TRD OR
    How to install new Uni-Ball Upper Control Arms

    Here is the DIY install for Camburg Uni-Ball UCA on a 1st Gen Tacoma.

    Steps as I completed them:
    1. Apply WD-40 to all nuts and bolts once or twice in the 24 hours prior to work.
    2. Loosen nuts for both UCA and strut assembly (you can exclude the lower strut nut till you remove the assembly)
    3. Remove strut assembly
    4. Remove UCA
    5. Install new UCA
    6. Install new strut assembly

    Important tools not listed in required tools list:
    1. punch - used to get lower bolt out of the strut assembly. I used a punch and a narrow pry bar to work the bolt out then used a ratchet to twist it the rest of the way (warning: this will strip your bolt)
    2. pry bar - a very narrow, square 1/2" x 1/2", was very useful for working with the strut assembly
    3. WD-40 to pre-grease all connections
    4. Circular cutter/grinder - Very necessary to grind down some of the corrosion to ensure a flush fit of the uni-ball joint into the spindle.
    5. Sawsall - Used it to cut the ball-joint bolt because I was unable to separate the ball-joint from the stock UCA.
    6. Sandpaper - to clean the inside of the spindle of all corrosion to ensure a flush fit of the new joint.
    7. A thin coat of M-A-N: You're going to need it because some of those rust sealed nuts and bolts are going to hurt your feelings.

    Complete the install of the new Camburg Uni-Ball UCA and OME strutt assembly in about 12 hours over two days. I will not it took me about 3 hours to completely finish the second side as I'd learned several very useful lessons doing the first side (ie. F#@! trying to separate the old UCA from the ball joint, just cut it). Removing and replacing the strut assemblies was piece of cake though it did require some serious muscle at some points.


    1. Raise the vehicle and place on jackstands, ensure you place wheel blocks on the back wheels. Make sure you look in your owners manual (or google search) for the proper jack location on your frame as you can't just place it anywhere (who knew).
    2. Remove the wheels (if this is your first time ever doing anything like this, make sure you've already loosened the lug-nuts prior to lifting the tires off the ground)
    3. With the jack stands under the vehicle, use the jack to take off some of the pressure on the suspension. I found I raised and lowered the front suspension assembly 0-3 inches throughout the installation to get the strut assembly on and off and to work with the UCA.
    4. Remove the strut assembly. Loosen the three retention nuts at the top (obviously don't mess with the center which holds the actual assembly together). Then loosen and remove the nut and bolt at the bottom of the assembly. Never fear, though it may seem like a spring loaded strut assembly will shot down, it won't. However, this is where the punch comes in handy. Once the nut is off, I used a punch and hammer to push the bolt the rest of the way out; on the driver's side, in order to avoid getting my punch out, I used a ratchet to screw it the rest of the way out. Once the lower attachment is off, finish removing the top three nuts and then remove the strut assembly. It is heavy, so be prepared to man handle it out and avoid mashing your fingers on the lower control arm, which I did and then swore at nothing in particular.
    5. The easy part is now over, it is time to remove the old Upper Control Arm.

    [​IMG]
    As you can tell, there is some serious rust on the old spindle/ball joint. This proved to be a huge pain in the ass because I ended up breaking the 3 ton 3 jaw press I bought from Sears to press it out. Also, the typical U-joint press you get from your auto parts store doesn't fit very well on your spindle. IMPORTANT: if you are lucky enough to have a good O'Reilly's (like I do, but didn't realize when I did the install), they will have the Ball Joint Press 4wd kit to accompany the Ball Joint Press kit. The 4wd kit just has additional bits to help. Anyway, I ended up using a BFH to get the ball joint housing separated.

    [​IMG]
    Seen here: tied the spindle up to protect the cv boots and reduce droop, using the 3 jaw press to get the ball joint housing out of the spindle. The 3 jaw press is an amazing tool if you can find one at a local store.

    [​IMG]
    The U-joint press is awesome for pressing in the new Camburg uniball. IMPORTANT: Get some sand paper and clean inside and outside of your spindle thoroughly before you install the new uniball/balljoint. You need to ensure you have a completely flush fitting or installing the new o-rings will be a nightmare, trust me. Crank down on the U-joint until you pull a muscle, it is the only way you can ensure a solid fit.

    [​IMG]
    Here is everything on and done before putting the wheel back on. May as well rent a torsion wrench if you don't have one to get all your tensions correct during install.

    CV angle, I'll install the Diff drop tomorrow
    [​IMG]

    Final ride height. The front is definitely higher then before.
    [​IMG]
     
    Last edited: May 14, 2014
  15. Dec 11, 2013 at 9:13 PM
    #15
    CascadesTacoma

    CascadesTacoma [OP] Well-Known Member

    Joined:
    Oct 28, 2013
    Member:
    #115414
    Messages:
    115
    Gender:
    Male
    Seaside, CA
    Vehicle:
    '14 DCSB TRD OR
    2014 DCSB TRD OR
    I'll keep working on the DIY writeup. However, got a question for you guys regarding my CV angle: after installing the Toytec diff drop, I still have a pretty sizable angle, how harmful? As the new front suspension settles in, my front end will drop slightly, but hopefully the angle I have right now isn't too crazy.
    [​IMG]

    Here is how it looks from the side. There is a fairly substantial lift difference.
    [​IMG]

    Second question: This is my front wheel stance after the new front setup with 1.25" spacer. As you can see (maybe), there is a slight angle to the front wheels; will this go away as the suspension settles? What causes it?
    [​IMG]

    Third question: I'll start installing my second battery in the next few weeks; after reading through some threads I see some battery terminals with plastic caps on them, how important are these and how effective are they for preventing corrosion?
     
    Last edited: Dec 11, 2013
  16. Dec 11, 2013 at 11:14 PM
    #16
    davidpick

    davidpick NWXPDTN

    Joined:
    Jan 21, 2010
    Member:
    #29760
    Messages:
    2,380
    Gender:
    Male
    First Name:
    David
    Leavenworth, WA
    Vehicle:
    1988 Pickup 22R 5sp 2wd
    Weber 32/36, RV Cam, LCE exhaust headers, Desmogged
    you will need an alignment after installing that lift. give it a day or two to settle, then get it aligned!
     
  17. Dec 11, 2013 at 11:21 PM
    #17
    HBtaco02

    HBtaco02 Well-Known Member

    Joined:
    Jan 27, 2013
    Member:
    #96220
    Messages:
    2,298
    Gender:
    Male
    First Name:
    Allen
    Huntington Beach
    Vehicle:
    02 4wd SR5 TRD
    ARB Front Locker grey wire mod Camburg UCA's Extended Kings All-Pro expo's 10" Bilstien Brute Force Hybrid front bumper Smitty XRC8
    Looking good. The front will settle a bit..
     
  18. Dec 24, 2013 at 12:46 PM
    #18
    CascadesTacoma

    CascadesTacoma [OP] Well-Known Member

    Joined:
    Oct 28, 2013
    Member:
    #115414
    Messages:
    115
    Gender:
    Male
    Seaside, CA
    Vehicle:
    '14 DCSB TRD OR
    2014 DCSB TRD OR
    Had the chance to tear around in the snow for a bit in Frisco, CO. Just had a transmission leak fix around the shifter. Turns out it is an easy fix with some industrial silicon sealant. 4wd is working great again.
    [​IMG]

    [​IMG]

    Lesson learned, going too fast in 4wd, even by mistake, will cause a leak.
     
    Last edited: Jan 14, 2014
  19. Jan 14, 2014 at 10:35 PM
    #19
    CascadesTacoma

    CascadesTacoma [OP] Well-Known Member

    Joined:
    Oct 28, 2013
    Member:
    #115414
    Messages:
    115
    Gender:
    Male
    Seaside, CA
    Vehicle:
    '14 DCSB TRD OR
    2014 DCSB TRD OR
    New question for you guys:

    I'm working towards an overland rig. I've got grand ideas of driving to Patagonia (2015 anyone?) and up to Dead Horse, AK and all over. I've got a great truck as it is but want to do as much now to save some pain in the future. I'm learning as I go through some of this that the previous owner definitely offroaded with the truck (rust damage, but this is the PNW) and it has me worried about the durability in the long run of some of my parts (cvs, etc).

    Here is a list of what I plan on upgrading/replacing, what should I add?

    - CV boots
    - Diff breather mod
    - New shackles and spring pack
    - Alternator (about to add a second battery)
    - New skid plate (rust requires this)
    - I have a K&N which I need to clean (didn't realize I had one till I went to replace my air filter for the first time, thanks previous owner!)

    I'm really looking for engine parts and suspension parts to upgrade/replace. All the expo additions I'll work through as I go. Really want to make the truck as reliable as possible first before I start going to town on the upgrades.
     
    Last edited: May 14, 2014
  20. Jan 14, 2014 at 10:38 PM
    #20
    SupraT

    SupraT Tacoma Lover

    Joined:
    Feb 26, 2010
    Member:
    #32148
    Messages:
    2,515
    Gender:
    Male
    First Name:
    Tony
    Columbia Falls
    Vehicle:
    98 TRD SR5 4x4
    3" Lift Three leaf add and Bilstin 5100"s in back and Donahoe coilovers in front, Tinted Windows, Blackened parking light, tinted brake lights, clear bumper lights, Blacked out turn signals, AVS vent visors, Electric Fan mod, K&N CAI
    Nice looking truck man:)
     

Products Discussed in

To Top