1. Welcome to Tacoma World!

    You are currently viewing as a guest! To get full-access, you need to register for a FREE account.

    As a registered member, you’ll be able to:
    • Participate in all Tacoma discussion topics
    • Communicate privately with other Tacoma owners from around the world
    • Post your own photos in our Members Gallery
    • Access all special features of the site

Dispatch55126 Build Thread

Discussion in '1st Gen. Builds (1995-2004)' started by dispatch55126, Jun 26, 2014.

  1. Sep 23, 2014 at 7:22 PM
    #21
    dispatch55126

    dispatch55126 [OP] Well-Known Member

    Joined:
    Mar 12, 2014
    Member:
    #125193
    Messages:
    976
    Gender:
    Male
    MN
    Vehicle:
    2004 Xtracab SR5
    Complete OME kit w/ 881's and dakars. All-Pro Sliders, CB, HAM Radio and various other minor stuff.
    I think I've settled on the Fabtech truck bed mount. It mounts the spare flat in the bed and if I need to haul something, removal is easy and doesn't leave anything sticking out.

    I really tested the skids this weekend. The reduced clearance caused by the current 30" tires meant I was dragging, scraping and slamming them on rock harder and more often than I'd like. They now have a few well-earned dents due to the skid hitting rocks before my tires could ride over. Also high-centered myself a few times. Still, these skids held up extremely well and more importantly, didn't allow any damage to the parts that matter.

    T-Case skid:
    5cdfa3ff-9709-4a69-8be3-02842c66a5c9_zps_2a370dc5b51644cd352a9d7ddf975cd7cde81c27.jpg
    20140921_110857_zps5e5a5b18_e0d5fec9944e6cfe3296e774e008774c9325702c.jpg

    IFS skid:
    20140921_111046_zps7f4b612b_26faa37376487df0a17d49e1d8a0423cd95ecbe1.jpg
    20140921_111101_zps28ddf6c5_cb32fec2faae93940bb3109c49d03c7c17284fb1.jpg

    Gratuitous trail pics:
    Pic1_zpseaf885f2_841782be6b309f436c7b4b45278b1f9fdc5c5cc8.jpg
    Pic2_zps120a7faa_372e5ea522656e7e3418cafa5fd12fe1ab9c1fdb.jpg
    Pic3_zps2cb610f9_f50b6b08b07cb202eb5ef0995aa2ca1586d059b5.jpg
    Pic4_zpscddbaf47_d8eec74d0fe84a4734f9784457e80a1342b13047.jpg
    Pic5_zps6ee2e98a_0fc29c035ef19873f670883ae990142c4540fb08.jpg
     
  2. Sep 23, 2014 at 10:04 PM
    #22
    ThatTallDude

    ThatTallDude Well-Known Member

    Joined:
    Jan 10, 2014
    Member:
    #120364
    Messages:
    88
    Gender:
    Male
    First Name:
    Jesse
    sf peninsula
    Vehicle:
    '01, 4x4, SR5, 2.7L, 5spd, 33x12.5x15
    Leer shell, bedliner, helwig helper springs, hid aux driving lights. UPDATE: 33x12.5x15 duratracs, buds skid plate & belly pan (delivered not yet installed); now need good bolt-on sliders... UPDATE: Ordered bamf sliders, LCA skids, & badlands rear bumper
    Wow that is some good wheeling; open diffs still right?

    The stock skid would be DOA after that...!

    I like the simpler design of RAT skids, but went with budsbuilt since I could get them.

    Question for you; what do think of bedlinering the skids. Trying to figure what to do with mine. Sad to see that nice paint all scraped up so soon...
     
  3. Sep 24, 2014 at 7:42 AM
    #23
    dispatch55126

    dispatch55126 [OP] Well-Known Member

    Joined:
    Mar 12, 2014
    Member:
    #125193
    Messages:
    976
    Gender:
    Male
    MN
    Vehicle:
    2004 Xtracab SR5
    Complete OME kit w/ 881's and dakars. All-Pro Sliders, CB, HAM Radio and various other minor stuff.
    Yep, I still have open diffs. I got stuck once because of it and couldn't make it up an obstacle but I still got through 99% of the trails.

    Bedliner wouldn't hold up any better when being dragged over the rocks. Since this is rattle can paint, it'll be easy to touch them up.
     
  4. Sep 24, 2014 at 11:31 PM
    #24
    ThatTallDude

    ThatTallDude Well-Known Member

    Joined:
    Jan 10, 2014
    Member:
    #120364
    Messages:
    88
    Gender:
    Male
    First Name:
    Jesse
    sf peninsula
    Vehicle:
    '01, 4x4, SR5, 2.7L, 5spd, 33x12.5x15
    Leer shell, bedliner, helwig helper springs, hid aux driving lights. UPDATE: 33x12.5x15 duratracs, buds skid plate & belly pan (delivered not yet installed); now need good bolt-on sliders... UPDATE: Ordered bamf sliders, LCA skids, & badlands rear bumper
    Cool; thanks, will go that way with mine.

    One thing I've notice on here is that a lot of folks that do a 2" & especially 3" lift in front have their cv boots fail not long after; you may want to concider doing a 1" diff drop. I think the extra cv angle is creating friction/heat on the boot itself; causing older one to fail.

    It should also put a lot less strain on the cv's too since it looks like your are running without the swaybar and the tire can hang pretty low with a significant amount of angle on the cv but but still get good traction so get loaded pretty hard; just my 2 cents.

    Again; love this build...
     
  5. Dec 20, 2014 at 8:40 PM
    #25
    Delta00

    Delta00 ᕕ( ᐛ )ᕗ

    Joined:
    Sep 16, 2013
    Member:
    #112633
    Messages:
    4,142
    Gender:
    Male
    First Name:
    Troy
    Chandler AZ
    Vehicle:
    2002 Toyota Tacoma 4WD
    Check Build
    Sweet build! Like what you have done with it so far :)
     
  6. Dec 20, 2014 at 8:55 PM
    #26
    dispatch55126

    dispatch55126 [OP] Well-Known Member

    Joined:
    Mar 12, 2014
    Member:
    #125193
    Messages:
    976
    Gender:
    Male
    MN
    Vehicle:
    2004 Xtracab SR5
    Complete OME kit w/ 881's and dakars. All-Pro Sliders, CB, HAM Radio and various other minor stuff.
    Thanks. Haven't done much in awhile. Was going to get a bumper but I needed a new ice auger first. Bumpers, winch and relocate the spare are next on the list. Tires/gears/lockers will be last.
     
  7. Dec 20, 2014 at 9:02 PM
    #27
    Delta00

    Delta00 ᕕ( ᐛ )ᕗ

    Joined:
    Sep 16, 2013
    Member:
    #112633
    Messages:
    4,142
    Gender:
    Male
    First Name:
    Troy
    Chandler AZ
    Vehicle:
    2002 Toyota Tacoma 4WD
    Check Build
    What bumper are you looking at?
     
  8. Feb 11, 2015 at 10:03 AM
    #28
    4x4Banger

    4x4Banger Gold Member

    Joined:
    Nov 16, 2014
    Member:
    #142517
    Messages:
    4,234
    Gender:
    Male
    First Name:
    Ham
    Los Angeles
    Vehicle:
    2012 DCSB/OR 4x4
    Any updates?
     
  9. Feb 11, 2015 at 3:05 PM
    #29
    dispatch55126

    dispatch55126 [OP] Well-Known Member

    Joined:
    Mar 12, 2014
    Member:
    #125193
    Messages:
    976
    Gender:
    Male
    MN
    Vehicle:
    2004 Xtracab SR5
    Complete OME kit w/ 881's and dakars. All-Pro Sliders, CB, HAM Radio and various other minor stuff.
    None recently. Too cold to wheel or work in an unheated garage. We'll have to see what the spring brings...
     
  10. Apr 5, 2015 at 12:02 PM
    #30
    dispatch55126

    dispatch55126 [OP] Well-Known Member

    Joined:
    Mar 12, 2014
    Member:
    #125193
    Messages:
    976
    Gender:
    Male
    MN
    Vehicle:
    2004 Xtracab SR5
    Complete OME kit w/ 881's and dakars. All-Pro Sliders, CB, HAM Radio and various other minor stuff.
    Okay, finally took some pics. Having received my General License a few weeks ago and since the only CB traffic in my area is some hillbilly spammer, I decided to install a mobile HAM radio.

    The antenna mount is a CBI Offroad, comes painted (which is a nice touch since everything else seems to come unpainted) and is very beefy. The install was easy and took about 30 minutes. The antenna is a Comet Super Slim Dual Band with a NMO base. The coax is RG-58.
    20150405_132137_zpsc7kpcy2j_8245923f2d71fe49d8ff59825f699bf49d570755.jpg
    20150405_132131_zpsx3hzjkpe_d6b7f86f81382598c490da92ddab1246cbbe21eb.jpg

    I didn't take any pics but the wires were run through the firewall and down the drivers side kick place and into the drivers side storage compartment.
    20150405_132305_zps0yid8bk3_594095dffb2d9d6038aa9d44e81905ce7591e279.jpg

    I used a 6-gang Blue Sea fuse block in the storage compartment. The positive and negative are 10 gauge run directly from the battery. This will allow me to add additional radios or other things in an easily accessible area.
    20150405_132532_zpsdbxyyywp_c504f0756e226a80926fea3f150d52fa865db4a4.jpg

    The radio itself was screwed to the hatch cover measured 3" from the rear of the hatch to the rear of the mounting bracket. This allows easy access to the fuses and for programming.
    20150405_132538_zpsxvu6rdwt_9c773b0deec70384afa42eb644c03aa19a466bf8.jpg

    The speaker was mounted to the back of the center console, has good sound and is out of the way.
    20150405_132250_zpsmdg6lemu_070186404e576d809b1fc57a42f0cc5aeebbacf3.jpg

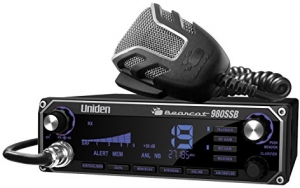
    The head unit is mounted to the top of the center console between the mic and my Steelie phone mount. It's within easy reach, easy visible without taking my eyes completely off the road and works well. The vents are also accessible so this isn't an issue. There is also a reason my the plastic trim around the radio looks hacked up. I originally had a Bearcat 980SSB CB below the radio. However, in order to make everything fit, I had to dremel the trim piece. I'll eventually replace the trim piece but it isn't a high priority right now.
    20150405_132153_zpsfzy4cdfp_499ca7c1fbfafb515a24918d39363c7ca29e3311.jpg

    Since I took out the CB but this is the method used while on the trails, I relocated the CB coax to one of the switch panels. I have a Midland 75-822 which will connect to the coax and the power plug is right next to it.
    20150405_132201_zpssinrhqjt_8321743a8d894f1db0d13a664fbce25d65fba921.jpg
     

Products Discussed in

To Top