1. Welcome to Tacoma World!

    You are currently viewing as a guest! To get full-access, you need to register for a FREE account.

    As a registered member, you’ll be able to:
    • Participate in all Tacoma discussion topics
    • Communicate privately with other Tacoma owners from around the world
    • Post your own photos in our Members Gallery
    • Access all special features of the site

1st Gen Pseudo Satoshi Grille Assembly

Discussion in '1st Gen. Tacomas (1995-2004)' started by 747, Jul 8, 2010.

  1. Aug 18, 2010 at 7:16 PM
    #21
    747

    747 [OP] function > form

    Joined:
    Jan 27, 2008
    Member:
    #4465
    Messages:
    3,003
    Gender:
    Male
    Vehicle:
    1st Gen.
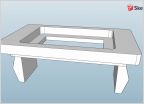
    here's the part that has taken most of my time; eliminating the ridge/seam between the outer (frame) piece and inner (grille insert) piece of the assembly...

    [​IMG]

    [​IMG]
     
  2. Aug 26, 2010 at 10:06 AM
    #22
    Taco76087

    Taco76087 Well-Known Member

    Joined:
    Jan 16, 2010
    Member:
    #29458
    Messages:
    4,023
    Gender:
    Male
    First Name:
    Robert
    Weatherford,Texas
    Vehicle:
    04 Tacoma prerunner TRD SR5
    Rockford Fosgate p2 10'', Q-Logic Enclosure, JVC KD-PDR30 Ipod Connection, Rockford p200.2 Amp, Clear Corners, KING Coilovers, Rancho Rear shocks FJ TRD Trail Teams Wheels with 285/75/16 Duratracs
    any updates? :D
     
  3. Aug 26, 2010 at 2:44 PM
    #23
    ccoliver09

    ccoliver09 Member

    Joined:
    Jul 22, 2010
    Member:
    #40592
    Messages:
    16
    Gender:
    Male
    First Name:
    Chris
    California
    Vehicle:
    00 Tacoma PreRunner
    CB Radio Tow Hitch Fog Light Mod Deck Plate Mod
  4. Aug 26, 2010 at 6:11 PM
    #24
    747

    747 [OP] function > form

    Joined:
    Jan 27, 2008
    Member:
    #4465
    Messages:
    3,003
    Gender:
    Male
    Vehicle:
    1st Gen.
    Sorry for the build-up guys...I had to work all last weekend, and haven't been able to touch the grille since my last post. I'll update this thread when it's done.
     
  5. Aug 28, 2010 at 10:52 AM
    #25
    mrp192

    mrp192 REALLY!!

    Joined:
    Feb 21, 2009
    Member:
    #13911
    Messages:
    738
    Gender:
    Male
    First Name:
    Brent
    Cheney WA
    Vehicle:
    2017 Tacoma Dbl cab long bed.
    Hood Strusts, remote Start, truck came with Leveling kit and wheels.
    cant wait to see how it turns out!
     
  6. Aug 28, 2010 at 11:51 AM
    #26
    scocar

    scocar hypotenoper

    Joined:
    Nov 11, 2009
    Member:
    #25814
    Messages:
    39,431
    So bkeith, I am curious if it is critical or even necessary to modify the bottom part of the original grill opening with the fiberglass. I was looking at mine, and it seems like you could just lay the new grill material behind the original grill frame without building up this extra material. Would this not work? Is the grill material too rigid to flex/fit flush against the back of the grill frame?

    EDIT. Oh, and now going back to the pix, I see that you cut out the original grill's vertical bars around their bases, leaving a square cutout in the surroundging grill frame at top and bottom that had to be filled with something, and that was another thing I was wondering...it looks like the vertical bars could be cut out just above/below the grill surround and the remaining material just ground down or sanded flush (and thus not creating the large cutouts that need to be filled). Would this not be possible? Am I sniffing too much epoxy?
     
  7. Aug 28, 2010 at 10:24 PM
    #27
    747

    747 [OP] function > form

    Joined:
    Jan 27, 2008
    Member:
    #4465
    Messages:
    3,003
    Gender:
    Male
    Vehicle:
    1st Gen.
    Mmmm...the sweet smell of epoxy. This started out as a deeper-dish satoshi. Thus, I fiberglassed "back" further than the original opening in an effort to create the deeper dish. This will end up as a non-deeper-dish satoshi, as I could never get the fiberglass even/level at the back; therefore, I will be trimming the added fiberglass back to the original opening depth.

    You are correct: If you're careful with initial "fin" cut-out, you should be fine w/o fiberglassing the bottom of the opening.
     
  8. Aug 3, 2011 at 3:04 AM
    #28
    Stout890

    Stout890 Well-Known Member

    Joined:
    May 8, 2011
    Member:
    #56287
    Messages:
    926
    Gender:
    Male
    First Name:
    Jason
    Palmdale ca
    Vehicle:
    99 prerunner sr5
    10" sub, OME881 on Bilstein's, 3" all-pro leaf springs with billies in the back, JBA UCA's, bed cover with custom LED lighting, k&n intake and DT headers, OEM E-locker in the rear. 32" BFG KO2 on steel D window wheels, suicide knob. rebuilt 3RZ w/ stage 1 cam and balance shaft delete . big 3 mod, all new suspension and body mount bushings. cat back magnaflow exhaust.
    what happned to all the pics im curious to see them. and wonder if he ever finished???
     
  9. Aug 23, 2011 at 8:02 PM
    #29
    747

    747 [OP] function > form

    Joined:
    Jan 27, 2008
    Member:
    #4465
    Messages:
    3,003
    Gender:
    Male
    Vehicle:
    1st Gen.
    wow...stumbled across this thread...so, it ended up looking like sh!t, and i ditched it. :O

    no longer interested in satoshi mod. sorry fellas.
     
  10. Aug 27, 2011 at 8:14 AM
    #30
    747

    747 [OP] function > form

    Joined:
    Jan 27, 2008
    Member:
    #4465
    Messages:
    3,003
    Gender:
    Male
    Vehicle:
    1st Gen.
    true...this project got away from me...could've been cool.:eek:
     

Products Discussed in

To Top