

-
Welcome to Tacoma World!
You are currently viewing as a guest! To get full-access, you need to register for a FREE account.
As a registered member, you’ll be able to:- Participate in all Tacoma discussion topics
- Communicate privately with other Tacoma owners from around the world
- Post your own photos in our Members Gallery
- Access all special features of the site
 Iridium Spark Plugs and 120k Lifespan?
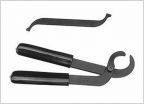 3rz Valve Clearance Tool
 Universal fender flare seal
 First gen bulb types FYI
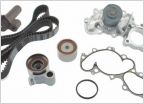 2003 PreRunner V6 Timing Belt - Looking for correct part
 Uws tool box question
1st Gen Switch cluster location suggestions?
Discussion in '1st Gen. Tacomas (1995-2004)' started by RattleTractor, Jul 18, 2010.
Page 1 of 2
Page 1 of 2


