

-
Welcome to Tacoma World!
You are currently viewing as a guest! To get full-access, you need to register for a FREE account.
As a registered member, you’ll be able to:- Participate in all Tacoma discussion topics
- Communicate privately with other Tacoma owners from around the world
- Post your own photos in our Members Gallery
- Access all special features of the site
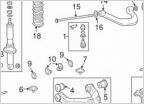 First gen front suspension question...
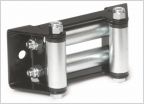 Warren wenches
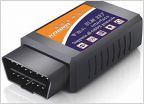 Bluetooth OBD II scanners for iPhone
 Bidirectional scanner
 Spyder tail assemblies- 1156 led bulb replacement comparisons
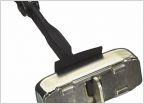 Doors have no resistance
Changing rear brake shoes (with mediocre pics)
Discussion in '1st Gen. Tacomas (1995-2004)' started by IDtrucks, Jul 23, 2013.


