

-
Welcome to Tacoma World!
You are currently viewing as a guest! To get full-access, you need to register for a FREE account.
As a registered member, you’ll be able to:- Participate in all Tacoma discussion topics
- Communicate privately with other Tacoma owners from around the world
- Post your own photos in our Members Gallery
- Access all special features of the site
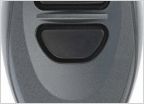 Keyless remote replacement
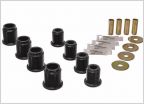 Uca moog bushing part#
 Is there a washer fluid reservoir mod?
 Rear shock questions
 I tow heavy with my first gen. How can I monitor trans temp?
 Infamous P0420 CEL code
Total Chaos LCA Cam Tab Gussets install
Discussion in '1st Gen. Tacomas (1995-2004)' started by NightProwler, Feb 8, 2015.
Page 1 of 2
Page 1 of 2


