1. Welcome to Tacoma World!

    You are currently viewing as a guest! To get full-access, you need to register for a FREE account.

    As a registered member, you’ll be able to:
    • Participate in all Tacoma discussion topics
    • Communicate privately with other Tacoma owners from around the world
    • Post your own photos in our Members Gallery
    • Access all special features of the site

Tutorial: change or lube your wheel bearings.

Discussion in '1st Gen. Tacomas (1995-2004)' started by bobwilson1977, Oct 22, 2009.

  1. Oct 22, 2009 at 7:07 AM
    #1
    bobwilson1977

    bobwilson1977 [OP] Well-Known Member

    Joined:
    Jan 7, 2009
    Member:
    #12328
    Messages:
    1,357
    Gender:
    Male
    KaliFORN-I-A
    Vehicle:
    96 Tacoma 2WD ( pizza delivery model)
    none except for crappy hub caps and floor mats.
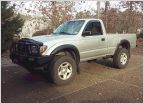
    Yesterday I changed out one set of wheel bearings on my 96 taco 2WD and re-packed the other. I had repacked them around 100,000 miles ago and wound up using the wrong grease. The grease I used was a low temp grease that liquefies a lot easier under heat , which happens with disc brakes. The grease in mine had almost solidified and hardened up, damaging one set of bearings.

    I have no idea where the camera went so I failed to take pics. But here's how you do it.

    First of all, the 2WD taco hub assembly is as simple as it comes. There's 2 bearings, 2 races, and one seal in the back. That's it. For this job you only need a 17 wrench, a pair of pliers, a can of high temp hub grease ( usually red) and around half a roll of paper towels.

    Remove the wheel. Then remove the mounting bolts for the brake caliper. Use a piece of wire to tie it out of the way and prevent putting strain on the brake line.

    Next, pry off the dust cap. Underneath you'll see a cotter pin and a stamped steel retainer nut behind it. Remove the cotter pin. You'll need to use a new cotter pin because believe it or not, that cotter pin is the only thing preventing the wheel from coming off. Remove the retainer nut.

    Under that is another nut. Its only held on with by hand-tightened pressure. I didn't even need a wrench: Just unscrew it by hand. Behind that is a flat washer. Pull it off. Now grasp the rotor and pull it off. The rotor and hub are one piece.

    The front bearing will come right out. The back one is held in with a seal. Use a screwdriver and pry the seal out. You'll need to replace the old seal with a new one. They're about $10-$15 ea. Pull out the rear bearing.

    If all you're doing is re-packing the bearings, use some sort of solvent to dissolve the grease in the bearings. I used gasoline, but that's probably not the safest thing but man it works great. Inspect the bearings for rust, damage, or roughness. If you detect any- replace them. Next inspect the races, which are stamped into the hub from either side. Luckily mine were in perfect shape so I just left them in there.

    Clean all the old grease out of the hub itself. That's where half the roll of paper towels comes in handy. Now for the worst part of the job: pack the bearings with grease. Dunk them into the can of grease, roll them in your hand and fully immerse all the rollers in grease. Re-install the rear seal. Use a plastic or soft mallet to tamp the new seal in place. Install the front bearing.

    Now re-install the hub in the reverse order. Install the nut. Just tighten it by hand. Make sure that there is no play back and forth with the hub. Install the retainer nut and as mentioned- use a new cotter pin. You do not want this to break and if you use an old one, that could more likely happen then you'd be shit out of luck if the wheel came off going 70MPH.

    With the wheel re-installed, spin it and make sure everything seems allright. Take er' for a spin and see how it sounds and handles. If all is well, you won't have to do this job perhaps ever again.
     

Products Discussed in

To Top