

-
Welcome to Tacoma World!
You are currently viewing as a guest! To get full-access, you need to register for a FREE account.
As a registered member, you’ll be able to:- Participate in all Tacoma discussion topics
- Communicate privately with other Tacoma owners from around the world
- Post your own photos in our Members Gallery
- Access all special features of the site
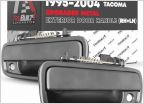 Need advice on broken door handles
 Hunting upgrades! Show me what you got!
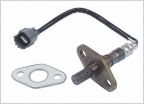 Exhaust sensor
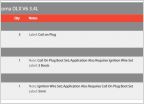 WTH shudder and shake
 2001 throwing p0325 code
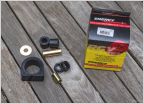 How-To: Steering Rack Bushing Replacement on a 1st Gen Tacoma
1st Gen How-To: Change your belts (P/S, A/C, Alternator) 2.4/2.7L
Discussion in '1st Gen. Tacomas (1995-2004)' started by The Parts Whore, Dec 29, 2009.
Page 1 of 6
Page 1 of 6
