

-
Welcome to Tacoma World!
You are currently viewing as a guest! To get full-access, you need to register for a FREE account.
As a registered member, you’ll be able to:- Participate in all Tacoma discussion topics
- Communicate privately with other Tacoma owners from around the world
- Post your own photos in our Members Gallery
- Access all special features of the site
 Angel Eyes LEDs
 Need help with finding these parts
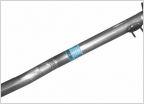 Where can I get the best deal on a muffler?
 Plastic Body Clips & Rivets & Fasteners
 Where can I get a power steering cap
 Need Lift Ideas and/or suggestions
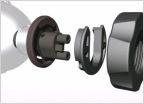
Steering Rack to inner tie rod and back again....ugh
Discussion in '1st Gen. Tacomas (1995-2004)' started by TejasYOTA, Aug 3, 2013.


