1. Welcome to Tacoma World!

    You are currently viewing as a guest! To get full-access, you need to register for a FREE account.

    As a registered member, you’ll be able to:
    • Participate in all Tacoma discussion topics
    • Communicate privately with other Tacoma owners from around the world
    • Post your own photos in our Members Gallery
    • Access all special features of the site

Trouble Removing Bolt From Upper Control Arm With Pics

Discussion in '1st Gen. Tacomas (1995-2004)' started by Deere9798, Jul 17, 2014.

  1. Jul 17, 2014 at 5:57 PM
    #1
    Deere9798

    Deere9798 [OP] Well-Known Member

    Joined:
    Jul 6, 2014
    Member:
    #133408
    Messages:
    755
    Gender:
    Male
    First Name:
    Charles
    Western NY
    Vehicle:
    2001 Tacoma 4x4
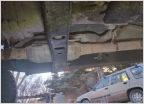
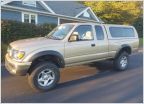
    Hello. New member here. While trying to replace my left front wheel bearing on my 2001 Toyota Tacoma 4cyl 5spd 4x4 ... I could not get the bolt out of the upper control arm. If anyone has experienced this issue I would value your input.

    Thanks,
    Charlie

    IMG_2289.jpg
    IMG_2285.jpg
    IMG_2286.jpg
    IMG_2288.jpg
     
  2. Jul 17, 2014 at 6:02 PM
    #2
    User Name01

    User Name01 Little boy from FairyTale Land

    Joined:
    Jul 15, 2013
    Member:
    #108296
    Messages:
    6,382
    Gender:
    Male
    First Name:
    Bolbi Stroganovsky
    Wherever the next wind project is
    Vehicle:
    TRD Sport Barcelona Red Metallic Dbl Cab 4x4
    You need a ball joint separator......they rent them at local autoparts store.
     
  3. Jul 17, 2014 at 6:19 PM
    #3
    Snowman

    Snowman I have a problem for your solution…

    Joined:
    Sep 8, 2010
    Member:
    #42917
    Messages:
    3,246
    First Name:
    Craig
    Somewhere in Canada
    Vehicle:
    Check out my build
    You need to have some weight on the ball joint. Thread the nut on a bit but leave it loose, then with a BFH hit the control arm as hard as you can.
     
    Last edited: Jul 17, 2014
  4. Jul 17, 2014 at 6:27 PM
    #4
    Deere9798

    Deere9798 [OP] Well-Known Member

    Joined:
    Jul 6, 2014
    Member:
    #133408
    Messages:
    755
    Gender:
    Male
    First Name:
    Charles
    Western NY
    Vehicle:
    2001 Tacoma 4x4
    Thanks for the quick replies...


    You need to have some weight on the ball joint. Thread the nut on a bit but leave it loose, then with a BFH hit the control arm as hard as you can.


    Where should I hit on the upper control arm?
     
  5. Jul 17, 2014 at 6:30 PM
    #5
    Snowman

    Snowman I have a problem for your solution…

    Joined:
    Sep 8, 2010
    Member:
    #42917
    Messages:
    3,246
    First Name:
    Craig
    Somewhere in Canada
    Vehicle:
    Check out my build
    Right around the ball joint stud. Just be careful to not hit anything else.

    Side note, Oscar (User_Name01) mentioned the correct method. But the hammer usually works for those types of situations. (lower ball joint, outer tie rod end, etc)
     
  6. Jul 17, 2014 at 6:32 PM
    #6
    Squeaky Penguin

    Squeaky Penguin Nothing Ventured, Nothing Gained

    Joined:
    Apr 5, 2012
    Member:
    #76340
    Messages:
    9,778
    Gender:
    Male
    First Name:
    Brett
    Steamboat Springs, Colorado
    Vehicle:
    '01 4WD, SR5, TRD & '13 TRDOR AC
    Lots of dust and custom dents, Check Build
    Take a BFH and swing upward at the lip of the control arm. Should come out pretty easy, if it doesn't, hit it with some heat, than repeat.
     
  7. Jul 17, 2014 at 6:34 PM
    #7
    Deere9798

    Deere9798 [OP] Well-Known Member

    Joined:
    Jul 6, 2014
    Member:
    #133408
    Messages:
    755
    Gender:
    Male
    First Name:
    Charles
    Western NY
    Vehicle:
    2001 Tacoma 4x4
    Thanks Brett, Is the bolt welded to the upper control arm?, or if not how is it held?
     
  8. Jul 17, 2014 at 6:34 PM
    #8
    Snowman

    Snowman I have a problem for your solution…

    Joined:
    Sep 8, 2010
    Member:
    #42917
    Messages:
    3,246
    First Name:
    Craig
    Somewhere in Canada
    Vehicle:
    Check out my build
    Only problem with heat is it may melt the ball joint boot. Kind of risky if you want to reuse it.
     
  9. Jul 17, 2014 at 6:35 PM
    #9
    Squeaky Penguin

    Squeaky Penguin Nothing Ventured, Nothing Gained

    Joined:
    Apr 5, 2012
    Member:
    #76340
    Messages:
    9,778
    Gender:
    Male
    First Name:
    Brett
    Steamboat Springs, Colorado
    Vehicle:
    '01 4WD, SR5, TRD & '13 TRDOR AC
    Lots of dust and custom dents, Check Build
    That's your upper ball joint, which is press fit into the spindle from the bottom. What you're trying to do is seperate the ball joint from the UCA.
     
  10. Jul 17, 2014 at 6:39 PM
    #10
    Deere9798

    Deere9798 [OP] Well-Known Member

    Joined:
    Jul 6, 2014
    Member:
    #133408
    Messages:
    755
    Gender:
    Male
    First Name:
    Charles
    Western NY
    Vehicle:
    2001 Tacoma 4x4
    So, is the balljoint attached the bolt?
     
  11. Jul 17, 2014 at 6:43 PM
    #11
    Snowman

    Snowman I have a problem for your solution…

    Joined:
    Sep 8, 2010
    Member:
    #42917
    Messages:
    3,246
    First Name:
    Craig
    Somewhere in Canada
    Vehicle:
    Check out my build
    Yes, the ball joint and the bolt are one and the same.
     
  12. Jul 17, 2014 at 6:49 PM
    #12
    Deere9798

    Deere9798 [OP] Well-Known Member

    Joined:
    Jul 6, 2014
    Member:
    #133408
    Messages:
    755
    Gender:
    Male
    First Name:
    Charles
    Western NY
    Vehicle:
    2001 Tacoma 4x4
    Thanks, that cleared it up. Since i have tried laying on it with a 5lb sledge I think a balljoint separator is needed.

    Where do I place the the two jaws of the separator?
     
  13. Jul 17, 2014 at 6:51 PM
    #13
    TacoLlama

    TacoLlama Well-Known Member

    Joined:
    Jun 29, 2014
    Member:
    #132919
    Messages:
    195
    Gender:
    Male
    R.I.
    Vehicle:
    2019 SR5 DCSB
    Soak that thing with some penetrating oil.Grab your largest hammer in your box and smack the upper control arm near where the stud is.X marks the spot.If you have a friend around you can put a bar between the UCA and the arm the ball joint is on.The shock from smacking and the pressure from the prybar will cause it to break free.


    joint.jpg
     
  14. Jul 17, 2014 at 6:56 PM
    #14
    Deere9798

    Deere9798 [OP] Well-Known Member

    Joined:
    Jul 6, 2014
    Member:
    #133408
    Messages:
    755
    Gender:
    Male
    First Name:
    Charles
    Western NY
    Vehicle:
    2001 Tacoma 4x4
    Thanks for your input.
    Will do. If / When it works I will follow up with the results.


    To All: Thanks for the asssistance
     
  15. Jul 17, 2014 at 10:07 PM
    #15
    Digiratus

    Digiratus Adventurer

    Joined:
    Mar 26, 2010
    Member:
    #34006
    Messages:
    23,039
    Gender:
    Male
    First Name:
    Mike
    Roaming the PNW
    Vehicle:
    The RedHead
    2002 XtraCab TRD 4x4 SCv6 AutoTrans With Lots of Mods ADS COs w/Compression Adjusters Camburg Uniball UCAs Whiteline Lower Control Arm Bushings Kartek 7" Limit Straps Plastics Guy Front Bumpstops Custom Alcan Springs +800 lbs +3" ADS 10" Stroke Triple Bypass w/Resi Rear Shocks Custom Rear Shock Relocate All-Pro U-bolt Flip w/Timbren Bumpstops 4.88 Nitro Gears ARB Front Locker ARB Twin Compressor Black 17x8 Konig Countersteer Type X 285/70r17 Falken A/T3w Gunmetal 16x8 SCS Ray10s 255/85r16 Maxxis Bighorns Limited Edition (Relentless) Elite Front Bumper Smittybilt X2O 10K Winch Diode Dynamics SS3 Sport Selective Yellow Fog Lights in the Bumper Diode Dynamics SS3 Pro 4,000 Kelvin SAE Driving Lights with Clear Lenses on the Bumper Morimoto D2S Projectors XB35 Ballasts + 4300K Bulbs Badland Sliders FrankenFab Tire Carrier Swingout bumper w/kitchen BudBuilt Front & Bellypan Skids BAMF Rear Diff Skid Dometic CFX 55im Fridge/Freezer Alpha II Hardshell RTT Badland Custom Bed Rack Denso 210-0461 105 amp alternator Dual Northstar 24F AGM batteries BlueSea 7622 ML-ACR Battery controller Peak DBI Dual Battery Voltage Monitor Magnuson MP62 Supercharger w/2.37" Pulley Haltech Elite 2000 Standalone ECU Denso 650cc Fuel Injectors Doug Thorley Headers Aeromotive Stealth 340 Fuel Pump TransGo A340F Reprogramming Shift Kit Magnaflow Hi-Flow CAT, Magnaflow 18" Muffler w/Vibrant Resonator 13WL Brake Calipers Braided Steel Brake Lines ScanGauge II OBDII Scanner Kenwood TM-71A Dual Band Ham Radio Larson 70CM/2M Antenna Uniden 520xl CB radio 3' Firestik Adjustable tip antenna Pioneer DEH-P9400BH HU Alpine Amps & Type R components (F) and coaxials (R) Wet Okole Seat Covers Weathertech Digital Liners Deck Plate Mod 1" Diff Drop Carrier Bearing Drop
    I found that no amount a smacking would dislodge ball joint from the UCA. I resorted to using one of these.

    31yl053qC-L_SL500_AA280__32030b883002d371a67f1c8b598be7a2069ee6e6.jpg

    Once I was able to get the three arms to grab, the BJ bolt pushed right out.
     
  16. Jul 17, 2014 at 10:18 PM
    #16
    ImplicitlyAlberta

    ImplicitlyAlberta VA6DCO

    Joined:
    Apr 22, 2012
    Member:
    #77432
    Messages:
    5,229
    Gender:
    Male
    First Name:
    David
    edmonton
    Vehicle:
    06 SR5 Trail Rated, 16 Tundra CM TRD
    TC Uni Uppers, TC race lowers, TC shock tower gusset/ secondary shock hoop, Modified Pelfrey rear shock relocate, ATO shackle flip,radflo hydro bumps front and rear, Radflo 2.0 CO/ 14" rear, Arb rear air locker, ARB front bump/m8000, Road armor rear bump/m8000, FJ TransCase/ Twin sticks....other shit.
    Wedge a 5' steel bar between the top of the spindle (the little shoulder that sticks out) and the upper control arm. Put some weight on the end of the bar and it should pop free. Thread the nut slightly on to keep it from coming out and possibly straining other parts.
     
  17. Jul 18, 2014 at 6:49 PM
    #17
    Deere9798

    Deere9798 [OP] Well-Known Member

    Joined:
    Jul 6, 2014
    Member:
    #133408
    Messages:
    755
    Gender:
    Male
    First Name:
    Charles
    Western NY
    Vehicle:
    2001 Tacoma 4x4
    I talked to a local mechanic after failing to remove it with a large sledgehammer and he recommended I use a pickle fork...does this sound like a good idea?
     
  18. Jul 18, 2014 at 6:59 PM
    #18
    Bennett707

    Bennett707 Station707

    Joined:
    Apr 28, 2012
    Member:
    #77793
    Messages:
    33,231
    Oregon
    Vehicle:
    No more taco life for me
  19. Jul 18, 2014 at 7:18 PM
    #19
    Snowman

    Snowman I have a problem for your solution…

    Joined:
    Sep 8, 2010
    Member:
    #42917
    Messages:
    3,246
    First Name:
    Craig
    Somewhere in Canada
    Vehicle:
    Check out my build
    It will probably ruin the ball joint. Old one would have to be pressed out of the spindle and a new one pressed in.
    Grab one of those pullers everyone has posted pics of.
     
  20. Jul 18, 2014 at 7:33 PM
    #20
    Squeaky Penguin

    Squeaky Penguin Nothing Ventured, Nothing Gained

    Joined:
    Apr 5, 2012
    Member:
    #76340
    Messages:
    9,778
    Gender:
    Male
    First Name:
    Brett
    Steamboat Springs, Colorado
    Vehicle:
    '01 4WD, SR5, TRD & '13 TRDOR AC
    Lots of dust and custom dents, Check Build
    Pickle forks are great for removing ball joints. But agreed, will more than likely ruin the ball joint, well, at least the boot.
     

Products Discussed in

To Top