1. Welcome to Tacoma World!

    You are currently viewing as a guest! To get full-access, you need to register for a FREE account.

    As a registered member, you’ll be able to:
    • Participate in all Tacoma discussion topics
    • Communicate privately with other Tacoma owners from around the world
    • Post your own photos in our Members Gallery
    • Access all special features of the site

eetaco's build

Discussion in '2nd Gen. Builds (2005-2015)' started by EEtaco, Jul 5, 2011.

  1. Jul 5, 2011 at 8:23 PM
    #1
    EEtaco

    EEtaco [OP] Well-Known Member

    Joined:
    Feb 22, 2009
    Member:
    #13917
    Messages:
    242
    Gender:
    Male
    North Carolina
    Vehicle:
    09 V6 Prerunner
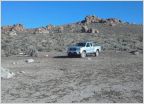
    I guess I'll finally put one of these together.

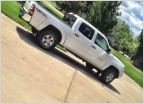
    Day 1 with a 2009 doublecab prerunner V6 base
    [​IMG]

    Current:
    5100's all around with frost @ 1.75 w/ TSB rear
    Hardwired GPS
    Ham radio
    Alpine CDA-105 w/ Hybrid Audio speakers
    SPod
    OBA: MasterFlow mounted in bed cubby
    BLHM
    Morimoto D2S retrofit
    OEM Fogs
    Switched DC power to toolbox
    40% front tint (came from dealer)
    Chopped front mudflaps
    EGR slim visors
    245/75/16 Michelin AT2


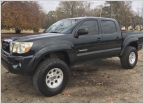
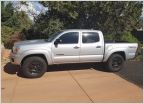
    How it sits today:
    [​IMG]

    But better clean!
    [​IMG]

    First mod was locating the free maglight holder position.
    It's secure, rattle-free and... free. :)
    [​IMG]

    Next I installed an Icom-2200h with a Larsen NMO 2/70. It's a great radio that's been working flawlessly with excellent range from the larsen.
    [​IMG] [​IMG]

    Sometime either before the radio or after came the GPS. The wire goes down the A piller into a female plug with wires going to the SPod.
    [​IMG]

    Audio:
    [​IMG]

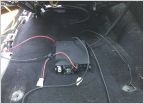
    To help with power distribution/switching/cable management I installed the SPod. The price may seem a little steep for such a simple thing, but the quality of their product is outstanding and they helped me through my hardheadedness and some unforeseen compatibility issues.

    The main unit is under the hood by the fuse box:
    [​IMG]

    Switches:
    [​IMG] [​IMG]

    BLHM and retrofit:
    [​IMG] [​IMG]
     
  2. Jul 30, 2011 at 7:37 AM
    #2
    EEtaco

    EEtaco [OP] Well-Known Member

    Joined:
    Feb 22, 2009
    Member:
    #13917
    Messages:
    242
    Gender:
    Male
    North Carolina
    Vehicle:
    09 V6 Prerunner
    Just installed an Alpine cda-105 and I must say it's worlds better than that stock pos! My only gripe is it can be difficult to read when the sun hits it. There are more pics in the audio sub-forum if interested.
    [​IMG]
     
  3. Dec 11, 2011 at 6:54 AM
    #3
    RadRed06

    RadRed06 Christ Follower

    Joined:
    Sep 20, 2011
    Member:
    #63845
    Messages:
    746
    Gender:
    Male
    First Name:
    Daniel
    Flowood, MS
    Vehicle:
    '12 Pyrite 4x4 OR
    Lifted on 33s
    where are you in MS?
     
  4. Aug 6, 2012 at 1:37 PM
    #4
    EEtaco

    EEtaco [OP] Well-Known Member

    Joined:
    Feb 22, 2009
    Member:
    #13917
    Messages:
    242
    Gender:
    Male
    North Carolina
    Vehicle:
    09 V6 Prerunner
    Starkville.

    I originally had no intention in doing the BLHM or retrofit, but installing emergency strobes took me down a frustrating path. I had no idea that there was such a large gap between the outer shell and reflector bowl and thus had to hack away at my headlight. Also the reflector bowl is made of some composite/fiber material and gave off some hellacious dust which demanded opening the headlight and cleaning it... the reflecting/chrome material is also fragile and chips extremely easily.

    [​IMG] [​IMG] [​IMG]

    I could never bring myself to open my headlights just to paint them, but since I had no choice I went ahead and did the BLHM and ordered the Morimoto D2S retrofit kit from TRS. The retrofit install was very easy, but after fitting the Apollo shrouds the hole I had cut for the strobe bulb put the strobe bulb too close to the shroud! (Minimum 1" clearance required around strobe bulb for heat)... FUCK FUCK FUCK! I stared at the problem and thought about it for a while and finally cut another hole for the strobe bulb and covered the other one with ducting tape. Overall everything is complete and a close inspection will reveal my fuck up, but what's done is done. I'm not happy with how it turned out, but I'll live with it until I can find a set of replacement reflector bowls to fix it. I considered bondo + painting the bowl black, but I fear that will cut down on the effectiveness of the strobe with the absence of reflection.

    Strobe is in the bottom left, old hole is right above it, and the whole triangle is taped for uniformity.
    [​IMG]

    BLHM came out great!
    [​IMG]

    Strobe wiring... Exposed wire lengths on right are for +12V, Pattern, and Low/Hi power toggle. Switch will be installed in center console.
    [​IMG]
     

Products Discussed in

To Top