1. Welcome to Tacoma World!

    You are currently viewing as a guest! To get full-access, you need to register for a FREE account.

    As a registered member, you’ll be able to:
    • Participate in all Tacoma discussion topics
    • Communicate privately with other Tacoma owners from around the world
    • Post your own photos in our Members Gallery
    • Access all special features of the site

Shauncho's "Who knows where this is going?" Build

Discussion in '2nd Gen. Builds (2005-2015)' started by Shauncho, Sep 30, 2012.

  1. Oct 5, 2013 at 5:07 PM
    #81
    BaLLZaCH

    BaLLZaCH Active Member

    Joined:
    Sep 8, 2012
    Member:
    #86515
    Messages:
    41
    Gender:
    Male
    Ohh yeah ,,,,

    IMG_0670.jpg
     
  2. Oct 5, 2013 at 8:41 PM
    #82
    Shauncho

    Shauncho [OP] Embrace your inner Bro-ness

    Joined:
    Sep 19, 2012
    Member:
    #87284
    Messages:
    4,510
    Gender:
    Male
    First Name:
    Shaun
    Parts Unknown...
    Vehicle:
    none
    Looks awesome man! Great job! :thumbsup:
     
  3. Oct 5, 2013 at 11:11 PM
    #83
    bfoxglove

    bfoxglove Active Member

    Joined:
    Feb 4, 2012
    Member:
    #72105
    Messages:
    44
    Gender:
    Male
    First Name:
    Ben
    Alaska
    Vehicle:
    '13 TRD Sport
    I'm excited to see what your truck will look like with new wheels and a lift. It looks great already! I just got a black '13 trd sport
     
  4. Oct 5, 2013 at 11:15 PM
    #84
    Shauncho

    Shauncho [OP] Embrace your inner Bro-ness

    Joined:
    Sep 19, 2012
    Member:
    #87284
    Messages:
    4,510
    Gender:
    Male
    First Name:
    Shaun
    Parts Unknown...
    Vehicle:
    none
    Right on, dude! Yeah, I can't wait to do the lift too. It's gonna look so good. I'm just gonna paint the stock wheels black for now but when it's time for new tires, I'm gonna get some new wheels too. Happy modding! :D
     
  5. Oct 5, 2013 at 11:21 PM
    #85
    Traction120

    Traction120 "Not all those who wander are lost"

    Joined:
    Jan 4, 2013
    Member:
    #94452
    Messages:
    1,656
    Gender:
    Male
    First Name:
    Nathan
    Reno, NV
    Vehicle:
    2013 DCSB BLK
    SEE BUILD.
    Sub'd, good looking truck!
     
  6. Oct 6, 2013 at 6:06 AM
    #86
    Shauncho

    Shauncho [OP] Embrace your inner Bro-ness

    Joined:
    Sep 19, 2012
    Member:
    #87284
    Messages:
    4,510
    Gender:
    Male
    First Name:
    Shaun
    Parts Unknown...
    Vehicle:
    none
    Thanks! :thumbsup: you too have yourself a mighty fine rig! I'm diggin your setup so far. How you liking the OME's?
     
  7. Oct 6, 2013 at 9:50 AM
    #87
    Traction120

    Traction120 "Not all those who wander are lost"

    Joined:
    Jan 4, 2013
    Member:
    #94452
    Messages:
    1,656
    Gender:
    Male
    First Name:
    Nathan
    Reno, NV
    Vehicle:
    2013 DCSB BLK
    SEE BUILD.
    It's a great lift!
     
  8. Oct 9, 2013 at 10:12 AM
    #88
    Shauncho

    Shauncho [OP] Embrace your inner Bro-ness

    Joined:
    Sep 19, 2012
    Member:
    #87284
    Messages:
    4,510
    Gender:
    Male
    First Name:
    Shaun
    Parts Unknown...
    Vehicle:
    none
    Not a major update but I got an Ultragauge hooked up and installed the Flyzeye Designs 3VP-RS center console light. Loving both! The Ultragauge seems pretty accurate so far however I'm still doing the calibration on it and haven't yet filled up my second full tank of gas since installing it so we'll see how it goes as time passes. There's still a group buy going on for the Ultragauge that you can get to from my signature.
     
  9. Oct 12, 2013 at 9:01 PM
    #89
    Shauncho

    Shauncho [OP] Embrace your inner Bro-ness

    Joined:
    Sep 19, 2012
    Member:
    #87284
    Messages:
    4,510
    Gender:
    Male
    First Name:
    Shaun
    Parts Unknown...
    Vehicle:
    none
    Sooooooo there's nothing I hate more than trying to clean in between the letters on the badges when I wash my truck...and I got kinda bored today so I debadged Marty. I think it looks pretty bitchin. But I'm gonna reapply some of the badges at some point but for now i'm going completely badgeless. There's more pics than this in my gallery.

    What I used to do this:
    • Fishing line (12lb test)
    • Goo Gone
    • Spray bottle with soapy water
    • Hair dryer
    • Meguiar's Ultimate compound
    • Foam application pad for compound
    • Microfiber cloth
    • Beer

    I started with the Tacoma badge.
    [​IMG]

    First I heated it up a little with the hair dryer then I took a length of fishing line and started to saw back and forth starting at one end of the emblem. The fishing line broke a few times so start with a long piece and you can use it a few times.
    [​IMG]

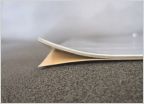
    I wasn't able to get it close enough to the paint so I had a lot of the adhesive tape to remove. Rolling it with your fingers works best. Also heat it up with the hair dryer to speed up the process.
    [​IMG]

    After all the tape is gone you'll need to remove the remaining adhesive left behind. I used the Goo Gone spray gel. Some people use the 3M adhesive remover. I sprayed the Goo Gone on the adhesive and let it sit for a minute. Then I began to rub it off. You'll need to use pressure...that's ok, that's what the Meguiar's is for later. Once I was finished I used the soapy water to clean up the area. I didn't want any goo gone sitting on the paint longer than it needed to be just in case it could have damaging effects.
    [​IMG]

    Cut to the rear TRD decals because I didn't take pics of this part for the Tacoma badge but the process was the same all the way around. So now it looks good but you'll see if you look at an angle in the right light you see an outline of the badge or decal. It almost looks like an impression in the paint but fortunately it's not. Also, if you're like me, you used a cloth that was less than delicate and there is a hazy area where you scrubbed the crap out of the adhesive to get it off. Just take some Meguiar's Ultimate Compound and apply it to the foam applicator pad. Then begin to massage that in to the badge area. Once you're done wipe it down with the microfiber cloth. You'll see the badge/decal outline even better once you first apply the compound. Just keep rubbing till you don't see it anymore. Now's a good time to take care of any other pesky light blemishes.
    [​IMG]
    [​IMG]
    [​IMG]

    That's about it. Here's some after pics. In this first pic, that's not dirt on the truck, that's the reflection of the dirt in my yard behind where I'm sitting.
    [​IMG]
    [​IMG]
    [​IMG]
     
    Last edited: Oct 14, 2013
  10. Oct 12, 2013 at 10:23 PM
    #90
    Traction120

    Traction120 "Not all those who wander are lost"

    Joined:
    Jan 4, 2013
    Member:
    #94452
    Messages:
    1,656
    Gender:
    Male
    First Name:
    Nathan
    Reno, NV
    Vehicle:
    2013 DCSB BLK
    SEE BUILD.
    Looking good
     
  11. Oct 13, 2013 at 10:27 PM
    #91
    Shauncho

    Shauncho [OP] Embrace your inner Bro-ness

    Joined:
    Sep 19, 2012
    Member:
    #87284
    Messages:
    4,510
    Gender:
    Male
    First Name:
    Shaun
    Parts Unknown...
    Vehicle:
    none
    Thanks! :thumbsup:
     
  12. Oct 15, 2013 at 5:51 AM
    #92
    Lray

    Lray Active Member

    Joined:
    Jul 23, 2013
    Member:
    #108877
    Messages:
    25
    Gender:
    Male
    deep south
    Vehicle:
    PreRunner SR5
    I need some help, this looks like the nearest to my situation. I have read many posts but can't decide where I need to start. I bought a 2011 dbl cab prerunner 3 mo ago. I want a lift, new wheels and tires but can't do it all at once. My rear tread is getting low. Do I get the wheels and tires now and do the lift later. Do I get the lift, put new tires on old crappy, ugly, stock rims and plastidip them for now. I want jesters without the red inserts, don't know about the tires just yet. Have you been through this and is there a better starting point for builds? I have limited funds so I have to be frugal with my purchases. what do you fellas think. where to start, where to finish.
     
  13. Oct 15, 2013 at 5:54 AM
    #93
    Lray

    Lray Active Member

    Joined:
    Jul 23, 2013
    Member:
    #108877
    Messages:
    25
    Gender:
    Male
    deep south
    Vehicle:
    PreRunner SR5
    also, are there hidden costs? X dollars for the lift but man hour costs for installation. With wheels and tires, spacers and such that will be needed. Tell me where you went wrong, or what you would have changed with your builds. thanks much
     
  14. Oct 15, 2013 at 6:18 AM
    #94
    Shauncho

    Shauncho [OP] Embrace your inner Bro-ness

    Joined:
    Sep 19, 2012
    Member:
    #87284
    Messages:
    4,510
    Gender:
    Male
    First Name:
    Shaun
    Parts Unknown...
    Vehicle:
    none
    I know the feeling man. What to do first. There's a couple questions that immediately come to mind.

    - how bald are the tires? Winter's coming so take that into consideration.
    - Do you want bigger tires than you have now? If so how much bigger? Some tire sizes will fit now, others will require the lift and a cab mount chop to fit.
    - Will you be getting larger diameter wheels than your stock wheels? If so this will determine whether the tires you buy now will fit on the wheels you get later.
    - Cab mount chop...will you need it? If you're going 33's or bigger, you'll need it.

    In my mind, safety always comes first. Me personally, I would do the wheels and tires first just for that reason. Also you'll look at your truck and be like "badass"....if you did the lift first then yeah the lift looks pretty cool but then you have to look at those ugly wheels and tires. You may not be able to go as big as you might want with the tires, but first get something that works, then after you do the lift and whenever you end up needing new tires you get the size you want. I just re-read your question again and saw that last option of lift and tires now and paint wheels. That's really what I would do. You get the lift, you get the tires then later when you can afford the wheels just swap them out and you're good to go! However that only works if you're not planning on going with a bigger diameter wheel later on.

    As for hidden costs, I honestly have no idea. I haven't done my lift yet (but plan on installing it myself when I do) so don't know about costs. You gotta figure a lot of shops charge anywhere from
    $75-$95 per hour for labor. Some places may just give you a set rate for the install. But really I have no clue.
     
  15. Oct 15, 2013 at 6:42 AM
    #95
    Jake1025

    Jake1025 Active Member

    Joined:
    Feb 19, 2013
    Member:
    #97921
    Messages:
    40
    Gender:
    Male
    First Name:
    Jake
    Tampa
    Vehicle:
    12 TRD PreRunner
    Headlights look good. I need to get around to spraying mine.
     
  16. Oct 15, 2013 at 2:17 PM
    #96
    Lray

    Lray Active Member

    Joined:
    Jul 23, 2013
    Member:
    #108877
    Messages:
    25
    Gender:
    Male
    deep south
    Vehicle:
    PreRunner SR5
    thanks for the input, I have several months of drive time on the tires, but if I buy new tires for the old rims I will stick with them till new tires are needed again. Having read your reply, I think I should start with wheels and tires. I put 90mi a day on my taco but still want a bigger look for the tires. I like the ballistic jesters for wheels, would rather have more tire than rim so I think 17's. Any suggestions for tires that are daily drivers but have a meaty look? My apologies also, I am not trying to hyjack this thread. MY sons like the rockstars, but I'm seeing them all over the place.
     
  17. Oct 15, 2013 at 3:35 PM
    #97
    Shauncho

    Shauncho [OP] Embrace your inner Bro-ness

    Joined:
    Sep 19, 2012
    Member:
    #87284
    Messages:
    4,510
    Gender:
    Male
    First Name:
    Shaun
    Parts Unknown...
    Vehicle:
    none
    no worries, I'm happy to provide as much assistance as my limited knowledge allows.

    As for tire suggestions, I have the DuraTracs which I love the look of but I wouldn't necessarily recommend them for someone driving 90mi a day (my commute is only 35mi a day). A lot of people like the BFGoodrich All Terrain T/A which I hear perform awesome off-road and are quiet and minimize MPG loss on-road (for an all terrain tire). Goodyear also make a tire similar to the Duratracs but for much less cost which they sell exclusively at Walmart. They're called the Goodyear Wrangler Authority.

    Here's a pretty thorough review of them:
    http://www.tacomaworld.com/forum/wheels-tires/233752-goodyear-wrangler-authority-rangers-review.html

    As for the wheels, I also love the look of the Rockstars but they are definitely very popular and lot of people are rocking those. I say go with what you really like. Ultimately, it's your rig and you should make it look however you want, regardless of what everyone else is doing. There are only a finite number of selections and designs and you're bound to pick something someone else already has...so just pick what you like. That's the way I look at it.
     
  18. Oct 15, 2013 at 7:59 PM
    #98
    Traction120

    Traction120 "Not all those who wander are lost"

    Joined:
    Jan 4, 2013
    Member:
    #94452
    Messages:
    1,656
    Gender:
    Male
    First Name:
    Nathan
    Reno, NV
    Vehicle:
    2013 DCSB BLK
    SEE BUILD.
    Ok,
    If you guys don't mind my .02

    Go to big o, les Schwab, discount, American, pretty much any tire place and buy some cheap 1/3-1/2 tread used tires. See if you can track down a slightly larger tire than you are currently running. This should remedy your bald tire problem for now.

    Then buy your lift. I can promise you, the lift bug will hit you almost immediately after installing brand new rims and tires, and there's nothing like blowing $1200 on new rubber only to find out you need/want a larger size. Ask me how I know.
     
  19. Oct 15, 2013 at 8:12 PM
    #99
    whonoez

    whonoez Well-Known Member

    Joined:
    Jan 13, 2012
    Member:
    #70609
    Messages:
    185
    Gender:
    Male
    First Name:
    Jay
    Bay Area
    Vehicle:
    2013 Tacoma TRD Sport DCSB
    3"lift, Monster XD w/ 285/65/18 Nitto Trail Grapplers, Blacked out emblems, tinted front windows, BHLM
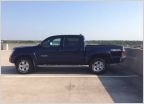
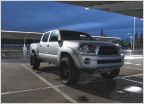
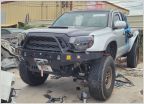
    I've had my lift with new wheels and tires for three weeks now and I still can't believe it's my truck. I love it and i loved thee the way it turned out. I went with the Toytec lift kit, LR UCA's, sway bar relocate, 18" XD Monsters with Nitto Trail Grapplers 285/65/18. Great tire so far on road and minor off road. Again, ever time in see my truck I shock myself. The way I pictured it to be wasn't the way I pictured it to be BUT it came out even BETTER,anusyvup_2e12634d7ff5501b5434d7fca1446432efd6827d.jpgudyneve4_81139716a01b2cf4543ce0741c8023a181b2a4dd.jpgadu3y4et_db22128c0144f409a0b4ec91113e7c4430bf5148.jpg

    And a before and after pic
    yhygaqer_ee2432d6c40e012486aee6b40d60617d3d344c4f.jpg
     
  20. Oct 16, 2013 at 6:44 AM
    #100
    Lray

    Lray Active Member

    Joined:
    Jul 23, 2013
    Member:
    #108877
    Messages:
    25
    Gender:
    Male
    deep south
    Vehicle:
    PreRunner SR5
    again, thanks very much.
     

Products Discussed in

To Top