1. Welcome to Tacoma World!

    You are currently viewing as a guest! To get full-access, you need to register for a FREE account.

    As a registered member, you’ll be able to:
    • Participate in all Tacoma discussion topics
    • Communicate privately with other Tacoma owners from around the world
    • Post your own photos in our Members Gallery
    • Access all special features of the site

de6w6it's documentary

Discussion in '2nd Gen. Builds (2005-2015)' started by de6w6it, May 21, 2013.

  1. May 21, 2013 at 5:50 PM
    #1
    de6w6it

    de6w6it [OP] Well-Known Member

    Joined:
    Apr 12, 2013
    Member:
    #101947
    Messages:
    63
    Gender:
    Male
    First Name:
    DeWitt
    NJ
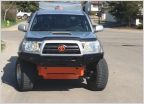
    got my first taco six weeks ago, and I am going to use this thread as a documentary of my truck's progress/upgrades/mods/maintenance.
    at the dealership:
    [​IMG]
    removed badges and painted front emblem:
    [​IMG]
    3 days later, I found a broken leaf spring:
    [​IMG]
    after receiving a set of tsb leafs from a member on here, I installed them.
    [​IMG]
    [​IMG]
    When I bought the truck, it had a pretty dented tailgate, so I found a new one and put that on. It actually had an oem backup camera in the handle, which I had no use for, so I sold it on ebay (which helped pay for the tailgate :D):
    [​IMG]

    I had been driving my 350k miles SAS '88 4runner for the past 5 years or so (the build thread is in my signature), and finally had the funds to upgrade to a better daily driver.
     
    This site contains affiliate links for which the site may be compensated.
    #1
  2. May 21, 2013 at 5:59 PM
    #2
    de6w6it

    de6w6it [OP] Well-Known Member

    Joined:
    Apr 12, 2013
    Member:
    #101947
    Messages:
    63
    Gender:
    Male
    First Name:
    DeWitt
    NJ
    I painted my wheels black. I primed them, sprayed them with gloss black enamel, and then sprayed them with clear gloss. The center caps I sprayed with plasti-dip:
    [​IMG]
    I added 6 tie-downs in the bed under the bed mounting bolts. I ground down one side of the washer, but that was all I had to do. The tie-downs I got already had a 1/2" hole in them. The part the bolt goes though is double layer. I used these:
    http://www.armysurpluswarehouse.com/hardware/tie-downs/military-issue-vehicle-cargo-tie-down.html
    [​IMG]
    I picked up a cargo net from ebay to keep small light things from sliding around:
    [​IMG]
    To keep the net from flying around when empty and on the highway, I made two loops out of paracord to tie the bottom two corners of the net to the front two tie-downs:
    [​IMG]
     
    This site contains affiliate links for which the site may be compensated.
    #2
  3. May 22, 2013 at 8:09 AM
    #3
    de6w6it

    de6w6it [OP] Well-Known Member

    Joined:
    Apr 12, 2013
    Member:
    #101947
    Messages:
    63
    Gender:
    Male
    First Name:
    DeWitt
    NJ
    I found a guy on ebay making Delrin shift knobs. Super cool stuff, and he shipped it the same day I did a buy it now.
    [​IMG]
    And I got a shorty antena:
    [​IMG]
    Also picked up some OEM all weather floor mats (made in USA!)
    [​IMG]
    I also swapped in some PEP boys special LED dome light and map light bulbs
    [​IMG]
     
    This site contains affiliate links for which the site may be compensated.
    #3
  4. May 22, 2013 at 8:13 AM
    #4
    de6w6it

    de6w6it [OP] Well-Known Member

    Joined:
    Apr 12, 2013
    Member:
    #101947
    Messages:
    63
    Gender:
    Male
    First Name:
    DeWitt
    NJ
    I decided I wanted to put some courtesy LED's in the cab. I went with the Radio Shack Amber assemblies, as recomended by many users on here.
    One in front cup holder
    [​IMG]
    [​IMG]
    One in switch blank under climate controls
    [​IMG]
    [​IMG]
     
  5. May 22, 2013 at 8:18 AM
    #5
    de6w6it

    de6w6it [OP] Well-Known Member

    Joined:
    Apr 12, 2013
    Member:
    #101947
    Messages:
    63
    Gender:
    Male
    First Name:
    DeWitt
    NJ
    One in console, with a switch mounted so it shuts off when console is closed
    [​IMG]
    [​IMG]
    [​IMG]
    One on the back of the console towards the bottom
    [​IMG]
    [​IMG]
    And one in the cupholder in the rear of the console
    [​IMG]
    [​IMG]
     
  6. May 22, 2013 at 8:21 AM
    #6
    de6w6it

    de6w6it [OP] Well-Known Member

    Joined:
    Apr 12, 2013
    Member:
    #101947
    Messages:
    63
    Gender:
    Male
    First Name:
    DeWitt
    NJ
    So here is how it sits now
    [​IMG]
    I got it with 48 k on the clock, and at 50 k I did:
    Oil Change
    Oil Filter
    Cabin Filter
    Greased U Joints
    Serpentine Belt
     
  7. May 22, 2013 at 3:53 PM
    #7
    Greytacoma1

    Greytacoma1 Senior Member

    Joined:
    Feb 28, 2012
    Member:
    #73797
    Messages:
    500
    Gender:
    Male
    First Name:
    dave
    Sacramento ca
    Vehicle:
    Tacoma dc lb
    Satoshi grill, Plasti derp, Ready lift kit, Wheelers 2 inch aal, Hella 700, Wheather tech floor mats, Blueinstinct armrest cover, sockmonkey bed decal, BHLM, debadge, 35% tint front windows, OEM roof rack, OEM step bar, TRD skid plate, tacomaworld.com decal, stock antenna trimed, gorilla extended lug nuts,diff breather mod, cab mount chop, AVS window visor, spidertrax 1.25 wheel spacers, toytec sway bar relocate, extra d ring mod
    So far so good. Keep it up
     
  8. Jun 14, 2013 at 6:50 AM
    #8
    de6w6it

    de6w6it [OP] Well-Known Member

    Joined:
    Apr 12, 2013
    Member:
    #101947
    Messages:
    63
    Gender:
    Male
    First Name:
    DeWitt
    NJ
    I ordered a dry, washable filter from AEM to replace the oiled one on my K & N CAI. I want to avoid any oil/sensor issues. Plus I like the fact I can just wash it out.
    This is the K & N CAI that was on my truck when I got it:
    http://www.knfilters.com/search/product.aspx?prod=63-9026
    This is the filter I ordered:
    http://www.aemintakes.com/search/product.aspx?prod=21-209DBF
    I got that one over the AFE because it was cheaper and they had free shipping. Here is one from AFE just FYI:
    http://afepower.com/shop/custom/filter.php
    Part #: 21-60507
    You may have to enter specs, but basically filter should have:
    flange: 6"
    height: 7"
    flange length: 1"
    top diameter: 5.5"
    bottom diameter: 7.5"

    Once I receive my filter, I will post an installed pic.
     
  9. Nov 20, 2013 at 5:34 PM
    #9
    de6w6it

    de6w6it [OP] Well-Known Member

    Joined:
    Apr 12, 2013
    Member:
    #101947
    Messages:
    63
    Gender:
    Male
    First Name:
    DeWitt
    NJ
    Apparently I never posted a pic of my installed filter. It fit perfect and has been no issue.

    On another note, I believe I have finally figured out the noise I was getting from the front end I probably mis-described here:
    http://www.tacomaworld.com/forum/2nd-gen-tacomas/282860-blow-across-top-bottle-jug-noise-highway-speed.html

    I am fairly certain it is one or both of my front wheel bearings. I ordered from Rock Auto, which is a great online store with great prices, and you can select which manufacturer/pn you want.
    Going on a hunch from previous experiences with buying Timken bearings for my 88 'runner, I purchased Timken bearings for this job, and found Koyo bearings from Japan in the Timken box. :D

    [​IMG]

    [​IMG]

    I got the outer seal and inner seal, though I will not separate the knuckle to get at the inner seal unless it looks really bad, which I am not anticipating. I plan on re-using the O-ring, as this is dealer or random industrial application territory. The rust level is almost non-existent and I have a press in my garage, so I am anticipating a smooth install.
     
  10. Nov 24, 2013 at 12:31 PM
    #10
    de6w6it

    de6w6it [OP] Well-Known Member

    Joined:
    Apr 12, 2013
    Member:
    #101947
    Messages:
    63
    Gender:
    Male
    First Name:
    DeWitt
    NJ
    Well, this cured my noise. When I pressed the bearing out of the passenger side, it looked fine, which was kind of surprising because when I turned right, the noise went away. When I pressed apart the driver side, the outer bearing's (plastic!) cage was completely destroyed, allowing the rollers to come into contact with each other and allowing them to migrate and leave a circumference of the bearing un-supported. I didn't replace the inner seal, as it looked fine and I didn't want to separate the knuckle if I didn't have to.
    I was not able to budge them with my 20 ton bottle jack press, I had to use my father's air over hydraulic 25 ton press. The passenger side's outer bearing's inner race that was pressed onto the spindle did not come off with everything else as it did on the driver's side, so it had to be cut off.
     
  11. Nov 24, 2013 at 1:27 PM
    #11
    Fiolo

    Fiolo Senior member

    Joined:
    Sep 10, 2011
    Member:
    #63227
    Messages:
    4,381
    Gender:
    Male
    Vehicle:
    1998 Tacoma, 2022 Tacoma, 2019 L5P Duramax
    Lost track many mods ago
    Looking good! Keep up the good work
     
  12. Jun 4, 2015 at 6:53 AM
    #12
    de6w6it

    de6w6it [OP] Well-Known Member

    Joined:
    Apr 12, 2013
    Member:
    #101947
    Messages:
    63
    Gender:
    Male
    First Name:
    DeWitt
    NJ
    So hey there!
    It has been a while since I had to do anything to the truck, which is kind of nice for a change!

    So, I splurged and purchased:

    LCE Header:
    http://www.lceperformance.com/Street-Header-Kit-2005-2014-2TR-2-7-Liter-Tacoma-p/1041055.htm
    New exhaust spring mounting bolts:
    http://www.partsgeek.com/gbproducts/WC/18056-01163907.html

    [​IMG]

    [​IMG]

    [​IMG]


    Alpine head unit:
    http://www.crutchfield.com/p_500UTE52BT/Alpine-UTE-52BT.html?tp=5684
    Head unit adapter harness:
    http://www.crutchfield.com/p_120701761/Metra-70-1761-Receiver-Wiring-Harness.html?tp=2977
    Head unit install kit:
    http://www.crutchfield.com/p_120998214B/Metra-99-8214TB-Dash-Kit-Black.html?tp=3121

    [​IMG]


    Core Hurst shifter kit:
    http://www.ebay.com/itm/Core-Hurst-...uck-/281708345442?hash=item4197203862&vxp=mtr
    Shifter bracket:
    http://www.steeda.com/steeda-mustang-shifter-handle-offset-bracket-555-7070/

    I rounded off the corners on the bracket, as I didn't want it tearing up the rubber boot directly on the shifter base. Using this bracket, I was able to re-install all factory rubber, boots, insulation, etc, with zero cutting, etc. It places the shifter slightly rearward than it would sit without the bracket, which is comfortable for me in my driving position, and results in not clearance issues.

    [​IMG]

    [​IMG]

    [​IMG]


    Also, here is a shot of my K&N intake tube with AFE washable non-oiled filter:
    [​IMG]
     
    This site contains affiliate links for which the site may be compensated.
    #12
  13. Jul 11, 2017 at 10:00 AM
    #13
    de6w6it

    de6w6it [OP] Well-Known Member

    Joined:
    Apr 12, 2013
    Member:
    #101947
    Messages:
    63
    Gender:
    Male
    First Name:
    DeWitt
    NJ

Products Discussed in

To Top