

-
Welcome to Tacoma World!
You are currently viewing as a guest! To get full-access, you need to register for a FREE account.
As a registered member, you’ll be able to:- Participate in all Tacoma discussion topics
- Communicate privately with other Tacoma owners from around the world
- Post your own photos in our Members Gallery
- Access all special features of the site
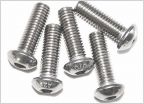 Needing to know the type screws used for side bed accy rail for 2010 tacoma
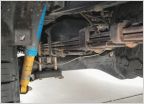 3 Leaf Progressive AAL or New Leaf Pack
 Fuel Injector Cleaner
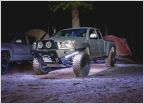 LED Light Bars... Show em off!
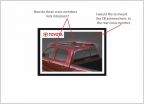 Advise/Comments on Roof Rack Functionality
front differential side bearing replacement.. done!
Discussion in '2nd Gen. Tacomas (2005-2015)' started by Metallikatz3, Dec 27, 2010.
Page 12 of 13
Page 12 of 13


