1. Welcome to Tacoma World!

    You are currently viewing as a guest! To get full-access, you need to register for a FREE account.

    As a registered member, you’ll be able to:
    • Participate in all Tacoma discussion topics
    • Communicate privately with other Tacoma owners from around the world
    • Post your own photos in our Members Gallery
    • Access all special features of the site

My CB Installation (in detail)

Discussion in '2nd Gen. Tacomas (2005-2015)' started by NetMonkey, Jan 15, 2011.

  1. Jan 15, 2011 at 8:39 PM
    #1
    NetMonkey

    NetMonkey [OP] Well-Known Member

    Joined:
    Aug 14, 2008
    Member:
    #8536
    Messages:
    1,734
    Gender:
    Male
    Geogetown, TX
    Vehicle:
    2010, 4x4, DC, off-road, shortbed, automatic
    Toytec Ultimate Lift @ 3", Mickey Thompson MTZ's 285/75/16, Moto Metal 955b, rear 2" ALL, Marlin Crawler sliders
    so my awesome wife got me an entire CB setup for my birthday (i gave her a list of what i wanted :) ). so i did a ton of thread searching on this website trying to figure out how to do the installation. everything from getting power to the CB, getting wires through the firewall, taking apart the center console, routing the antenna from inside the cab to the bed, removing the little bed pockets, mounting the antenna, antenna grounding issues with the non metallic bed, and more. i had to view quite a few threads to find all the information i needed.

    so, since there was not a single thread with all the information for installing a CB, i am making this detailed post for the next guy who wants to install a CB.

    so, here is my setup: (everything was purchased from right channel radios http://www.rightchannelradios.com/).
    uniden 520xl CB.
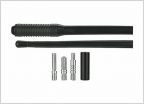
    firestik 4 foot non ground plane (NGP) antenna 3-way mount kit.
    antenna fold over adapter.
    pa speaker.
    SWR meter.

    i chose the NGP because i have read about grounding issues with the tacoma bed. it was just easier to not have to worry about it. also, the mount end of the antenna coax is flat and i thought it would make it easier to route it the way i wanted.
    [​IMG]

    even after seeing how others have mounted their CBs, i was still unsure as to where i wanted to mount it. i did know that i wanted it to be in view so i can easily see the display and adjust the controls. many people mount their CBs inside the armrest. i think that is a great location because its out of the way and fits perfectly. however, i really wanted a location where i could see it. my first choice is inside the pocket in front of the cup holders, but i didnt know how much space was behind it. my second choice was along the left side of the center console.
    [​IMG]

    i placed the cb in the pocket and messured how far i would have to recess it. it looked like i would need to recess it by about 4 inches.
    [​IMG]

    as a backup, i was seeing how it fits along side the center console.
    [​IMG]

    well... only one way to find out... time to take the center console apart.
    the first step is to remove the cup holders. you can easily pry it up with your fingers. (at the arrows).
    [​IMG]

    once the cupper holders are out of the way, you can reach around inside and push up on the trim for the gated shifter. once it pops out of the 2 front clips, you can slide your fingers around the trim and pop it out of the other clips (its pretty easy).
    [​IMG]

    the trim can be pulled over the shifter.
    [​IMG]

    next, open the armrest and pull out the little carpet piece. i just pinched the carpet fibers with my fingers and pulled it out. this will expose the 2 bolts that need to be removed. this is also where i discovered that i didnt own a socket set, doh! :facepalm:so i made a quick trip to home depot :) (btw, these are 10mm bolt heads.)
    [​IMG]

    next, remove the 4 screws holding the front and back center console pieces together. also make note of the tabs (marked by the square).
    [​IMG]

    once the 4 screws and 2 bolts are removed, you can remove the armrest. slightly lift up on the back of the armrest and pull it back towards the rear of the truck. make sure that you gently release the 2 tabs (in the previous picture). you may have to try differrent angles on the armrest as you pull back.
    [​IMG]

    this little pocket has to be removed. just pull it towards you. it comes out easy.
    [​IMG]

    the front part of the center console has 5 tabs. just pull it towards the rear of the truck. it comes out easy. with the whole console removed, we can see whats behind it and determine if there is room for a CB. unfortnately, the airbag system is sitting there along with a huge plastic panel. this panel has alot of bracing behind it. it would be alot of work to carve out space for the CB here. also, its way too close to the airbag system. oh well, on to my second choice.
    [​IMG]

    with the front piece of the center console back in place, i started placing the CB in various locations on left side to find a mounting location.
    [​IMG]

    i found a spot that was most out of the way for me and marked mounting holes with a sharpie.
    [​IMG]

    drilled out to accomodate #10 screws.
    [​IMG]

    CB bracket mounted. i angled it back so that i can view the display flat on.
    [​IMG]

    console piece re-installed with CB mounted on it. it sits next to my knee so there is plenty of space so i dont bump into it.
    [​IMG]

    [​IMG]

    re-assembled the entire console. its at a perfect spot for me. i can easily reach all the controls on the CB and i can easily see the display.
    [​IMG]

    you can then wire the CB up through the dash or from under the seat. if you pull the seat all the way back, you can see an opening used for other wires. this is where i chose to run all the wires.
    [​IMG]

    to gain access to the area under the carpet, the door sill has to come off. this was a HUGE pain in the ass. it is held on there very tightly with a bunch of clips. i started by pulling up on the rear most part of it. once the rear clips released, i could get my fingers under the rest of it. but i had to pull VERY HARD. i was afraid that the sill piece would break or that i would break clips. fortunately, they released without breaking.
    [​IMG]

    the clips on the left in this picture are the ones that are hard to pull off. there are a total of 6 of these.
    [​IMG]

    there is also this little clip thats holding the carpet down. you can easily pry it up with a screw driver.
    [​IMG]

    a wire coat hanger is your friend. i couldnt have done all this work without one. so i pushed the hanger under the carpet from the door sill to this opening in the carpet. i then taped the power wires from the CB to hanger and pulled them both back through under the carpet.
    [​IMG]

    [​IMG]

    i was initially going to power the CB with a fuse tap on the fuse box, but i got the wrong size tap (you need the SMALL taps and fuses :rolleyes:). so i decided to wire it to the battery. to get wires through the firewall, i pushed the hanger through the gromet that the hood release cable parallels.
    [​IMG]

    the hanger came out here above the E-brake pedal.
    [​IMG]

    i pulled the hanger farther out and taped wires to it.
    [​IMG]

    pull the hanger out and the wire will follow.
    [​IMG]

    with the power wires through the firewall, i prepped them for attaching to the battery.
    [​IMG]

    the wire also needed to be routed behind the kick panel and along the door sill. for me, removing the kick panel was impossible. it was on there so tight. i pulled from the bottom of it near the weather stripping and was able to separate these 2 clips. it was enough to tuck the wires in behind it.
    [​IMG]

    popping up these brackets makes it easy to route the wires along the sill. they easily pry up with a screw driver.
    [​IMG]

    connected the power wire from the CB to the wire routed to the battery.
    [​IMG]

    tucked the wires into the sill. i purposely left extra length on the power wire.
    [​IMG]

    next, i tackled the PA speaker. i started by adding ends to the PA wires.
    [​IMG]

    this spot in the engine compartment had the most space for the PA speaker. but i would need to fabricate some sort of mount.
    [​IMG]

    the wire that came with the PA speaker was not long enough to reach from the CB to the location that i wanted to mount it. so i had to add extra length. again, i pulled the wire under the carpet, along the door sill and through the firewall.
    [​IMG]

    i inserted the wire into some flex tubing and routed it behind the engine.
    [​IMG]

    i zip tired the flex tubing to an existing wire harness.
    [​IMG]

    here is the mounting "bracket" that i came up with. i took 2 pieces of metal (found at home depot in the hardware section) and bolted them together and to another bracket on the fender well. its rough looking, but it works.
    [​IMG]

    bracket attached to the PA speaker.
    [​IMG]

    [​IMG]

    PA speaker mounted to the fender well.
    [​IMG]

    [​IMG]

    i also covered the power wires with some flex tubing and placed the wires near their mount points.
    [​IMG]

    next, i had to get the antenna coax from the CB to the bed of the truck. on an NGP coax, you have to be very careful of the wire. any damage to it or reduction in length can lead to performance issues.
    [​IMG]

    i wrapped it with tape to protect it while i was routing it through the truck.
    [​IMG]

    to get the coax from inside to outside the truck, i went though this grommet in the floor of the truck (which is just under the drivers seat).
    [​IMG]

    it comes up under the carpet next to the door sill.
    [​IMG]

    collection of wires that goes down through the grommet.
    [​IMG]

    i used the hanger to poke a hole in the grommet from underneath the truck.
    [​IMG]

    i pulled the hanger up through the grommet and out from under the carpet.
    [​IMG]

    i taped the coax to the hanger and pulled it back through the grommet.
    [​IMG]

    once pulled all the way through, i zip tied the coax to the collection of wires coming from the grommet.
    [​IMG]

    i zip tied the coax to the wire collection all the way along inside of the frame and to the back of the truck.
    [​IMG]

    i wanted to utilize the bed pocket to bring the coax up through. the bed pocket is easy to remove. pull the bottom part of the pocket out towards the center of the truck. you will need to pull hard to break the seal from the tape.
    [​IMG]

    then pull from the top of the bed pocket. again, pull hard enough to break the tape bond.
    [​IMG]

    the whole bed pocket can then be rotated out.
    [​IMG]

    i then fed the hanger down the inside of the bed side and hooked it so it wouldnt fall down.
    [​IMG]

    from under the truck, this is where the hanger comes out.
    [​IMG]

    i routed the coax up to near where the hanger was hanging down and taped the coax to the hanger.
    [​IMG]

    back inside the bed; pull the hanger and coax up the bed side.
    [​IMG]

    i drilled a small hole in the side of the bed pocket and pulled the coax through it.
    [​IMG]

    prepped the end of the coax for mounting.
    [​IMG]

    rockey mounts sells replacement brackets for their bed rail bike mounts. so i picked up a set to use to hold the antenna mount to the bed rail.
    [​IMG]

    brackets attached to the antenna mount.
    [​IMG]

    antenna mount inserted into the bed rail.
    [​IMG]

    attached the coax to the stud mount and then to the fold over adapter.
    [​IMG]

    there was some excess on the coax, so i tucked it behind the bed pocket. also reinstered the bed pocket and attached the antenna. i like the way the NGP coax mounts to the stud. it allows for a clean routing of the coax. however, the coax wont stay tucked up underneath the bed rail so i will need to come up with a way to do that.
    [​IMG]

    the folder over adapter is really cool. the antenna will nicely fold down into the bed when needed.
    [​IMG]

    [​IMG]

    now that everything is installed, i can hook up the power. positive to the battery and negative to the bolt grounded to the body.
    [​IMG]

    quick check to make sure the radio has power.
    [​IMG]

    finally, i reassembled everything and pulled the seat up to my driving position. the wires to the CB are totally out of the way, but i still may wrap them in some flex tubing.
    [​IMG]

    i was going to install a mic holder, but since i never use this cupholder and mic fits there perfectly, this will suffice :)
    [​IMG]

    as recommended, the antenna is at least 2/3rds above the cab.
    [​IMG]

    as a last step, you have to tune the antenna.
    i used the instructions from right channel radios (also, all the equipment was purchased from RCR).
    http://www.rightchannelradios.com/pages/cb-antenna-tuning-guide-pv-c0-61.html

    i was able to get the SWR for channel 1 and channel 40 both at 1.7. on channel 20, the SWR is at 1.4. i was hoping that the SWR could be lower, but its still in the acceptable range. according on the instructions on the SWR meter, the power loss with an SWR of 1.7 is 6% so its not that bad. here is the chart the instructions had:

    SWR / power loss
    1.0 / 0%
    1.3 / 2%
    1.5 / 3%
    1.7 / 6%
    2.0 / 11%
    3.0 / 25%
    4.0 / 38%
    5.0 / 48%
    10.0 / 70%

    i am curious to see how the CB performs. i tried to listen for conversations, but no one in range was talking. i want to make sure it all works, but i dont know anyone else with a cb :)

    also, the PA speaker sounds softer than i thought it would. i turned the volume up to max and spoke in a moderate volume. i guess if you talk loudly into the mic, the PA speaker will be louder. i also read that the mic that comes with the CB is kinda cheap and buying a better mic would increase performance.

    anyway, i hope this will help anyone who is ready to install their CB.

    enjoy :)


    UPDATES:

    added flex tubing around the wires from the CB to under the seat.
    [​IMG]

    on the recommendation of others on this site, i added an inline fuse to the CB power wire at the battery. i chose this style because it will be easy to check/replace the fuse should i ever need to. the fuse at the battery is important in case the power wire ever gets overloaded from the battery to the fuse at the CB inside the cab. having the wire burn up near the firewall would be bad :)
    [​IMG]

    i was getting a fair amount of electrical noise in the CB speaker. even though the CB itself has an electrical noise filter built in (which helped alot), noise was still getting through (alternator whine, engine noise, some buzzing, window motor, the brake pedal caused a noise surge, etc...). so i found a post online about installing car stereos and about electrical grounding in automobiles. it said that the noise can come from multiple grounding loops and from the power wires being too close to other wires in the vehicle (i couldnt do anything about the power wire location, however). it also talked about how devices in the vehicle use the body to get a ground path back to the battery. i then thought about how i had the CB grounded. i figured that grounding to the wire that comes off the battery to the body was sufficient, but it makes sence that i could pick up electrical signals from other devices in the truck. so i moved the ground wire directly to the battery and about 90% of the electrical noise is gone!! so if you are getting any electrical noise in your CB, move your ground directly to the battery. another solution is to use a CB Noise filter. right channel radios sells one.
    [​IMG]

    i was thinking about how to secure the coax from the antenna to the bed pocket. i examined the bed rail more closely and found that it has 2 small slots hear the end of it..... perfect for a zip tie :)
    [​IMG]

    now its up and out of the way.
    [​IMG]
     
    deanosaurus, bigmw, Jack790 and 8 others like this.
  2. Jan 15, 2011 at 8:42 PM
    #2
    Max-4_Yota

    Max-4_Yota The Welfare Cadilac

    Joined:
    Dec 10, 2009
    Member:
    #27357
    Messages:
    4,235
    Gender:
    Male
    First Name:
    Michael
    South Carolina
    Vehicle:
    3rd gen Tacoma
    Chicken lights, chrome and smoke tunes.
    Great write up!
     
  3. Jan 15, 2011 at 8:43 PM
    #3
    Incognito

    Incognito No better friend, no worse enemy

    Joined:
    May 25, 2009
    Member:
    #17626
    Messages:
    13,752
    Gender:
    Male
    VA
    Vehicle:
    2012 Pyrite AC TRD OR
    Spacer lift, bumper stickers, ejector seat, etc.
    Awesome write up, very detailed and will help me out tremendously when I install mine. Thanks NetMonkey! :)
     
  4. Jan 15, 2011 at 8:47 PM
    #4
    bjmoose

    bjmoose Bullwinkle J. Moose

    Joined:
    Aug 31, 2010
    Member:
    #42529
    Messages:
    6,009
    Gender:
    Male
    First Name:
    Steve
    San Jose CA
    Vehicle:
    '11 Std Cab 4x4 5sp
    OME suspension, ARB Air Lockers, CBI/Relentless/Pelfrey armor, HAM radio
    Nice! Rep to you for the thorough writeup.
     
  5. Jan 15, 2011 at 8:47 PM
    #5
    BAMFTACO

    BAMFTACO Another day another beer

    Joined:
    Feb 3, 2010
    Member:
    #30639
    Messages:
    10,907
    Gender:
    Male
    First Name:
    Juan
    Woodlandland hills , CA
    Vehicle:
    2007 Tacoma AC Prerunner
    Kings bruh
    Pretty cool and is it just me I can't see the other pics
     
  6. Jan 15, 2011 at 8:48 PM
    #6
    Johns Taco

    Johns Taco I'm not 4x4, and have an open diff. So i'm 4x1

    Joined:
    Dec 6, 2010
    Member:
    #47253
    Messages:
    2,074
    Gender:
    Male
    First Name:
    John
    Albuquerque, NM
    Vehicle:
    05 DSM Base SR5 Slug Taco
    Full custom stereo, onboard air compressor, train horns, spacer lift, 30" tires, optima yellow top, rear slider window & tailgate anti-theft mod, pop & lock, class 3 tow hitch, lights in bed, Ultra Gauge, Weather Tech mats, yellow fog lights, camper top, air lift rear airbags, rear diff breather mod, soon to be more...
    Great write up and pics! :thumbsup: I want to do the same with my truck, your great pics will help a lot. Let us know how it all works out. Good job. :proposetoast:
     
  7. Jan 15, 2011 at 8:49 PM
    #7
    bjmoose

    bjmoose Bullwinkle J. Moose

    Joined:
    Aug 31, 2010
    Member:
    #42529
    Messages:
    6,009
    Gender:
    Male
    First Name:
    Steve
    San Jose CA
    Vehicle:
    '11 Std Cab 4x4 5sp
    OME suspension, ARB Air Lockers, CBI/Relentless/Pelfrey armor, HAM radio
    PS: the kick panel is held on by a screw that's accessed by removing the dead pedal.
     
  8. Jan 15, 2011 at 8:50 PM
    #8
    907taco

    907taco Alaskan Assassin

    Joined:
    Mar 27, 2010
    Member:
    #34091
    Messages:
    1,358
    Gender:
    Male
    First Name:
    Bobby
    Alaska
    Vehicle:
    2010 BlackSandPearl 4x4
    ultimate lift kit ( toytec ) ome dakar leaf pack , w/ extended length billies, LR uca's, Pro comp 7089s, KM2's 285 70 17, neoprene seat covers, weather techs, CBI sliders w/kickout, URD ss, cab mount chop, VHT night shade tint>tails,3rd B-light. Debadged. Grillecraft grille, rear diff breather mod. CBI Moab front bumper, warn M8000 winch, HID kragens 7", Hella's micro fogs. retrofit headlights HIDS, LED solutions maps/license! 886 back up light mod,
    nice write, i have a cb but need everything else, not sure what to get.
     
  9. Jan 15, 2011 at 8:50 PM
    #9
    EEtaco

    EEtaco Well-Known Member

    Joined:
    Feb 22, 2009
    Member:
    #13917
    Messages:
    242
    Gender:
    Male
    North Carolina
    Vehicle:
    09 V6 Prerunner
    Very good write up, nice pictures too! You may want to think about moving those fuses closer to the battery.
     
  10. Jan 15, 2011 at 8:58 PM
    #10
    BCTacoma

    BCTacoma Well-Known Member

    Joined:
    Sep 7, 2009
    Member:
    #22398
    Messages:
    526
    Gender:
    Male
    First Name:
    Ryan
    Port Hardy, BC
    Vehicle:
    06 SR5 Tacoma
    Toytec ULK, OME Dakars, Bilstein Shocks, Extended Brake Lines, 285/75/16 Duratracs, Pro Comp Steel wheels, Relentless Fab Front Bumper/Sliders
    Didn't see a fuse at the battery ? It should have one with in a few inches of the positive post. May be i missed it ?
     
  11. Jan 15, 2011 at 8:58 PM
    #11
    oofy15354

    oofy15354 Proud Tundra *****

    Joined:
    Nov 2, 2009
    Member:
    #25311
    Messages:
    510
    Gender:
    Male
    First Name:
    Dave
    Massachusetts
    Herculiner, Access Tonneau, Uniden cb, firestik antennae, Bosch Wipers, JVC Ipod headunit, Boston Acoustic Speakers
    another thought on your PA, even though it is a 50 watt speaker (or whatever it is), im sure its not getting 50 watts from your radio. i ran a similar set up with a rectangular 100 watt speaker from Radio Shack and it was barely louder than a very loud talking voice (imagine being a security guard and having to say "excuse me sir" to someone who is running off with stolen goods. that loud). I'd guess the output of the radio is around 10 watts (never could find specs) so it would need an amplifier to reach its full potential. thats what i plan on doing once i get my radio set up in my new truck. maybe a 200 watt amp and run dual speakers
     
  12. Jan 15, 2011 at 8:59 PM
    #12
    oofy15354

    oofy15354 Proud Tundra *****

    Joined:
    Nov 2, 2009
    Member:
    #25311
    Messages:
    510
    Gender:
    Male
    First Name:
    Dave
    Massachusetts
    Herculiner, Access Tonneau, Uniden cb, firestik antennae, Bosch Wipers, JVC Ipod headunit, Boston Acoustic Speakers
    comes with an inline fuse close to the ends of the leads coming from the radio. if he extended the leads he should move the fuse also
     
  13. Jan 15, 2011 at 9:12 PM
    #13
    NetMonkey

    NetMonkey [OP] Well-Known Member

    Joined:
    Aug 14, 2008
    Member:
    #8536
    Messages:
    1,734
    Gender:
    Male
    Geogetown, TX
    Vehicle:
    2010, 4x4, DC, off-road, shortbed, automatic
    Toytec Ultimate Lift @ 3", Mickey Thompson MTZ's 285/75/16, Moto Metal 955b, rear 2" ALL, Marlin Crawler sliders
    GAH! :facepalm:
     
  14. Jan 15, 2011 at 9:14 PM
    #14
    NetMonkey

    NetMonkey [OP] Well-Known Member

    Joined:
    Aug 14, 2008
    Member:
    #8536
    Messages:
    1,734
    Gender:
    Male
    Geogetown, TX
    Vehicle:
    2010, 4x4, DC, off-road, shortbed, automatic
    Toytec Ultimate Lift @ 3", Mickey Thompson MTZ's 285/75/16, Moto Metal 955b, rear 2" ALL, Marlin Crawler sliders
    ya, the fuse is near the radio. what is the importance of the fuse being at the battery?
     
  15. Jan 15, 2011 at 9:16 PM
    #15
    oofy15354

    oofy15354 Proud Tundra *****

    Joined:
    Nov 2, 2009
    Member:
    #25311
    Messages:
    510
    Gender:
    Male
    First Name:
    Dave
    Massachusetts
    Herculiner, Access Tonneau, Uniden cb, firestik antennae, Bosch Wipers, JVC Ipod headunit, Boston Acoustic Speakers
    if too much current is sent through the wires for whatever reason (a short or something), the wires could possibly melt and catch fire. if there is a fuse near the battery, there is no wire to melt, the fuse pops and no damage is done except to the fuse
     
  16. Jan 15, 2011 at 9:18 PM
    #16
    NetMonkey

    NetMonkey [OP] Well-Known Member

    Joined:
    Aug 14, 2008
    Member:
    #8536
    Messages:
    1,734
    Gender:
    Male
    Geogetown, TX
    Vehicle:
    2010, 4x4, DC, off-road, shortbed, automatic
    Toytec Ultimate Lift @ 3", Mickey Thompson MTZ's 285/75/16, Moto Metal 955b, rear 2" ALL, Marlin Crawler sliders
    i see. i will get an inline fuse and place it near the battery :)
     
  17. Jan 15, 2011 at 9:20 PM
    #17
    bjmoose

    bjmoose Bullwinkle J. Moose

    Joined:
    Aug 31, 2010
    Member:
    #42529
    Messages:
    6,009
    Gender:
    Male
    First Name:
    Steve
    San Jose CA
    Vehicle:
    '11 Std Cab 4x4 5sp
    OME suspension, ARB Air Lockers, CBI/Relentless/Pelfrey armor, HAM radio
    If the power lead insulation rubs through and shorts to ground, you want the fuse to be between the battery and the short to avoid melting the wire and possibly starting an electrical fire.
     
  18. Jan 15, 2011 at 9:27 PM
    #18
    southpier

    southpier Well-Known Member

    Joined:
    Feb 14, 2010
    Member:
    #31370
    Messages:
    144
    Gender:
    Male
    really helpful write-up & pictures; thanks for taking the time to do this
     
  19. Jan 15, 2011 at 9:27 PM
    #19
    steved411

    steved411 I came. I saw. I conquered.

    Joined:
    Sep 21, 2010
    Member:
    #43598
    Messages:
    129
    Gender:
    Male
    First Name:
    Steve
    Clayton, NC
    Vehicle:
    2008 DC TRD Off-Road
    Thanks - your post help me find the Antenna Fold Over Adapter
     
  20. Jan 15, 2011 at 11:49 PM
    #20
    ruslanus

    ruslanus Well-Known Member

    Joined:
    May 5, 2010
    Member:
    #36608
    Messages:
    330
    Gender:
    Male
    First Name:
    Rus
    Wasilla, AK
    Did your CB Radio come with the mounting bracket or did you have to buy it separately?
     

Products Discussed in

To Top