

-
Welcome to Tacoma World!
You are currently viewing as a guest! To get full-access, you need to register for a FREE account.
As a registered member, you’ll be able to:- Participate in all Tacoma discussion topics
- Communicate privately with other Tacoma owners from around the world
- Post your own photos in our Members Gallery
- Access all special features of the site
 Coolers
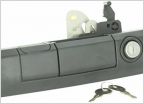 URGENT Tailgate Lock
 Great, how much is this going to cost me?
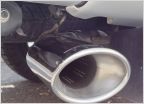 Is the TRD Cat-Back Exhaust right for me?
 Second gen bulb types FYI
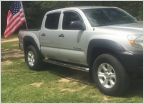 Suggestions on new shoes for the yota
Pop and Lock PL8521 Power Tailgate Install (2012 Tacoma)
Discussion in '2nd Gen. Tacomas (2005-2015)' started by JTyfz450, Apr 13, 2012.
Page 19 of 26
Page 19 of 26
Products Discussed in


