

-
Welcome to Tacoma World!
You are currently viewing as a guest! To get full-access, you need to register for a FREE account.
As a registered member, you’ll be able to:- Participate in all Tacoma discussion topics
- Communicate privately with other Tacoma owners from around the world
- Post your own photos in our Members Gallery
- Access all special features of the site
 2006 tacoma
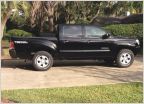 Looking at options to lift my 13 4x4 trd off-road dbl cab
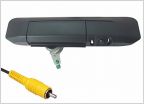 Pop Lock tailgate...which cam?
 New, heavier duty leaf springs?
 Traded my Tacoma today
Mod Day. Mod 2. Installing power point in center console -clean look, LOTS OF PICS-
Discussion in '2nd Gen. Tacomas (2005-2015)' started by ramonortiz55, Dec 13, 2013.
Page 2 of 4
Page 2 of 4


