1. Welcome to Tacoma World!

    You are currently viewing as a guest! To get full-access, you need to register for a FREE account.

    As a registered member, you’ll be able to:
    • Participate in all Tacoma discussion topics
    • Communicate privately with other Tacoma owners from around the world
    • Post your own photos in our Members Gallery
    • Access all special features of the site

Look what I did this weekend! CornHole and Truck Rack!

Discussion in '2nd Gen. Tacomas (2005-2015)' started by Murica, Jun 9, 2014.

  1. Jun 9, 2014 at 6:13 AM
    #1
    Murica

    Murica [OP] F' YEAH!

    Joined:
    Jun 6, 2014
    Member:
    #131387
    Messages:
    135
    Gender:
    Male
    First Name:
    Jon
    NH
    Vehicle:
    '14 DCSB TRD OFFROAD 4x4
    Plasti Derp
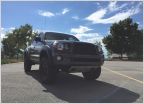
    I didn't feel like dropping some coin on a truck rack, so I made one!

    Blue moose.jpg
     
  2. Jun 9, 2014 at 6:19 AM
    #2
    Thegenerik1

    Thegenerik1 Well-Known Member

    Joined:
    Aug 7, 2013
    Member:
    #109954
    Messages:
    3,386
    Gender:
    Male
    First Name:
    Erik
    NorCal
    Vehicle:
    18 DCLB OR
    I wouldn't put 10 2x4's on that without worry of the whole thing tumbling down on my roof. :eek:
     
  3. Jun 9, 2014 at 6:26 AM
    #3
    BulletToothTony

    BulletToothTony You’ll have that on these big jobs.

    Joined:
    Feb 20, 2008
    Member:
    #4833
    Messages:
    16,292
    First Name:
    You can call me Susan if it makes you happy.
    You better redneck-o-nize bitches
     
  4. Jun 9, 2014 at 6:36 AM
    #4
    Murica

    Murica [OP] F' YEAH!

    Joined:
    Jun 6, 2014
    Member:
    #131387
    Messages:
    135
    Gender:
    Male
    First Name:
    Jon
    NH
    Vehicle:
    '14 DCSB TRD OFFROAD 4x4
    Plasti Derp
    that thing is top notch engineering its pretty stable, for my canoes, kayaks, and surfboards.
     
  5. Jun 9, 2014 at 6:50 AM
    #5
    SoutheastTaco

    SoutheastTaco Resident Jackass

    Joined:
    Nov 24, 2009
    Member:
    #26461
    Messages:
    1,288
    Gender:
    Male
    First Name:
    steven
    columbia sc
    Vehicle:
    09 trd sport dc 4x4
    rear spring tsb, 255/75/17 bfg muds
    It actually looks pretty stable. Good job OP.
     
  6. Jun 9, 2014 at 6:52 AM
    #6
    Murica

    Murica [OP] F' YEAH!

    Joined:
    Jun 6, 2014
    Member:
    #131387
    Messages:
    135
    Gender:
    Male
    First Name:
    Jon
    NH
    Vehicle:
    '14 DCSB TRD OFFROAD 4x4
    Plasti Derp
    Thanks southeast, it was from this forum that gave me the courage to try this out!!!

    my buddy saw my truck the other day and called it the Blue Moose, he said it looks like antlers, I like it alot!
     
  7. Jun 9, 2014 at 7:05 AM
    #7
    buzhazzard

    buzhazzard Dad

    Joined:
    Aug 7, 2009
    Member:
    #20793
    Messages:
    77
    Gender:
    Male
    First Name:
    Chris
    Houston
    Vehicle:
    2009 Magnetic Grey DC 4X4
    Wet Okole seat covers, Weathertech floor mats, blacked out tail lights, leer cap, OME 885s in front and leaf pack in rear with AAL, bhlm, all pro sliders, Pioneer head unit, rear plate bumper, US Off Road hidden winch mount, 10k lb winch, On-board water
    Looks great!
     
  8. Jun 9, 2014 at 9:16 AM
    #8
    DeSean Thick

    DeSean Thick TuRD TACO

    Joined:
    Mar 10, 2013
    Member:
    #99443
    Messages:
    324
    Gender:
    Male
    First Name:
    Sean
    Snowmass, CO
    Vehicle:
    05 TRD Sport Speedway Blue
    I did something similar awhile back for a short term trip. If you have any leftover plywood from the cornhole set, consider ripping a couple strips, maybe a foot wide and long enough to span between the posts. This will secure your joints much better. Even though the corner bracing looks strong, there will be a lot of forces acting on this while you're driving with a full load. I assume you used screws for everything, please tell me you did! And attached it to the bed somehow...

    But well done on your ingenuity, and enjoy your new toys!
     
  9. Jun 9, 2014 at 9:44 AM
    #9
    wgreenlee1021

    wgreenlee1021 Off the Meds Again...

    Joined:
    Apr 23, 2014
    Member:
    #128340
    Messages:
    571
    Gender:
    Male
    Ummmm....are you gonna paint it...or stain it....?
     
  10. Jun 9, 2014 at 9:55 AM
    #10
    DeSean Thick

    DeSean Thick TuRD TACO

    Joined:
    Mar 10, 2013
    Member:
    #99443
    Messages:
    324
    Gender:
    Male
    First Name:
    Sean
    Snowmass, CO
    Vehicle:
    05 TRD Sport Speedway Blue
    [​IMG]

    "blue moose.jpg" :D

    it's a great looking truck! don't mistake any constructive criticism that you'll hear as just criticism
     
  11. Jun 9, 2014 at 10:49 AM
    #11
    Thegenerik1

    Thegenerik1 Well-Known Member

    Joined:
    Aug 7, 2013
    Member:
    #109954
    Messages:
    3,386
    Gender:
    Male
    First Name:
    Erik
    NorCal
    Vehicle:
    18 DCLB OR
    It won't last, those corner braces don't do much. One of them is toe screwed into the upright and will rip out with minimal force. You need a piece of plywood down each side to add sheer value. If you plan for it to last you need some modifications and some paint.
     
  12. Jun 9, 2014 at 10:54 AM
    #12
    Murica

    Murica [OP] F' YEAH!

    Joined:
    Jun 6, 2014
    Member:
    #131387
    Messages:
    135
    Gender:
    Male
    First Name:
    Jon
    NH
    Vehicle:
    '14 DCSB TRD OFFROAD 4x4
    Plasti Derp
    Yes I am def staining it.
    I used galvanized deck screws (weather proof).
    Securing it right now is ratchet straps from the bed rail cleats going to the the 2x4 frame on both side, I was thinking about using eye-bolts one on each side and connecting to the bed rail cleats? how does that sound?

    maybe i could rig up something from the bed rail (attachment thread) and bolt it to the bed rail?

    This wont be on the truck all the time.

    I need the constructive critisim anything you guys think i should do is fine by me, I appreciate it! keep the tips coming!
     
    Last edited: Jun 9, 2014
  13. Jun 9, 2014 at 11:29 AM
    #13
    DeSean Thick

    DeSean Thick TuRD TACO

    Joined:
    Mar 10, 2013
    Member:
    #99443
    Messages:
    324
    Gender:
    Male
    First Name:
    Sean
    Snowmass, CO
    Vehicle:
    05 TRD Sport Speedway Blue
    Gonna apologize for this quick sketch... but in order to keep the bed rack from wobbling apart, you need something to span between the legs. This is the dark brown rectangle I drew. Making it out of plywood would keep it easy and slim, and you can make this "wall" as tall as you want to either aid or prevent things from being removed from the back. The important part is the triangle shapes created (shown in green) between the screws which are in yellow. This well prevent the rack from leaning like so /___/. If you do this on each side as well as between the front two legs, your rack will be strong enough to handle anything. You can skip spanning the rear two legs, just to make things easier loading and unloading from the bed. When I made my version of this, I essentially built walls from top to bottom to make it stronger and prevent stuff from being removed out the side. Like I said though, the important part are these imaginary triangles that are created between the plywood attachment points. The larger the triangles, the stronger the rack.

    bed rack.jpg

    Sorry I'm not an engineer and I'm not good at conveying what little knowledge I have, but I know that this will help your rack immensely. So if you have any questions please ask and hopefully another member can explain more clearly
     
  14. Jun 9, 2014 at 7:12 PM
    #14
    cholland

    cholland Active Member

    Joined:
    Dec 19, 2013
    Member:
    #118892
    Messages:
    42
    Gender:
    Male
    California
    Vehicle:
    13 Access cab 4x V6 manual
    I built a headache rack very similar to this from some scraps. Used plywood like the post above and it holds together nicely. I only use it occasionally when I need a few longer boards. Just toss it in the back when heading to the lumber yard, then I stand it up and secure it with the rest of the load to the bed tie downs or d-rings in the bed if a little heavy.

    Screwed mine together and then put two nails at each connection, one from each side. Just to be sure. Screws can sheer, even the high grade ones. A nail will only bend.

    Heck yeah it's redneck. It's a truck, use it to get stuff done.
     
  15. Jun 10, 2014 at 3:31 AM
    #15
    Murica

    Murica [OP] F' YEAH!

    Joined:
    Jun 6, 2014
    Member:
    #131387
    Messages:
    135
    Gender:
    Male
    First Name:
    Jon
    NH
    Vehicle:
    '14 DCSB TRD OFFROAD 4x4
    Plasti Derp
    I think it looks classy my neighbors were gawking the whole time i was building it!

    DeSean, thanks for the diagram I'm def gonna look into making the sides with the plywood attachment!

    Cholland, I'll add a couple nails too!

    Thanks guys!
     
  16. Jun 10, 2014 at 3:38 AM
    #16
    ToolFan66

    ToolFan66 Well-Known Member

    Joined:
    Mar 3, 2014
    Member:
    #124454
    Messages:
    286
    Gender:
    Male
    Littleton CO
    Vehicle:
    14 TRD Off Road DCSB 4x4
    Why would you spend the time, and money on this project, and not just put that money towards a new/used one?

    Looks good, but I couldn't do it..
     
  17. Jun 10, 2014 at 3:41 AM
    #17
    Murica

    Murica [OP] F' YEAH!

    Joined:
    Jun 6, 2014
    Member:
    #131387
    Messages:
    135
    Gender:
    Male
    First Name:
    Jon
    NH
    Vehicle:
    '14 DCSB TRD OFFROAD 4x4
    Plasti Derp
    it took like 2.5 hours drank some beers I got a solid tan, I think it cost $34.00 the used racks in my area are all around 200-350! Thule Xsporter/TracRac. I like sweat equity!
     
  18. Jun 10, 2014 at 5:21 AM
    #18
    DeSean Thick

    DeSean Thick TuRD TACO

    Joined:
    Mar 10, 2013
    Member:
    #99443
    Messages:
    324
    Gender:
    Male
    First Name:
    Sean
    Snowmass, CO
    Vehicle:
    05 TRD Sport Speedway Blue
    Chop saws are fun. That's why
     
  19. Jun 24, 2014 at 3:32 AM
    #19
    Murica

    Murica [OP] F' YEAH!

    Joined:
    Jun 6, 2014
    Member:
    #131387
    Messages:
    135
    Gender:
    Male
    First Name:
    Jon
    NH
    Vehicle:
    '14 DCSB TRD OFFROAD 4x4
    Plasti Derp
    Hey guys,

    Im bringing this thread back from the dead. I have a question should I stain the wood rack or paint? I was thinking of staining and varnish it for the wood look and decent protection from the elements. Or possibly I could paint the rack black so its more sleek looking, if I did paint it would I use primer first?

    Stain or Paint it Black?
     
  20. Jun 24, 2014 at 4:10 AM
    #20
    MagneticTaco79

    MagneticTaco79 COLD ASS HONKY

    Joined:
    Apr 28, 2014
    Member:
    #128692
    Messages:
    704
    Gender:
    Male
    First Name:
    AARON
    WV
    Vehicle:
    Mag Grey 2012 Tacoma AC TRD Sport 4x4
    ALL KINDS OF SHIT
    Paint it black...
     

Products Discussed in

To Top