

-
Welcome to Tacoma World!
You are currently viewing as a guest! To get full-access, you need to register for a FREE account.
As a registered member, you’ll be able to:- Participate in all Tacoma discussion topics
- Communicate privately with other Tacoma owners from around the world
- Post your own photos in our Members Gallery
- Access all special features of the site
Quick Links: Brake rotors
  Perf leather steering wheel cover
  How long can I run this speaker with just my truck battery via the bed outlet?
  Gear Oil Question - Transmission and Transfer Case - 08' Gen 2 Access Cab, Manual Transmissin, 2.7 L
  Saw this.. purolator synthetic oil filter?
 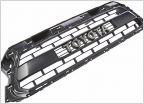 Looking for "TOYOTA" grill
eBay fog light kits for '08-'09-'10 Tacomas....
Discussion in '2nd Gen. Tacomas (2005-2015)' started by 10taco, Sep 6, 2009.
Page 16 of 18
Page 16 of 18


