

-
Welcome to Tacoma World!
You are currently viewing as a guest! To get full-access, you need to register for a FREE account.
As a registered member, you’ll be able to:- Participate in all Tacoma discussion topics
- Communicate privately with other Tacoma owners from around the world
- Post your own photos in our Members Gallery
- Access all special features of the site
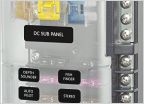 Interior Mounted Aux Fuse Box.
 Operation Taco- I finally have one!
 Apple CarPlay adapter
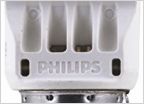 Old versus new versions of Philips 921 LED bulb
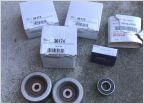 Serpentine belt replacement. 2011 V-6
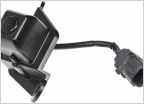 Backup camera help
Steering Rag Joint Mod, Phase-1
Discussion in '2nd Gen. Tacomas (2005-2015)' started by Caddmannq, May 14, 2010.
Page 1 of 3
Page 1 of 3


