

-
Welcome to Tacoma World!
You are currently viewing as a guest! To get full-access, you need to register for a FREE account.
As a registered member, you’ll be able to:- Participate in all Tacoma discussion topics
- Communicate privately with other Tacoma owners from around the world
- Post your own photos in our Members Gallery
- Access all special features of the site
 Drive Shafts: Two Types of Grease?
 Pop and Lock tailgate lock for back up camera..anyone use?
 Remotes not working still
 Truck Cover for hail protection?
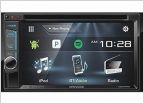 Back up camera issue
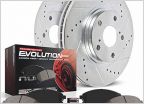 Opinions on Powerstop K137 Brake Kit
DIY: Bushwacker Fender Flare Installation
Discussion in '2nd Gen. Tacomas (2005-2015)' started by Wildcat, Sep 19, 2013.
Page 1 of 4
Page 1 of 4


