

-
Welcome to Tacoma World!
You are currently viewing as a guest! To get full-access, you need to register for a FREE account.
As a registered member, you’ll be able to:- Participate in all Tacoma discussion topics
- Communicate privately with other Tacoma owners from around the world
- Post your own photos in our Members Gallery
- Access all special features of the site
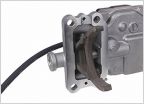 Front diff 4wd actuator replacement?
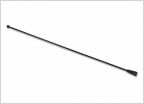 Replacement antenna mast
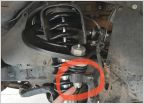 Help! Upper ball joint keeps turning when installing UCA
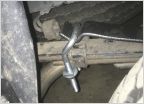 Helper springs with recall leaf pack
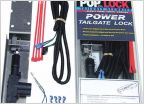 Locking tailgate for 2013 tacoma with back up cam, suggestions?
 Maintenance Interval For Front Differential and Transfer Case?
2012+ Grill mod write up 'thin lip' Custom Car Grills DIY
Discussion in '2nd Gen. Tacomas (2005-2015)' started by moondeath, Feb 23, 2014.
Page 1 of 10
Page 1 of 10


