1. Welcome to Tacoma World!

    You are currently viewing as a guest! To get full-access, you need to register for a FREE account.

    As a registered member, you’ll be able to:
    • Participate in all Tacoma discussion topics
    • Communicate privately with other Tacoma owners from around the world
    • Post your own photos in our Members Gallery
    • Access all special features of the site

DIY: Rear Speakers- 2nd Gen Reg Cab

Discussion in 'Audio & Video' started by gsm, Jan 11, 2008.

  1. Jan 11, 2008 at 8:07 AM
    #1
    gsm

    gsm [OP] Well-Known Member

    Joined:
    Nov 10, 2007
    Member:
    #3426
    Messages:
    143
    Raleigh, NC
    Vehicle:
    08 Tacoma Regular Cab, 2.7L, Impulse Red Pearl
    DIY OEM Fog Lights on anytime, DIY OEM Cruise Control, Removed 2ndary Air Filter, Rear Speakers Mod, Traction Bar/Helper Spring Mod, Red Brake Drums and Rotors, Stainless Steel Exhaust Tip, Door Sill Protectors, Taco Bed Mat, Custom Front Mud Flaps (Mudguards), TRD Bucket Seats (pending)
    This is one way for those of us that wish to have rear speakers in a regular / Std. cab Taco. And with no drilling, cutting into any part (except 1 factory ground wire connector swapped out). Furthermore, connections rear speakers for those with the factory CD/Radio.

    Disclaimer of course! Do not attempt any electrical work if you aren’t confident in your abilities. Any work you perform is at your own risk. BUT with that being said, I believe you will see that there isn’t much to this. The most time consuming part is the construction of the rear speaker boxes.

    Radio Removal:

    007Tacoma has a very good thread under “Mods and Tutorials” call Stereo Upgrade Basics… which can be also found at this link:

    http://www.tacomaworld.com/forum/audio-video/571-stereo-upgrade-basic-how-2nd-gen.html

    There 007 describes how to remove the factory radio. This is needed in order to wire the speaker wire for the rear speakers. Takes about 10 minutes to remove, 5 if you aren’t over the hill like I am!

    Wiring:

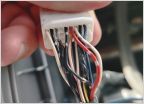
    The smaller square connector that came from the back of the radio is for the rear speakers to connect (see picture below). Unfortunately for me I was unable to locate locally the inserts for me to feed the speaker wire into this connector.

    [​IMG]

    From the factory there was a single dark brown wire (ground I believe from my research) on this connector. I had to modify how to connect that brown wire and the rear speaker wires to the tabs from behind the radio.

    Below you will see where the connection are for the factory brown wire and for the rear speakers:

    [​IMG]


    I couldn’t locate connectors small enough so I used 18-22 ga. quick disconnects and modified them to size as seen below:

    (edit: Tim Gainous posted below that Toyota Part#82998-12340 Female Connectors worked just fine for his install - Thanks Tim for your input)

    [​IMG]
     
  2. Jan 11, 2008 at 8:13 AM
    #2
    gsm

    gsm [OP] Well-Known Member

    Joined:
    Nov 10, 2007
    Member:
    #3426
    Messages:
    143
    Raleigh, NC
    Vehicle:
    08 Tacoma Regular Cab, 2.7L, Impulse Red Pearl
    DIY OEM Fog Lights on anytime, DIY OEM Cruise Control, Removed 2ndary Air Filter, Rear Speakers Mod, Traction Bar/Helper Spring Mod, Red Brake Drums and Rotors, Stainless Steel Exhaust Tip, Door Sill Protectors, Taco Bed Mat, Custom Front Mud Flaps (Mudguards), TRD Bucket Seats (pending)
    These fit firmly and secure to the rear of the stereo without fear of shorting out on other tabs. Electrical tap was used solely to apply pressure between the connections:

    [​IMG]

    Below is a picture of that Brown wire with the modified connector:

    [​IMG]

    I then ran the speaker wires through the inside of the dash, down behind the kick panels, under the door thresholds and up behind the rear quarter panels to the back bulkhead on each side. No pictures I felt was needed of this and you could just run the wires under the carpet if you so desired.

    Rear Speakers:

    Finding and deciding on a location for the rear speakers was hard for me. Ideally I wanted to locate them in the rear quarter panels facing inward for best appearance and sound. But that would have meant not only cutting into the plastic quarter panel cover – but a lot of metal behind that panel. Not to mention dealing with the seat belt running behind that panel.

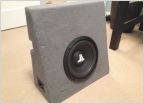
    So I finally decided on a boxed speaker setup. And since I couldn’t find anything that would work locally I made them myself. I didn’t want the speaker to be in the way or damaged when we put bags or such behind the seat (surprisingly a lot of space behind the seats for a regular cab, more than twice than I had in my Ranger). And I didn’t want to drill into the bulkhead in case I wanted to change the setup later. So here is my setup and how I did it:

    [​IMG]

    To build the boxes I used 1/4” craft plywood (12x24) from a local craft store. The 6 ½” speakers I chose were going to need a 7 ¼” square face which required me to make a step on the lower back of the box for the bulkhead railing. To hopefully help in sound, on the inboard side wall of each box I bored two large holes so hopefully sound will pass through the felt towards the other side of the cab rather than all forward. After building the boxes I sprayed them with adhesive and covered them in felt.

    End result. Sounds great and big improvement over factory setup!
     
  3. Jan 11, 2008 at 8:19 AM
    #3
    gsm

    gsm [OP] Well-Known Member

    Joined:
    Nov 10, 2007
    Member:
    #3426
    Messages:
    143
    Raleigh, NC
    Vehicle:
    08 Tacoma Regular Cab, 2.7L, Impulse Red Pearl
    DIY OEM Fog Lights on anytime, DIY OEM Cruise Control, Removed 2ndary Air Filter, Rear Speakers Mod, Traction Bar/Helper Spring Mod, Red Brake Drums and Rotors, Stainless Steel Exhaust Tip, Door Sill Protectors, Taco Bed Mat, Custom Front Mud Flaps (Mudguards), TRD Bucket Seats (pending)
    The Build/Install:

    First I took measurements for my particular speakers and marked the plywood to cut the pieces out.

    [​IMG]

    I initially went with the back of the box and sides. The top, bottom and face will be cut out after I put the back and sides together to ensure what size they need to be. Not a square box, so I took the measurements from here as I went.

    A back with two sides cut out:

    [​IMG]


    The notch above on the sides is for the bulkhead railing, that notch also permits the speaker wire to run inside of the box staying concealed inside the bulkhead railing. You can also notice that the sided do not go all the way to the top of the back board. That is because I left ½” for a lip to sit behind the top plastic cap that snaps on the top rail (just below the back window) to also help secure the box to the balkhead.

    Two ¼ x 1 1/8 ply strips to secure each box to. This was a test fit. The inboard strip slides up and behind the top and bottom rail while the inboard (right in this picture) strip only remains behind the lower rail.

    [​IMG]
     
  4. Jan 11, 2008 at 8:23 AM
    #4
    gsm

    gsm [OP] Well-Known Member

    Joined:
    Nov 10, 2007
    Member:
    #3426
    Messages:
    143
    Raleigh, NC
    Vehicle:
    08 Tacoma Regular Cab, 2.7L, Impulse Red Pearl
    DIY OEM Fog Lights on anytime, DIY OEM Cruise Control, Removed 2ndary Air Filter, Rear Speakers Mod, Traction Bar/Helper Spring Mod, Red Brake Drums and Rotors, Stainless Steel Exhaust Tip, Door Sill Protectors, Taco Bed Mat, Custom Front Mud Flaps (Mudguards), TRD Bucket Seats (pending)
    I taped each strip into place and place the back of the speaker box on top. There I marked and drill a small pilot hole through the back board of the box and made a mark in the strips behind it for reference.

    [​IMG]

    I then took the strips and drill them at the mark made from above and inserted a T-nut. The black foam sealer tape (like that used to seal camper shells) is used to apply pressure from the bulkhead while attempting to screw the box to it.

    [​IMG]

    I then assemble the box leaving the speaker out till after mounting. Lining up the holes through the back of the speaker box to bolt into the t-nuts was a little awkward. But the end result is a sturdy connection and well worth it.

    This is just one of an endless number of ways to install a speaker behind the seat in a regular cab. If questions arise and more clarity is needed I will be more than happy to edit or reply.
     
  5. Jan 11, 2008 at 8:26 AM
    #5
    gsm

    gsm [OP] Well-Known Member

    Joined:
    Nov 10, 2007
    Member:
    #3426
    Messages:
    143
    Raleigh, NC
    Vehicle:
    08 Tacoma Regular Cab, 2.7L, Impulse Red Pearl
    DIY OEM Fog Lights on anytime, DIY OEM Cruise Control, Removed 2ndary Air Filter, Rear Speakers Mod, Traction Bar/Helper Spring Mod, Red Brake Drums and Rotors, Stainless Steel Exhaust Tip, Door Sill Protectors, Taco Bed Mat, Custom Front Mud Flaps (Mudguards), TRD Bucket Seats (pending)
    Hope this helps out the other standard cab Taco owners out there that are interested in rear speakers!

    [​IMG]

    [​IMG]
     
  6. Feb 12, 2008 at 5:16 PM
    #6
    gsm

    gsm [OP] Well-Known Member

    Joined:
    Nov 10, 2007
    Member:
    #3426
    Messages:
    143
    Raleigh, NC
    Vehicle:
    08 Tacoma Regular Cab, 2.7L, Impulse Red Pearl
    DIY OEM Fog Lights on anytime, DIY OEM Cruise Control, Removed 2ndary Air Filter, Rear Speakers Mod, Traction Bar/Helper Spring Mod, Red Brake Drums and Rotors, Stainless Steel Exhaust Tip, Door Sill Protectors, Taco Bed Mat, Custom Front Mud Flaps (Mudguards), TRD Bucket Seats (pending)
    Hey Phantom, glad to hear it all went well and congrats!

    If you have the time post pics of your speakers/enclosures or part numbers in case others may want to go that way.

    Hows it sound? It's made the difference of night and day in my Regular Cab.
     
  7. Feb 19, 2008 at 6:03 AM
    #7
    gsm

    gsm [OP] Well-Known Member

    Joined:
    Nov 10, 2007
    Member:
    #3426
    Messages:
    143
    Raleigh, NC
    Vehicle:
    08 Tacoma Regular Cab, 2.7L, Impulse Red Pearl
    DIY OEM Fog Lights on anytime, DIY OEM Cruise Control, Removed 2ndary Air Filter, Rear Speakers Mod, Traction Bar/Helper Spring Mod, Red Brake Drums and Rotors, Stainless Steel Exhaust Tip, Door Sill Protectors, Taco Bed Mat, Custom Front Mud Flaps (Mudguards), TRD Bucket Seats (pending)
    Hey Phantom looks great guy. Glad it all worked out.

    I noticed you still have what I believe to be the worthless center seat belt restraints. Do/have you ever been able to use yours for anything? I found that taking mine out helped free up some floor space behind the seats for those bags of groceries, etc. (See PIC above) Everything simply unbolted with ease. I replaced the bolts back into the threaded locations in case for future use and simply placed all of the plastic covers, seat belt harness away in my Taco Parts storage box in case the need should arise (I doubt it), or for some ungodly reason I might have to sell her :eek:
     
  8. Feb 22, 2008 at 2:48 PM
    #8
    TIM GAINOUS

    TIM GAINOUS Well-Known Member

    Joined:
    Dec 6, 2007
    Member:
    #3738
    Messages:
    146
    Gender:
    Male
    tallahassee fl
    Vehicle:
    o7 base desert sand
    tints,venvisors,low pro toolbox, readylift sst ,afe pro dry,dynomax muffler,sec air filter removed. jvc aresenal, with rear jvc 6x9's front blaupunkts.
    hey at the expense of sounding dense where do you hook up the brown wire to? and also if the factory harness is there why cant you just hook to the other end of it? i must be missing something here
     
  9. Feb 22, 2008 at 7:59 PM
    #9
    gsm

    gsm [OP] Well-Known Member

    Joined:
    Nov 10, 2007
    Member:
    #3426
    Messages:
    143
    Raleigh, NC
    Vehicle:
    08 Tacoma Regular Cab, 2.7L, Impulse Red Pearl
    DIY OEM Fog Lights on anytime, DIY OEM Cruise Control, Removed 2ndary Air Filter, Rear Speakers Mod, Traction Bar/Helper Spring Mod, Red Brake Drums and Rotors, Stainless Steel Exhaust Tip, Door Sill Protectors, Taco Bed Mat, Custom Front Mud Flaps (Mudguards), TRD Bucket Seats (pending)
    Start at the beginning of the thread and you will see the second photo lists where the brown wire attaches to.

    It also explains that I couldn't locate the pins to wire the speakers to the factory connector so I came up with a solution for me - Read the first post of the thread it goes into detail.

    Hope this helps
     
  10. Feb 26, 2008 at 2:12 PM
    #10
    TIM GAINOUS

    TIM GAINOUS Well-Known Member

    Joined:
    Dec 6, 2007
    Member:
    #3738
    Messages:
    146
    Gender:
    Male
    tallahassee fl
    Vehicle:
    o7 base desert sand
    tints,venvisors,low pro toolbox, readylift sst ,afe pro dry,dynomax muffler,sec air filter removed. jvc aresenal, with rear jvc 6x9's front blaupunkts.
    Gotcha Thanks!!
     
  11. Feb 27, 2008 at 4:51 AM
    #11
    TIM GAINOUS

    TIM GAINOUS Well-Known Member

    Joined:
    Dec 6, 2007
    Member:
    #3738
    Messages:
    146
    Gender:
    Male
    tallahassee fl
    Vehicle:
    o7 base desert sand
    tints,venvisors,low pro toolbox, readylift sst ,afe pro dry,dynomax muffler,sec air filter removed. jvc aresenal, with rear jvc 6x9's front blaupunkts.
    i can get the molex connectors im just wondering where the factory rear harness is hidden? thanks for your help
     
  12. Mar 7, 2008 at 6:57 AM
    #12
    TIM GAINOUS

    TIM GAINOUS Well-Known Member

    Joined:
    Dec 6, 2007
    Member:
    #3738
    Messages:
    146
    Gender:
    Male
    tallahassee fl
    Vehicle:
    o7 base desert sand
    tints,venvisors,low pro toolbox, readylift sst ,afe pro dry,dynomax muffler,sec air filter removed. jvc aresenal, with rear jvc 6x9's front blaupunkts.
    There Isnt Really A Part Number For The Ones Im Using I Got Mine From A Large Universal Fuel Injector Harness Repair Kit However I Think Gm Used These In Theweatherpack Connectors" In The 90's If You Could Find A Real Parts Store Theyd Have Em Or Pep Boys Might Have Em Their "help" Line Thanks Again For The Info Phantom And Gsm
     
  13. Apr 8, 2008 at 11:50 AM
    #13
    TIM GAINOUS

    TIM GAINOUS Well-Known Member

    Joined:
    Dec 6, 2007
    Member:
    #3738
    Messages:
    146
    Gender:
    Male
    tallahassee fl
    Vehicle:
    o7 base desert sand
    tints,venvisors,low pro toolbox, readylift sst ,afe pro dry,dynomax muffler,sec air filter removed. jvc aresenal, with rear jvc 6x9's front blaupunkts.
    I Couldnt Make The Fi Connectors Work Right So I Got More Info Off Of A Lexus Forum .the Way I Finally Hooked It Up Was With 4 Toyota Part#82998-12340 Female Connectors .they Click In The Harness Perfectly .splice Em To The Speaker Wires Youre Done. Night And Day Difference I Used Blaunpunkt 6x9's In Q Logic Boxes Sounds Great Ps I My Pos Computer Wont Send The Pictures I Took
     
  14. Apr 9, 2008 at 8:09 AM
    #14
    TIM GAINOUS

    TIM GAINOUS Well-Known Member

    Joined:
    Dec 6, 2007
    Member:
    #3738
    Messages:
    146
    Gender:
    Male
    tallahassee fl
    Vehicle:
    o7 base desert sand
    tints,venvisors,low pro toolbox, readylift sst ,afe pro dry,dynomax muffler,sec air filter removed. jvc aresenal, with rear jvc 6x9's front blaupunkts.
    Thanks Man For Doin The Pictures My Computer Has Windows 98 On It I Think Thats The Problem. I Didnt Mention The Cost Thought I Might. Speakers 30.00 Boxes 30.00 Toyota Repair Harness 4.37 Each
    2 Rolls Speaker Wire 3.00 Ea Totalabout 85.00 Well Worth It.next Ill Be Installing The Gtc 542's I Ordered At The Same Time. Iwanted To Hear The Diff With Just The Rears Anyhow Thanks Again
     
  15. Apr 9, 2008 at 5:57 PM
    #15
    gsm

    gsm [OP] Well-Known Member

    Joined:
    Nov 10, 2007
    Member:
    #3426
    Messages:
    143
    Raleigh, NC
    Vehicle:
    08 Tacoma Regular Cab, 2.7L, Impulse Red Pearl
    DIY OEM Fog Lights on anytime, DIY OEM Cruise Control, Removed 2ndary Air Filter, Rear Speakers Mod, Traction Bar/Helper Spring Mod, Red Brake Drums and Rotors, Stainless Steel Exhaust Tip, Door Sill Protectors, Taco Bed Mat, Custom Front Mud Flaps (Mudguards), TRD Bucket Seats (pending)
    Great looking job! The larger speakers/boxes look good back there and I bet it sounds 100% better as well.

    I'm sure others will be needing your Magic Pins part numbers so I'll reference them up top.
     
  16. Oct 4, 2008 at 8:33 AM
    #16
    Coheednme13

    Coheednme13 Well-Known Member

    Joined:
    Jan 9, 2008
    Member:
    #4172
    Messages:
    243
    First Name:
    MattDaddy
    Elgin, SC
    Vehicle:
    11 DC TRD Sport
    I'm in the process of ripping my interior out to deaden the cab but I don't know how to get that little buckle undone on the center seat belt in the regular cab. I want to take out that center seatbelt. Please help me :eek: thanks guys
     
  17. Oct 4, 2008 at 9:29 AM
    #17
    gsm

    gsm [OP] Well-Known Member

    Joined:
    Nov 10, 2007
    Member:
    #3426
    Messages:
    143
    Raleigh, NC
    Vehicle:
    08 Tacoma Regular Cab, 2.7L, Impulse Red Pearl
    DIY OEM Fog Lights on anytime, DIY OEM Cruise Control, Removed 2ndary Air Filter, Rear Speakers Mod, Traction Bar/Helper Spring Mod, Red Brake Drums and Rotors, Stainless Steel Exhaust Tip, Door Sill Protectors, Taco Bed Mat, Custom Front Mud Flaps (Mudguards), TRD Bucket Seats (pending)
    Received you PM, check your messages.

    Will be a few days till I get back home, I'll post what I find as I don't remember how I accomplished this myself. Center worthless seat belt was the first to go nearly a year ago.
     
  18. Dec 21, 2008 at 10:00 AM
    #18
    beastlytaco

    beastlytaco Well-Known Member

    Joined:
    Jun 30, 2008
    Member:
    #7660
    Messages:
    4,044
    Gender:
    Male
    First Name:
    Ian
    Vehicle:
    08 Access Cab SR5
    does anybody know the size speakers for just the front speakers??
     
  19. Apr 2, 2009 at 8:50 AM
    #19
    glhsracer

    glhsracer Life is good.

    Joined:
    Mar 21, 2009
    Member:
    #15002
    Messages:
    53
    Gender:
    Male
    Michigan
    Vehicle:
    08 4x4
    You did a great job with your rear speakers. When I use the fader control on the factory radio does that mean it is simply going from the speakers in the bottom of the door to the little ones on the top? I never really took the time to look but I assumed it came with four speakers even though they are close together. What a good idea you had.
     
  20. Apr 2, 2009 at 8:57 AM
    #20
    TIM GAINOUS

    TIM GAINOUS Well-Known Member

    Joined:
    Dec 6, 2007
    Member:
    #3738
    Messages:
    146
    Gender:
    Male
    tallahassee fl
    Vehicle:
    o7 base desert sand
    tints,venvisors,low pro toolbox, readylift sst ,afe pro dry,dynomax muffler,sec air filter removed. jvc aresenal, with rear jvc 6x9's front blaupunkts.
    You have reg cab? If so you have no rears
     

Products Discussed in

To Top