1. Welcome to Tacoma World!

    You are currently viewing as a guest! To get full-access, you need to register for a FREE account.

    As a registered member, you’ll be able to:
    • Participate in all Tacoma discussion topics
    • Communicate privately with other Tacoma owners from around the world
    • Post your own photos in our Members Gallery
    • Access all special features of the site

Frollo's build

Discussion in '2nd Gen. Builds (2005-2015)' started by frollo, Sep 20, 2012.

  1. Sep 20, 2012 at 11:14 AM
    #1
    frollo

    frollo [OP] Member

    Joined:
    Jan 19, 2012
    Member:
    #70950
    Messages:
    23
    Gender:
    Male
    Dallas
    Vehicle:
    Tacoma 4x4 OR
    Alright gents here is my build thread. This will be a growing endeavor as i figure out what i want to do. I just got my first taco 8/24. Had to follow in my brothers footsteps and create a build thread ( ).

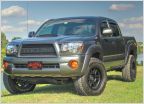
    Here she is in all her glory with a not so good pic! Magnetic Grey Metalic. This will also function as a before pic

    IMG_0001.jpg

    It came with chrome steps and mud flaps, both were removed and sold on the forums.

    Truck Specs
    2012 Magnetic Grey Metalic double cab
    TRD offroad 4x4
    Auto 4.0L V6

    Planned is

    Engine / powertrain
    Supercharger
    Exhaust
    headers

    Electrical
    OBDII monitor - Dashcommand - DONE
    Permanent mount Valentine 1 - DONE
    Stereo upgrade - DONE
    New horn (train) - possibly might want to trade this out to wake up the horrible Dallas drivers.
    Locker anytime mod
    Retain stock Aux in plug for aftermarket head unit - DONE

    Exterior
    Projectors
    Satoshi gril mod - still up in the air if i want to do this, looks pretty tough on some rigs.

    Suspension
    UCA's
    Lift - 3" - no idea what i want to do yet so suggestions are appreciated. Would prefer no rub options for tires / rims.
    Bigger Tires
    Different rims - don't mind the 16" but would want black rim.
    Diff drop to keep everything in line
    Spacers - probable depending on backspace of different rims

    Misc
    Tailgate theft tard check - DONE
    Tailgate lock (Pop a Lock) working off the door locks - DONE
    All weather mats - hey its a truck... going to get some mud in it.
    Rear diff breather relocation
    Seat belt chime disable
    Sliding rear window mod - when kits become avail.

    Done / in progress

    OBDII monitor - Dashcommand - after a horrible experience with an Amazon vendor (don't ever buy from ANKAmall) i finally got the wifi version that works with my phone.
    IMG_0013.jpg

    Tailgate theft tard check - Did the hose clamp addition, went on quick and easy!
    IMG_0011.jpg

    Permanent mount Valentine 1 - I have had this V1 in a few cars now, and imo for the way i drive is a must have, so i mounted it in this truck. Not a big fan of it all the way to the right since i'm 6'5" and it blocks some of my vision. Thinking of a way to mount it below or above the mirror. The dots on the glass prevent suction cups from sticking up by the mirrior. The second picture shows the wire tap i used, and the ground is attached to a dash mount inside the panel.

    IMG_0007.jpg
    IMG_0008.jpg

    Stereo upgrade
    - a little bit of a process here, had hexibase's (probably known from youtube) design a sub enclosure for an Alpine SWR-843D. I'm no competition guy, or car audio buff but i appreciate some good sound. Picked up the bundles from ********* as well for front and back of the car. After around 5 days of getting my tracking number the order actually shipped. I got an INE-Z928HD with a parking brake bypass i got off ebay. I also got the KTX-TCM8 perfect fit kit for it however since alpine is awesome at their fit kits, it isn't avail yet for shipping. I called them earlier this week and they expect them to ship to dealers at the end of sept.

    07.jpg
    Performance Data.jpg
    IMG_0004.jpg
    IMG_0012.jpg
    IMG_0009.jpg
    IMG_0010.jpg


    Ordered a couple wiring kits because the first one i got, the boss one i didn't trust. It was supposed to be 10 gauge and i highly doubt it was, so i ordered a better brand 8 gauge.
    IMG_0002.jpg
    IMG_0003.jpg
    Taco tunes shipment showed up, everything looks good except i'm missing my wiring harness. Composite fronts, component rear. E-mailed them, response was instant, and should receive them sometime soon.
    IMG_0014.jpg
    IMG_0015.jpg
    IMG_0016.jpg

    Got all the stuff to make the sub box (which will go behind my rear seats) and some RAAMATT sound deadening material, all 22lbs of it! 37.5 sq ft btx II, and 14 sq ft of ensolite which, from what i have found will cover most of the areas of the car that i plan to do (rear and doors). Can't really tell from the following pic but it is carpet for the sub box, and the box of sound deadening material.
    IMG_0006.jpg

    Thats all for now, will post more pix when the process starts

    IMG_0005.jpg
     
    Last edited: Mar 28, 2013
    This site contains affiliate links for which the site may be compensated.
    #1
  2. Sep 20, 2012 at 12:59 PM
    #2
    Mellow77

    Mellow77 New Member

    Joined:
    Sep 20, 2012
    Member:
    #87355
    Messages:
    2
    Gender:
    Male
    I recognize that rig! :rolleyes:

    I foresee a weekend of tearing apart a brand new truck to put a real stereo in very soon. :D
     
  3. Sep 28, 2012 at 8:33 AM
    #3
    frollo

    frollo [OP] Member

    Joined:
    Jan 19, 2012
    Member:
    #70950
    Messages:
    23
    Gender:
    Male
    Dallas
    Vehicle:
    Tacoma 4x4 OR
    Wewt my fit kit has shipped finally. If any of you know anything about alpine's fit kits and how long they tend to take to ship, you will know it is exciting!
     
  4. Sep 28, 2012 at 10:04 AM
    #4
    gusher

    gusher SUPERCHARGED!!!

    Joined:
    Mar 5, 2008
    Member:
    #5106
    Messages:
    1,172
    Gender:
    Male
    First Name:
    Greg
    Hudson NH
    Vehicle:
    08 Tacoma Double Cab 4x4 long bed, TRD Sport
    '08 Indigo Double Cab TRD Sport 4x4 Long Bed, Grillcraft grill, Pioneer AVH-P3200BT head unit, XM receiver, Boyo backup camera, Custom devil horns Toyota logo, Black headlight mod, Fog lights on anytime mod, Maglight mount, Weathertech floor liners, Debadged, Trex color-matched eyelids, Access tonneau cover, Toyota bed divider, Sno-way 7'4" snow plow, Auxiliary backup lights, Rear spring TSB, Removed front mud flaps, 2.5" Hell Bent Steel front lift, 285/70-17 Goodyear Wrangler Duratracs, Satin black MB TKO wheels, Black Go Rhino Dominator II nerf steps, custom HomeLink install, CompuStar remote starter, Redline Tuning QuickLift Elite hood struts, Toyota bed mat, Custom short Taco antenna, TRD cold air intake, TRD exhaust, TRD supercharger
    Looking good man! I run the same OBD-II sensor and the Torque App on my Droid and love having good, real-time data. Also looked at your bro's bad ass 4Runner...a couple of nice rigs there!

    Looking forward to watching your build. :thumbsup:
     
  5. Oct 1, 2012 at 8:55 AM
    #5
    frollo

    frollo [OP] Member

    Joined:
    Jan 19, 2012
    Member:
    #70950
    Messages:
    23
    Gender:
    Male
    Dallas
    Vehicle:
    Tacoma 4x4 OR
    Made some progress this weekend on the setup. I installed my components from ********* in the front, composites in the back. Fyi for anybody with a 2012 I am not sure if it was like this in the older cars however if you don't wish to cut wires or do any splicing the wiring adapters you get from taco tunes will not work for the front doors in 2012. Additionally the bolt kits provided are adequate however the main bolts to attach the speaker baffles are machine screws made to be attached with nuts (none provided) and so you are supposed to screw them into the plastic screw mounts already in the car. This can be a pita and time consuming since those plastic things are made for screws that tap and cut into the plastic, which the machine screws don't do very well. The main feed runs into the tweeters, and then from there piggy backs into the 6x9 woofer (if you can call a speaker virtually made out of paper mache a woofer. The cable going into the tweeter will have two say pinks and purples on the drivers side. I used a probe with a light on it to determine which of the pair was the hot wire and then used some wire taps to run to the crossover. Since i don't do too much with speaker wiring it took me a little bit of time to confirm what was + and - on the speakers. Fyi for image dynamics the side with the red dot = + and on the tweeter the copper wire is the + vs the tin looking wire. Additionally i ran the sub wiring from the battery through the plug (i agree pretty darn easy) using a rod used for fishing wire. I duct taped the wire to the end and pulled it to the hole i poked with the fishing rod. From there i ran it down the drivers side to the rear of the car with RCA's and a remote wire for the amp. This was put through the cable channels. I will say that the main pillar between the drivers door and the passenger door are a PITA to put back in place. The little tabs that hold it in suck balls to put back. Keep this in mind if you are trying to fish the wires as you don't actually have to move the bottom plastic to put the wires through. There is enough space to just slide them through, which i didn't know until after i made my life more difficult. So from where I'm at now all i have left are my head unit, with fit kit (which should be here Tuesday) and sound deadening the rear of the truck, making the sub box and installing the sub + amp.

    I opted to leave the vapor barrier there as i intend to probably go back and see if i can use some more ensolite over the top. With the kit i got i'm not sure that the 37.5sq ft will be able to do the back of the truck as well. I will see later this week if it will work. I have about 6 - 8 full sheets left, and the ensolite is much better than i thought it would be. I will mots likely get some more and put it over the door panel and the vapor barrier to help seal everything in there. You can see in one of the photos how i wired up the composites in the front with the cross over. If you leave it how it is in that picture and put the door panel over it surprisingly enough it doesn't rattle or interfere with the panel going back on.
    photo 2.jpg
    photo 3.jpg
    photo 4.jpg


    The sound coming out of the new speakers is great. I was surprised at the bass coming out of the upgraded speakers alone. Granted the stock head unit sucks and you have to crank it up to get any real output. All in all the speakers sound great so far.


    I have also attached the following two photos to illustrate a hurdle i will have to solve. I had the box created for the space behind the seats, however i did not make note of the middle bracket which you can see in the picture. This bracket extends about 3.5" in the 7" depth i allotted (there is a little wiggle room here due to seat spacing and rotation around 1.25") however i will have to shave some stuff down and do some wizardry to allow the current shape to work. If i cannot get it to work i will have to get another box designed. I have also attached my measurement doc because it was a pita to do, and i couldn't find anything else like it out there on the web. The measurements include the space under the rear seats, and behind the rear seats with plastic removed. Keep in mind these are rough and lean toward the conservative side, so if you build enclosures and then seal everything you shouldn't rub or buz on any other services. I suggest you do your own measuring, but for initial planning stages it should help.

    photo 1.jpg
    Measurements.jpg
     
  6. Oct 2, 2012 at 11:56 AM
    #6
    frollo

    frollo [OP] Member

    Joined:
    Jan 19, 2012
    Member:
    #70950
    Messages:
    23
    Gender:
    Male
    Dallas
    Vehicle:
    Tacoma 4x4 OR
    look what showed up today! Finally after a while of waiting my fit kit is in. The fit kit contains obviously the trim panel, a power harness, steering wheel interface module, brackets and screws. It also contains some nifty instructions for removal of the stock unit, bolt sizes, and wiring harness diagram. More to come tonight when it gets installed!

    photo 1.jpgphoto 2.jpgphoto 3.jpg
     
  7. Oct 3, 2012 at 7:52 AM
    #7
    frollo

    frollo [OP] Member

    Joined:
    Jan 19, 2012
    Member:
    #70950
    Messages:
    23
    Gender:
    Male
    Dallas
    Vehicle:
    Tacoma 4x4 OR
    Alright i ended up getting the head unit installed and working. I will say that alpine's "perfect fit" isn't really a perfect fit. The color doesn't match, and there is a little gap on the top of mine. It was very tight space wise due to all the wires so that my contribute to the lack of space and the gap presented on the top. Pay attention in the pictures below and you will see that the perfect fit is a matte black versus the satin / semigloss black with flake of the stock unit. When it is in the car and i'm driving around i don't notice the space (at the top so i can't see it), or the color shift. That said i'm anal so it kinda bugs me. Additionally the plastic that makes the bezel is the cheap injection molded stuff that is fairly brittle. You screw the face plate into the brackets provided using 4 screws. When i started tightening the screws in slowly by hand at least one of the screw sockets on the face plate cracked. It didn't crack to the point where you can see it, or keep it from being held on securely, just enough to make you think "what a pos".

    So first up we have the before pic with the old HU in, followed by the after shot for quick comparison.

    photo 1.jpgphoto 5 (2).jpg

    All in all it looks pretty darn good, the big screen and clarity are great.

    It all started by taking out the old,

    photo 3.jpg

    and then removing the clock / hazard button. It took a little bit of time to get out so as to not break any of the clips or plastic around.

    photo 4.jpg

    once you get that out you remove the screws from the old unit holding the bracket on and use them to attach the supplied brackets on the new unit, and then screw in the face plate, and snap in the clock module.

    photo 1 (3).jpg

    From there the easy part is done, the rest is all about making sense of the rats nest of wires needed to hook everything up. Since i will be hooking up a sub, and am retaining the steering wheel controls it took 3 wiring harnesses, which is why space ended up being tight. The main harness contains most of the business pieces and is shown below with the parking brake delete mod installed.

    photo 1 (2).jpg

    The mod utilized the parking brake wire, the foot brake wire, amp remote wire, and ground. One of the things i was bummed about was that you don't retain the stock usb and stereo in functionality which is conveniently placed below the stereo next to the car power inputs. The supplied cables had to be routed over by the glove box. I elected to take them and tuck them up under the plastic along the center console and they come out near the passenger's seat. The head unit came with an ipod cable that will allow you to listen and charge (not all allow you to charge at the same time) which is nice. So far i haven't tested that functionality, however i can say that pandora over bluetooth works great.

    I used the supplied gps puck and put it back in the slot, just under the dash, on top of the air vents. It is hard to see in the picture but it is in the same hole as the head unit. I tested it this AM and it works just fine, sat acquisition was fast and accurate.

    photo 2 (3).jpg

    Next up we have the rats nest just before testing, and attempting to stuff everything up where it is supposed to go, followed by a function test.

    photo 2 (2).jpg
    photo 3 (2).jpg

    With all that mess out of the way it was time to put everything together and close up shop. I ran the mic back under the dash and up the drivers side pillar and it is currently mounted to the driver's visor. I'm not a big fan of visible mics, or things attached to the visor, due to whenever the ladies get in the car it is clockwork for them to flip the darn things all over the place destroying your abilities to keep everything straight and organized. The final with everything put back together and a comparison between the perfect fit bezel and the old head unit's plastic follow.

    photo 5 (2).jpg
    photo 5.jpg

    All in all it was a pretty straight forward process. Took me around two hours to complete. I already had the amp wires routed and wound up ready for install though.

    The remaining items as far as sound goes is deadening the back, building the box, installing the sub / amp, and it should be complete.

    photo 2.jpg
    photo 4 (2).jpg
     
  8. Oct 3, 2012 at 10:03 AM
    #8
    frollo

    frollo [OP] Member

    Joined:
    Jan 19, 2012
    Member:
    #70950
    Messages:
    23
    Gender:
    Male
    Dallas
    Vehicle:
    Tacoma 4x4 OR
  9. Oct 4, 2012 at 5:56 AM
    #9
    Mellow77

    Mellow77 New Member

    Joined:
    Sep 20, 2012
    Member:
    #87355
    Messages:
    2
    Gender:
    Male
    Coming along pretty quickly! I guess I should get my A back into town so I can at least say I helped with something. :D

    Bummer on the trim piece not matching but it looks pretty good and I really doubt anyone will notice. Besides, maybe from the passenger seat "YOU" will never notice! :p
     
  10. Oct 4, 2012 at 7:13 AM
    #10
    frollo

    frollo [OP] Member

    Joined:
    Jan 19, 2012
    Member:
    #70950
    Messages:
    23
    Gender:
    Male
    Dallas
    Vehicle:
    Tacoma 4x4 OR
    it is much closer now than it was before and it is bugging me less and less. I had previously contemplated removing the HU and tucking all the harnesses away and then trying to chineese hand it to put it all back together as to allow more room. Was thinking this may allow for more room and potentially mesh everything up easier. Who knows... i may give it a go whenever i do the mod to retain the factory aux in plugs.
     
  11. Oct 6, 2012 at 9:01 AM
    #11
    frollo

    frollo [OP] Member

    Joined:
    Jan 19, 2012
    Member:
    #70950
    Messages:
    23
    Gender:
    Male
    Dallas
    Vehicle:
    Tacoma 4x4 OR
    You can't really tell in the picture, but the nav didn't have a truck icon. I opted for the tank icon :).

    photo 2.jpg

    photo 1.jpg
     
  12. Oct 12, 2012 at 7:43 AM
    #12
    frollo

    frollo [OP] Member

    Joined:
    Jan 19, 2012
    Member:
    #70950
    Messages:
    23
    Gender:
    Male
    Dallas
    Vehicle:
    Tacoma 4x4 OR
    Made some progress on the box, and by progress i mean that (thanks to the assistance of mellow) it is finished! I can't say it is the cleanest install ever, or the best sounding since i'm no audio guy, not to mention this is the first box i have ever built, but it sounds great in the truck. I have it setup for quality not SPL so i have no idea how loud it will get. I do have a question for you guys though i have an alpine mrx-55 amp that will do 350W RMS 4 ohms or 550 into 2ohms. My sub is an alpine type-r 8" which is a dual coil 4+4 ohm. My question is how is that listed? 4+4=8 or 4+4=4? I have it currently wired in series (the coil) which is setup for an 8 so that i don't over drive the sub (550rms into a 350 max rms sub = bad), but if it truly is 4+4=4 i can run it parallel and be where i need to be use wise with the sub.

    All in all it sounds great. I mentioned previously that there is a bracket that the seat bracket cuts into the box space, and in order to accommodate it i had to cut a groove. From a wave guide mapping (ie optimum) box design this more or less defeats the purpose of going through such trouble. That said since i was already mostly done with the box, it didn't hurt to slap it together and see how it would turn out. All in all i think it sounds great. Not too boomy, not too much resonance, fits in the songs with a nice crisp thump. Plenty of juice to make its presence known if wanted. All this without cranking it in the HU or via the amp gain etc.

    I will have to install the amp under the seat and i'm in the process of wiring for that, plan to screw the amp into mdf, with the hook part of hook and loop on the bottom of the mdf to keep it from moving.

    anyway pix or it didn't happen...

    basic shell top and bottom, glued and screwed
    photo 1.jpg

    pic with end profile. Obviously a wedge design. 7" deep allows the sub overhang to fit once installed. Better idea of that will be shown later.
    photo 2.jpg

    This pic shows the port length / design. The cavity and opening will be flush with the top back and side. Aka the port opening is more or less a rectangle with one side that is the angle of the wedge.
    photo 3.jpg

    with top panel just sitting on the box to show where the sub will go in and how everything would be laid out.
    photo 5.jpg

    Here is the box sitting in place behind the seat. See how with the seat tipped back the sub lip is touching the back of the seat. This isn't an issue with the seat in the up position, and no rattling or buzzing occurs. Excuse the wood dust, this was taken in the testing phase :).
    photo 2(1).jpg
     
  13. Oct 13, 2012 at 7:19 AM
    #13
    frollo

    frollo [OP] Member

    Joined:
    Jan 19, 2012
    Member:
    #70950
    Messages:
    23
    Gender:
    Male
    Dallas
    Vehicle:
    Tacoma 4x4 OR
    After some research i found out that my amp will do 525 Wrms @ 2 ohm and 350 @ 4ohm. my dual voice coil sub is dual 4 ohm so i can wire them at 8 ohm or 2. Each voice coil will take 175W rms each for a total of 350W rms. So i currently have them wired in series at 8ohm which won't harm anything however will produce less than optimum output (but again not going for SPL). My options would be to either leave it as is and tune it, or wire the speakers in parallel and then de-gain the amp to not output more than 350w rms. I'm going to opt for not taking it back out of the truck and fiddling with it since it is fine where it is at, and under testing it sounded fine. I will still need to tune everything and crossovers etc, but so far it thumps just fine.
     
  14. Oct 15, 2012 at 10:00 AM
    #14
    frollo

    frollo [OP] Member

    Joined:
    Jan 19, 2012
    Member:
    #70950
    Messages:
    23
    Gender:
    Male
    Dallas
    Vehicle:
    Tacoma 4x4 OR
    Got everything squared away this weekend. Sub was finalized, amp installed, everything tuned and it works / sounds great! The sub is coming into it's own and straight up thumps. As part of this i wanted to not only finalize the sub install in the back, but redo the HU to do the aux plug mod, and see if i can get it to fit better.

    So first step is take the HU back out. I have attached pictures of the back and how it attaches. It does have tabs which i previously thought weren't there, so that is good as it will help hold everything in.

    photo 1.jpg
    photo 2.jpg

    Here is my modded stereo wire. Interestingly enough my plug had shielding, white, red, and blue wires. One would have thought red and white were right / left, and blue would have been ground, however it wasn't. White ended up being the ground, so i attached that to the shielding, and then connected the red / blue properly. everything tested out properly and was installed. I opted to not disassemble everything and i just reached my hand down behind the temp controls to pop out the plug. It came out without issue, and with in the same.
    photo 3.jpg


    Once i got everything all setup with the plug it was a matter of putting things back in place. This time around since i knew there were so many wires i had to deal with, i taped things up and out of way where possible. From there i plugged in the needed things and then magically everything slid perfectly into place. The bezel slid back flush where it was supposed to go, and the fit was in fact perfect :D.

    Here is the pic showing the plug in place and everything back installed
    photo 4.jpg

    Here is another view showing the lack of gap once installed.
    photo 5.jpg
     
  15. Mar 28, 2013 at 6:16 AM
    #15
    frollo

    frollo [OP] Member

    Joined:
    Jan 19, 2012
    Member:
    #70950
    Messages:
    23
    Gender:
    Male
    Dallas
    Vehicle:
    Tacoma 4x4 OR
    Installed a Pop and lock last night following the link below. It was a B to find the correct wires. I started out attempting to follow the instructions that came with it (pretty terrible), and then a youtube video of an install but i wasn't going to take apart my B pillar, instead i tapped the wire that fed the B pillar, still no go. Finally resorted to rerouting everything over to passenger side and used the pictures from the post. After some new terminals it worked!

    http://www.tacomaworld.com/forum/2n...l8521-power-tailgate-install-2012-tacoma.html
     

Products Discussed in

To Top