1. Welcome to Tacoma World!

    You are currently viewing as a guest! To get full-access, you need to register for a FREE account.

    As a registered member, you’ll be able to:
    • Participate in all Tacoma discussion topics
    • Communicate privately with other Tacoma owners from around the world
    • Post your own photos in our Members Gallery
    • Access all special features of the site

Vicali's 2005 TRD Sport, Daily Driver

Discussion in '2nd Gen. Builds (2005-2015)' started by vicali, Nov 16, 2012.

  1. Nov 16, 2012 at 9:25 PM
    #1
    vicali

    vicali [OP] Touch my camera through the fence

    Joined:
    May 20, 2010
    Member:
    #37503
    Messages:
    2,663
    Gender:
    Male
    First Name:
    mike
    Kam,BC
    Vehicle:
    2017 TRD Sport 1D6
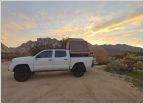
    Starting a build thread for our truck, We found it in September after searching for a few months. Looked at 2005-2009 used TRD Sports for the towing capacity..

    This one turned up in town and was well taken care of. One owner, from local dealership and all maintenance done there.

    UO page

    [​IMG]
     
    Last edited: Apr 30, 2015
  2. Nov 16, 2012 at 9:27 PM
    #2
    vicali

    vicali [OP] Touch my camera through the fence

    Joined:
    May 20, 2010
    Member:
    #37503
    Messages:
    2,663
    Gender:
    Male
    First Name:
    mike
    Kam,BC
    Vehicle:
    2017 TRD Sport 1D6
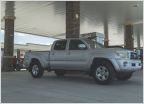
    First picture when we bought it;
    [​IMG]

    We bought it and took it on a family road trip a few hours later :D

    off to visit our inlaws and their 2006;
    [​IMG]
     
  3. Nov 16, 2012 at 9:31 PM
    #3
    vicali

    vicali [OP] Touch my camera through the fence

    Joined:
    May 20, 2010
    Member:
    #37503
    Messages:
    2,663
    Gender:
    Male
    First Name:
    mike
    Kam,BC
    Vehicle:
    2017 TRD Sport 1D6
    A couple quick and easy mods from TW;
    painted engine cover;
    [​IMG]
    and Fog light mod;
    [​IMG]
     
  4. Nov 16, 2012 at 9:38 PM
    #4
    vicali

    vicali [OP] Touch my camera through the fence

    Joined:
    May 20, 2010
    Member:
    #37503
    Messages:
    2,663
    Gender:
    Male
    First Name:
    mike
    Kam,BC
    Vehicle:
    2017 TRD Sport 1D6
    Headed on an early morning drive to pick up our new canopy;
    [​IMG]

    We ordered an Arrow Mark1 directly from the factory in Summerland, drove down on a saturday morning and met the owner of the company. He was in hanging out at the office and ended up doing our install;

    [​IMG]

    Ordered it with front sliders, kwik rails for a roof rack, and 60/40 sliders

    [​IMG]

    [​IMG]

    [​IMG]

    [​IMG]

    We're happy with it :D
     
  5. Nov 16, 2012 at 9:46 PM
    #5
    vicali

    vicali [OP] Touch my camera through the fence

    Joined:
    May 20, 2010
    Member:
    #37503
    Messages:
    2,663
    Gender:
    Male
    First Name:
    mike
    Kam,BC
    Vehicle:
    2017 TRD Sport 1D6
    A local member had a FS thread back in the spring here on TW for a Nfab lightbar, I pm'd and found that he still had it. He had traded his Tacoma in and didn't realise that the mounting brackets were still attached.

    After talking to Lance at NFab I was able to get some bracket shipped out and mounted it up with my 500FF lights off the rally car;

    [​IMG]

    They are wired inside/outside pairs triggered with the highbeams, switches in the dummy plugs on the dash and aimed to fill in the gaps in the stock lights.
     
  6. Nov 25, 2012 at 1:03 PM
    #6
    vicali

    vicali [OP] Touch my camera through the fence

    Joined:
    May 20, 2010
    Member:
    #37503
    Messages:
    2,663
    Gender:
    Male
    First Name:
    mike
    Kam,BC
    Vehicle:
    2017 TRD Sport 1D6
    Washed, cleaned, and weighed;

    [​IMG]

    [​IMG]

    [​IMG]

    2230kgs = 4916lbs
     
  7. Nov 25, 2012 at 10:19 PM
    #7
    OZ-T

    OZ-T You are going backwards

    Joined:
    Dec 15, 2009
    Member:
    #27584
    Messages:
    50,425
    Gender:
    Male
    First Name:
    Peter North
    British Columbia
    Vehicle:
    Mag Grey 09 Trd Sport DCLB 4x4
    OME 885x , OME shocks and Dakars , Wheelers SuperBumps front and rear , 275/70/17 Hankook ATm , OEM bed mat , Weathertech digifit floor liners , Weathertech in-channel vents , headache rack , Leer 100RCC commercial canopy , TRD bedside decals removed , Devil Horns by Andres , HomerTaco Satoshi
    Awesome :thumbsup:
     
  8. Nov 27, 2012 at 5:24 AM
    #8
    Glockman18

    Glockman18 Well-Known Member

    Joined:
    Aug 18, 2010
    Member:
    #262179
    Messages:
    171
    Gender:
    Male
    Vehicle:
    2018 Or
    How is your front shackle on your truck? Through the factory tow hook? Clean looking truck!!
     
  9. Nov 27, 2012 at 6:18 AM
    #9
    vicali

    vicali [OP] Touch my camera through the fence

    Joined:
    May 20, 2010
    Member:
    #37503
    Messages:
    2,663
    Gender:
    Male
    First Name:
    mike
    Kam,BC
    Vehicle:
    2017 TRD Sport 1D6
    The plan is for a front plate bumper at some point with proper recovery shackles. In the meantime I've hung a bow shackle from the front tie down point. I know it's not up for serious use, and wouldn't expect it to last very long if I was really stuck. Next will be to add a tow shackle out back.

    I volunteer at local rallies and it ends up being useful to have some kind of recovery points for the guys who go off.. :D
     
  10. Nov 27, 2012 at 8:07 AM
    #10
    Glockman18

    Glockman18 Well-Known Member

    Joined:
    Aug 18, 2010
    Member:
    #262179
    Messages:
    171
    Gender:
    Male
    Vehicle:
    2018 Or
    Plate bumper would be nice. One other question, your fog light mod. What is the fused end connected to? I did it that way too, except I just shoved the wire in and it came loose. Any way you can disconnect it and get a pic of it? Seems like a better way and safer being fused!
     
  11. Nov 27, 2012 at 8:38 AM
    #11
    vicali

    vicali [OP] Touch my camera through the fence

    Joined:
    May 20, 2010
    Member:
    #37503
    Messages:
    2,663
    Gender:
    Male
    First Name:
    mike
    Kam,BC
    Vehicle:
    2017 TRD Sport 1D6
    Here is exactly what I did;
    http://www.ct4wd.com/forum/showthread.php?1099-Fogs-always-on-Mod
    I wanted a clean mod that I could easily reverse if needed.

    I've also used this add-a-fuse method to trigger my driving light relays from the Highbeam fuse.
     
  12. Feb 7, 2013 at 8:10 AM
    #12
    vicali

    vicali [OP] Touch my camera through the fence

    Joined:
    May 20, 2010
    Member:
    #37503
    Messages:
    2,663
    Gender:
    Male
    First Name:
    mike
    Kam,BC
    Vehicle:
    2017 TRD Sport 1D6
    Looking around for storage solutions after losing the backseat to forward facing child seats, I came across the ammo box thread.

    A few weeks of searching kijiji turned up this;

    [​IMG]

    It's a WW2 Ammo box, labelled BSMS/c 1944 M152 I (interwebs says it carried mines during the war).

    With a few bolts through the back mounted to t-nuts slid in the track it sits secure, level, and the lid opens clear of the canopy;

    It's light, tough, removable, and will carry First Aid gear/ recovery gear/ fire extinguisher. Plus it can slide on the tracks if I need to fit things around it.
    It isn't shiny and new, but for 70 years old I can dig some patina.
     
    Last edited: Mar 14, 2013
  13. Mar 14, 2013 at 11:20 AM
    #13
    vicali

    vicali [OP] Touch my camera through the fence

    Joined:
    May 20, 2010
    Member:
    #37503
    Messages:
    2,663
    Gender:
    Male
    First Name:
    mike
    Kam,BC
    Vehicle:
    2017 TRD Sport 1D6
    Finished mounting up my gear, I used the DIY mount thread but added lifting eyes to give me four new tie-downs.

    Jackall mounts tight and doesn't budge or rattle (note: Hi-lift Handle Keeper will fit a Jackall with some trimming ;) )
    [​IMG]

    [​IMG]

    Shovel lives on opposite side;
    [​IMG]

    Ammo box for recovery gear centered at the front of the box,
    I'm not decided on this one, it might go over to the side as well;
    [​IMG]

    and all three;
    [​IMG]
     
  14. Apr 3, 2013 at 8:34 AM
    #14
    vicali

    vicali [OP] Touch my camera through the fence

    Joined:
    May 20, 2010
    Member:
    #37503
    Messages:
    2,663
    Gender:
    Male
    First Name:
    mike
    Kam,BC
    Vehicle:
    2017 TRD Sport 1D6
    Scangauge II installed and loving it.
    Here are the XGauges I've added so far;

    Transmission Fluid Temp in Deg C;
    TXD:07E021D9
    RXF:032180000000
    RXD:1810
    MTH:000700B4FE70
    Name:cTT

    Air Fuel Ratio (should be ~14.7);
    TXD:07DF0124
    RXF:044145240000
    RXD:2808
    MTH:05B900800000
    Name:A/F

    MAF;
    TXD:07E00110
    RXF:044145100000
    RXD:2810
    MTH:000100010000
    Name:MAF

    These are the Trip/Tank gauges I've added;

    Average L/100km Today;
    TXD:01
    RXF:8
    Name:ATd

    Average L/100km Tank;
    TXD:03
    RXF:8
    Name:ATk

    Distance to Empty;
    TXD:43
    RXF:8
    Name: D>E

    Time to Empty;
    TXD:63
    RXF:8
    Name:T>E

    Km today
    TXD:31
    RXF:8
    Name:KTd

    $ today;
    TXD:81
    RXF:8
    Name:$Td

    Here are some I've added but need to double check my codes for typos..

    Fuel Level %;
    TXD:07DF012F
    RXF:0441052F0000
    RXD:2808
    MTH:006400FF0000
    Name:FLv

    Oil Temp in Deg C;
    TXD:07E02101
    RXF:010702E80324
    RXD:3008
    MTH:00010001FFD8
    Name:OIL
     
    Last edited: Apr 3, 2013
  15. May 17, 2013 at 11:05 AM
    #15
    vicali

    vicali [OP] Touch my camera through the fence

    Joined:
    May 20, 2010
    Member:
    #37503
    Messages:
    2,663
    Gender:
    Male
    First Name:
    mike
    Kam,BC
    Vehicle:
    2017 TRD Sport 1D6
    Did a few pre-detail steps in the last few days,

    I painted the Sport Wheels;
    I liked the VHT Cast Iron paint that I've used previously on subaru wheels so I used it again, this time I used a satin clearcoat to seal them up though -the subaru wheels stained when it blew coolent on a stage.. The wheels were quite pitted before, and took some work with a couple of sanding flapwheels and a few hours of sanding to fix up before priming and painting.

    [​IMG]

    I also followed the Howto for restoring headlights, mine weren't terrible, but they do look a lot better.

    [​IMG]

    Next up is a full spring detail, so these are the dirty before pics.. :D
     
  16. May 19, 2013 at 1:54 AM
    #16
    krob32

    krob32 Well-Known Member

    Joined:
    Feb 18, 2012
    Member:
    #73075
    Messages:
    1,367
    Gender:
    Male
    First Name:
    Kelly
    Sierra Vista, AZ / Asheville, NC
    Vehicle:
    2012 MGM TRD Sport DCLB
    WeatherTec Digi Liners, AVS Bugflector II, TRD FJ SE Anthracite Rims, BF Goodrich AT KO2 265/75/16, AVS In-Channel Wind Deflectors, Extang Solid Fold, Pop & Lock, Color Match Grill Emblem (Anthracite), Plasti Dip Emblems, Tacoma Bed Mat, Tacoma Door Sill Protectors, ToyTec Ultimate Lift Kit, ICON UCAs, Wheeler's Progressive AAL, Wet Okoles, Sockmonkey 3rd Brake Light Cover, LED Hood/Bed Lighting w/ OTRATTW Switches, Famous Fabrication Sliders, Sockmonkey TRD Bed Decal, Proven Design 4x4 Mudflaps, BenWA's Rear Power Sliding Window, Jasper Off Road 6" Reverse LED Pod, ImMrYo Rear View Mirror Bracket, GrillCraft w/ Black Mesh and color matched Land Cruiser Emblem, LED Tail Lights, Badge Removal and Vinyl TRD/Tacoma Stickers, Bullaculla Trailer Harness Relocation.
    Nice truck. Haven't seen that ammo box before. I'll be looking around for one of those. DCLB FTW.
     
  17. May 30, 2013 at 6:30 PM
    #17
    almostheaven

    almostheaven Well-Known Member

    Joined:
    Feb 27, 2013
    Member:
    #98627
    Messages:
    79
    Gender:
    Male
    First Name:
    Sam
    Staunton, VA
    Vehicle:
    07 TRD Off-Road SR5
    Great build so far and in beautiful country to boot! Can't wait to get back to BC and explore some more. Sub'd!
     
  18. Jul 12, 2013 at 8:57 AM
    #18
    vicali

    vicali [OP] Touch my camera through the fence

    Joined:
    May 20, 2010
    Member:
    #37503
    Messages:
    2,663
    Gender:
    Male
    First Name:
    mike
    Kam,BC
    Vehicle:
    2017 TRD Sport 1D6
    Hardwired my Nuvi into the dash to get rid of the wires hanging everywhere.

    [​IMG]

    Using both of these threads as guides I added a 12v outlet behind the dash using an add-a-fuse and ran the power wires up behind the stereo and out the defrost vents at the center.

    No broken tabs and everything works; better than expected :D
     
  19. Oct 31, 2013 at 6:27 AM
    #19
    vicali

    vicali [OP] Touch my camera through the fence

    Joined:
    May 20, 2010
    Member:
    #37503
    Messages:
    2,663
    Gender:
    Male
    First Name:
    mike
    Kam,BC
    Vehicle:
    2017 TRD Sport 1D6
    Ordered a set of FJ Steelies for my winter wheels, painted them up and put them on now that the weather is turning.

    [​IMG]


    [​IMG]
     
  20. Jan 20, 2014 at 7:33 AM
    #20
    vicali

    vicali [OP] Touch my camera through the fence

    Joined:
    May 20, 2010
    Member:
    #37503
    Messages:
    2,663
    Gender:
    Male
    First Name:
    mike
    Kam,BC
    Vehicle:
    2017 TRD Sport 1D6
    After getting my HAM ticket back in august I finally spent a few hours putting my radio into the truck. I had ordered the FT-7900R plus the MLS-100 speaker and a Larson NMO 2/70 antenna from Gigaparts before the holidays, and they all arrived just in time for Christmas.

    I started by putting on the fender mount and antenna, and running the wires and coax through the firewall and into the cab.

    [​IMG]

    I considered putting it on switched 12v, but in the end I decided to follow the instructions (and advice!) to wire it directly to the battery.
    I was able to use the same grommet in the firewall that I used to wire my lights through, and put together a sheet of plexiglass with both the external speaker and the radio body to hang under the drivers seat;

    [​IMG]

    I was planning to mount the faceplate in the center cubby, or sticky taped right on the dash below the heater controls, but while I wired the base in I set the faceplate down in this spot and really liked how it looked;

    [​IMG]

    The remote wires run out around the front of the seat rail and then under the center trim.
    [​IMG]

    Only one hole was required to pass the remote cable through and it is completely covered by the faceplate. I pulled out the rubber liner from this pocket and if I ever pulled out the radio it would be completely stock looking.

    [​IMG]

    Now I need to figure out the local channels and repeaters, and get them programmed..

    I also managed to fit the truck in the garage.. with a few inches to spare. :D

    [​IMG]
     
    Last edited: Jan 20, 2014

Products Discussed in

To Top