

-
Welcome to Tacoma World!
You are currently viewing as a guest! To get full-access, you need to register for a FREE account.
As a registered member, you’ll be able to:- Participate in all Tacoma discussion topics
- Communicate privately with other Tacoma owners from around the world
- Post your own photos in our Members Gallery
- Access all special features of the site
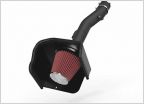 K&N 63-9037 Cold Air Intake
 Scan Gauge II
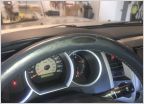 Replaced steering wheel wrap
 Lift Kit Question
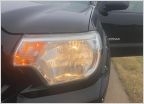 Anyone know part number for the small corner bulb on the headlight?
 Control Arm bolts
Raptor Satoshi Grill Write-Up w/ pics
Discussion in '2nd Gen. Tacomas (2005-2015)' started by Bennett4, Oct 25, 2013.
Page 1 of 2
Page 1 of 2


