1. Welcome to Tacoma World!

    You are currently viewing as a guest! To get full-access, you need to register for a FREE account.

    As a registered member, you’ll be able to:
    • Participate in all Tacoma discussion topics
    • Communicate privately with other Tacoma owners from around the world
    • Post your own photos in our Members Gallery
    • Access all special features of the site

How To: 2001 1st Gen Aftermarket CD Player Install

Discussion in 'Audio & Video' started by zacharypaul89, Nov 21, 2013.

  1. Nov 21, 2013 at 1:10 PM
    #1
    zacharypaul89

    zacharypaul89 [OP] Eat right, be fit, die anyway

    Joined:
    Sep 15, 2010
    Member:
    #43297
    Messages:
    12,569
    Gender:
    Male
    First Name:
    Zach
    Georgia
    Vehicle:
    2019 Quicksand Trd Offroad
    So I bought a new JVC CD/iPod deck to replace the stock cd/cassette unit in my 2001. I wanted to make this b/c I couldn't find any step-by-step instructions on here. So, here ya go:

    This is what I started with...stock Toyota CD/Cassette deck:

    Screenshot2013-11-21at25215PM_zpsae2697e_b615f579d42ce43c0a1874080a093f2d6810a6d8.jpg

    First, remove the negative battery terminal:

    Screenshot2013-11-21at25225PM_zps1c97541_f0e687ba25843cd8f3aebddf705e3f3f11226e6b.jpg

    Next, remove the 3 A/C Knobs. You just simply pull them off:

    Screenshot2013-11-21at25233PM_zps519084e_f4c1e01a9402e32ac3fe21643dcc5fa5e7d93471.jpg

    Next, pry off the backing with all the A/C info on it off. I did it with a pocket knife. It pops right off:

    Screenshot2013-11-21at25243PM_zps5212715_bbe7386b7890b1521aeb9badcf90496da8622d31.jpg

    There are 2 screws holding the black surround to the white A/C plastic. One on each side. I know you can't see from the picture, but remove those:

    Screenshot2013-11-21at25253PM_zps3db97ab_e600a1a560a1e38d47069dcb4e8451655ba21790.jpg

    Pull out the ash tray and the cigarette lighter:

    Screenshot2013-11-21at25309PM_zps1bcc845_706d3bca58bacc510887c6ed08b03db166e492a5.jpg

    Right below the air vents, grab on and pull out and down and the unit should pop out at the top. There are 5 pop-in spots that hold the black surround to the dash, so find all of them and pop them out. BE CAREFUL doing this because there are still wires from the dash connected to the black surround, so don't just try to pull it all the way out.

    Screenshot2013-11-21at25325PM_zpsd1fdd79_db009c94b00940f537a86e0a7d27ba07552af6bf.jpg

    Where you pulled the ashtray out, above that area is a screw holding the black surround into the dash. I know it's dark and hard to see, but there's one screw up there; remove it:

    Screenshot2013-11-21at25334PM_zpscd266a3_40a12379cb2925d94426e69cb2cc7336782e9772.jpg

    Disconnect the wire going to the cigarette lighter. It simply pulls right off:

    Screenshot2013-11-21at25353PM_zps06368ba_a6ac121ea4328d8d52795f01c3a273965d61ffe2.jpg

    Pull out the 2 connectors that go to the passenger airbag switch (that thing you put your key in to turn the passenger airbag on and off):

    Screenshot2013-11-21at25416PM_zpsa5eaa28_a1766ec20d8cee122f247db299b2c4c213a24a36.jpg

    Where you pulled the ashtray out, there should still be the housing for the ashtray connected to the black surround. Leave it in, but pull out the black wire; it is a baby light for the ashtray. Be sure not to break the bulb:

    Screenshot2013-11-21at25425PM_zps513ae23_871dad7d64f86cd2202e81278b9aa8e08d4af5cf.jpg

    There are 4 screws holding the stereo deck in place. Remove them. I think it was an 11mm socket:

    Screenshot2013-11-21at25456PM_zpsf080236_a489c48fe685f5ca8dd60de37ac859529487f30d.jpg

    Pull the radio out:

    Screenshot2013-11-21at25448PM_zps2577f41_951393db538592ec5afdd772daf8e8eae3bf4fc9.jpg

    Screenshot2013-11-21at25440PM_zps03e4e6f_780de6f06e4ba501a09926af7d7de5450a8440ba.jpg

    Disconnect the antenna wire:

    Screenshot2013-11-21at25502PM_zps520546e_62328800acbe97eb2a4ef9f01ffdb1cc903463ed.jpg

    Disconnect the speaker wires by pulling out the plastic clamp from the back of the radio:

    Screenshot2013-11-21at25523PM_zps482ee0c_1e646cdd403595434d120592aeea3d9bf621948a.jpg

    Everything important is out:

    Screenshot2013-11-21at25536PM_zps213a56e_f781af68ffff692b0427d88a65c63de481bd8024.jpg

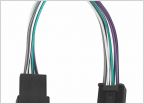
    If you're using a wiring harness, which i HIGHLY recommend, match all corresponding wires and splice them together:

    Screenshot2013-11-21at25544PM_zps0535e19_ecd013e1f187dba97301d8a56cf919f48fb1d313.jpg

    Close off the exposed wires. We don't want that truck catching on fire!

    Screenshot2013-11-21at25554PM_zps005a02c_3046051926a9c64483e715f38c0c1dce28b3224d.jpg

    These worked perfectly:

    Screenshot2013-11-21at25600PM_zps4ff3ce4_dd2f98c4bca6df5124f69ca027cdec5b34b0c5dc.jpg

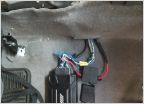
    Connect the wiring harness to the stock wires and connect the other end of the wiring harness to the back of your new unit:

    Screenshot2013-11-21at25619PM_zps5fc20ef_4f0e36ef1ab97fa4025ce00a3f33091cb64113ec.jpg

    Connect the antenna wire:

    Screenshot2013-11-21at25626PM_zps0cd9075_8d21cc9a21d354c9665d6e49f73e84b8ec1ce07b.jpg

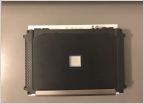
    Take off the metal brackets that connected your stock unit to the dash and mount it to the cd player surround that you should've bought with your new deck. I think all 1996-2004 Tacoma's use the same one:

    Screenshot2013-11-21at25634PM_zpsa58df26_2aee72d79041e2628e966ec3eba0b4b2e7aca353.jpg

    Screenshot2013-11-21at25639PM_zpsb4f8004_1afc78ccaba2299f67287af27825614d7766e91b.jpg

    Put together, the deck will mount on top of the handy new storage area you'll have in your dash:

    Screenshot2013-11-21at25646PM_zps43ea5b1_b76421f32f72e9ef936a96edeb9f13fdb06fb0bd.jpg

    Screenshot2013-11-21at25652PM_zpsef1e4cf_a508f948ed34709a5934068103ad8c4d4633f347.jpg

    Installed:

    Screenshot2013-11-21at25658PM_zps0012ddb_2513a641d3b538119fac17fcb8ab501ba14cd5ba.jpg

    Now, simply screw in the new unit just like you removed the old one:

    Screenshot2013-11-21at25707PM_zps773a792_35ccaf3122b646b542476a5be3288ff593d06df4.jpg

    Now, backtrack and connect back all the wires, pop your ashtray back in, connect the black dash surround (DON'T FORGET TO PUT THE SCREWS BACK IN), pop your A/C panel back on, and put the knobs back on and you're DONE!

    EDIT:

    Just so you know, if you get the surround from Best Buy, the little trim the surrounds the unit in these photos had to be removed for my install, as you can see in the final picture, below.

    Screenshot2013-11-21at25652PM_zpsef1e4cf_a508f948ed34709a5934068103ad8c4d4633f347.jpg

    Screenshot2013-11-21at25658PM_zps0012ddb_2513a641d3b538119fac17fcb8ab501ba14cd5ba.jpg

    Screenshot2013-11-21at25707PM_zps773a792_35ccaf3122b646b542476a5be3288ff593d06df4.jpg
     
    Last edited: Dec 4, 2013
    Bridge4 likes this.
  2. Nov 21, 2013 at 4:44 PM
    #2
    zacharypaul89

    zacharypaul89 [OP] Eat right, be fit, die anyway

    Joined:
    Sep 15, 2010
    Member:
    #43297
    Messages:
    12,569
    Gender:
    Male
    First Name:
    Zach
    Georgia
    Vehicle:
    2019 Quicksand Trd Offroad
    I got a message about the actual deck I put in and it's this one:

    http://www.bestbuy.com/site/cd-apple-174-ipod-174-ready-in-dash-deck-with-detachable-faceplate/7548041.p?id=1218851194852&skuId=7548041&st=categoryid$abcat0302012&cp=1&lp=1

    It's a JVC and it's got 4.6 out of 5 stars on Best Buy. The reason I got it was because of the high ratings, low price ($69.99), and b/c it has a USB port for my iPhone.

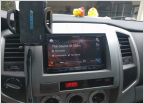
    The coolest feature I've found so far is that is tells what band and song you're listening to on the iPod and on the radio. It even says what station you're on: Instead of just saying, "97.1", it says, "97.1 The River" and it also tells you what song is on. I know that this ins't new technology, but from what I previously had in my truck, this unit is like the damn Starship Enterprise!
     
  3. Dec 2, 2013 at 3:20 PM
    #3
    SeekingZero

    SeekingZero Well-Known Member

    Joined:
    Sep 22, 2013
    Member:
    #113063
    Messages:
    577
    Gender:
    Male
    First Name:
    Ben
    Sierra Mountains, CA
    Vehicle:
    01 Xtracab 4x4 SR5 TRD Supercharged
    Thanks for the write up. I appreciate you taking the time to do this. It's always nice to see something done, even if its fairly simple, so that there aren't any surprises.

    Doing mine tonight.
     
  4. Dec 2, 2013 at 3:36 PM
    #4
    zacharypaul89

    zacharypaul89 [OP] Eat right, be fit, die anyway

    Joined:
    Sep 15, 2010
    Member:
    #43297
    Messages:
    12,569
    Gender:
    Male
    First Name:
    Zach
    Georgia
    Vehicle:
    2019 Quicksand Trd Offroad
    No problem! Good luck!
     
  5. Dec 2, 2013 at 7:45 PM
    #5
    Blizz191

    Blizz191 New Member

    Joined:
    Dec 2, 2013
    Member:
    #117771
    Messages:
    1
    Gender:
    Male
    Could you help me with what sleeve/surround you bought for for deck?
     
  6. Dec 3, 2013 at 7:47 AM
    #6
    zacharypaul89

    zacharypaul89 [OP] Eat right, be fit, die anyway

    Joined:
    Sep 15, 2010
    Member:
    #43297
    Messages:
    12,569
    Gender:
    Male
    First Name:
    Zach
    Georgia
    Vehicle:
    2019 Quicksand Trd Offroad
    Scoche. I got it at Best Buy. They should be able to look it up and get the one you need. The instructions said 1995-1998, I think, but it will work up to a 2004 I think...it worked for my 2001, but I couldn't fit the face plate surround on there. I didn't like it anyway
     
  7. Dec 4, 2013 at 8:47 AM
    #7
    Fuzzy Dustmite

    Fuzzy Dustmite Active Member

    Joined:
    Dec 3, 2013
    Member:
    #117805
    Messages:
    36
    Gender:
    Male
    First Name:
    Greg
    Mesa, AZ
    Vehicle:
    02 DLX Lunar Mist / Grey
    Just got my '02 this week and will be utilizing these instructions. Thanks! I looked at Crutchfield, and you can get the wiring harness, the surround and the head all at once from them (I've never ordered from them before). The "mechless" (no CD, just radio/ipod/usb/sd) head I am considering with the harness and surround came to about $115.
     
  8. Dec 4, 2013 at 9:13 AM
    #8
    meatman

    meatman I deal with dead animals

    Joined:
    Mar 24, 2011
    Member:
    #53630
    Messages:
    3,728
    Gender:
    Male
    First Name:
    Greg
    Murphy N.C.
    Vehicle:
    (built) 04 Tacoma SR5 4x4 and 01 TRD 4x4 DD
    If you go with Crutchfield they put installation instructions in the order also
     
  9. Dec 4, 2013 at 9:16 AM
    #9
    zacharypaul89

    zacharypaul89 [OP] Eat right, be fit, die anyway

    Joined:
    Sep 15, 2010
    Member:
    #43297
    Messages:
    12,569
    Gender:
    Male
    First Name:
    Zach
    Georgia
    Vehicle:
    2019 Quicksand Trd Offroad
    Just so you know, if you get the surround from Best Buy, the little trim the surrounds the unit in these photos had to be removed for my install, as you can see in the final picture, below.

    Screenshot2013-11-21at25652PM_zpsef1e4cf_a508f948ed34709a5934068103ad8c4d4633f347.jpg

    Screenshot2013-11-21at25658PM_zps0012ddb_2513a641d3b538119fac17fcb8ab501ba14cd5ba.jpg

    Screenshot2013-11-21at25707PM_zps773a792_35ccaf3122b646b542476a5be3288ff593d06df4.jpg
     
  10. Mar 23, 2014 at 9:27 PM
    #10
    Rubio92

    Rubio92 Well-Known Member

    Joined:
    Oct 14, 2012
    Member:
    #88981
    Messages:
    556
    Gender:
    Male
    First Name:
    Josh
    Bakersfield, CA
    Vehicle:
    '04 Prerunner IMPULSE RED
    Projector Retrofit in sig LED's galore inside and out Painted black stock alloys
    Sweet dude, thanks for the install and pics! I have $75 to use from my Pepboys rewards thing and an extra $10 off. I went today and priced some stuff out. The thing I'm probably going to have a problem with is the wiring harness. When I installed my sub to the factory radio, I used those quick connect things and had a hell of a time finding out which wire is which. I pulled up some diagrams online, but none of them seemed correct. Missing some wires, wrong places, different colors. When you had to splice the wires, how did you know what to splice where?
     
  11. Mar 24, 2014 at 5:38 AM
    #11
    zacharypaul89

    zacharypaul89 [OP] Eat right, be fit, die anyway

    Joined:
    Sep 15, 2010
    Member:
    #43297
    Messages:
    12,569
    Gender:
    Male
    First Name:
    Zach
    Georgia
    Vehicle:
    2019 Quicksand Trd Offroad
    I was worried about that too, but each wire in the wiring harness matches up to the same color wire from the truck perfectly.
     
  12. Mar 24, 2014 at 6:09 AM
    #12
    frizzman

    frizzman Well-Known Member

    Joined:
    Sep 25, 2013
    Member:
    #113212
    Messages:
    5,321
    Gender:
    Male
    Pittsburgh, PA
    Vehicle:
    04 XCab 4x4 TRD/OR
    OME 2.5,Tundra 17s,Falken Wildpeak AT3W hitch w/ 7-pin, ARE cap, JVC HU w/BT, HID/LED lights
    There is an extra "blue" wire from most aftermarket radios that is the power antenna wire (some now even have a dedicated "sub-woofer" wire), use this for the amp signal.

    I had bought everything for my '04 from Crutchfield and it all went together perfect. Wiring is not that bad when you get the supplied harness for the truck.
     
  13. Mar 30, 2014 at 8:38 PM
    #13
    2000TT

    2000TT Member

    Joined:
    Feb 27, 2014
    Member:
    #124172
    Messages:
    5
    Gender:
    Male
    zacharypaul89,
    Thank you for this great step by step install review! I just installed my stereo and it work out great!
     
  14. Mar 30, 2014 at 9:16 PM
    #14
    Rubio92

    Rubio92 Well-Known Member

    Joined:
    Oct 14, 2012
    Member:
    #88981
    Messages:
    556
    Gender:
    Male
    First Name:
    Josh
    Bakersfield, CA
    Vehicle:
    '04 Prerunner IMPULSE RED
    Projector Retrofit in sig LED's galore inside and out Painted black stock alloys
    You wouldn't by any chance have the part number for the specific wiring harness you bought would you? :pray:
     
  15. Mar 31, 2014 at 5:34 AM
    #15
    zacharypaul89

    zacharypaul89 [OP] Eat right, be fit, die anyway

    Joined:
    Sep 15, 2010
    Member:
    #43297
    Messages:
    12,569
    Gender:
    Male
    First Name:
    Zach
    Georgia
    Vehicle:
    2019 Quicksand Trd Offroad
  16. Mar 31, 2014 at 4:05 PM
    #16
    Rubio92

    Rubio92 Well-Known Member

    Joined:
    Oct 14, 2012
    Member:
    #88981
    Messages:
    556
    Gender:
    Male
    First Name:
    Josh
    Bakersfield, CA
    Vehicle:
    '04 Prerunner IMPULSE RED
    Projector Retrofit in sig LED's galore inside and out Painted black stock alloys
  17. May 23, 2014 at 3:47 PM
    #17
    Bren

    Bren Well-Known Member

    Joined:
    Nov 16, 2013
    Member:
    #116709
    Messages:
    269
    Gender:
    Male
    CT
    Vehicle:
    01 Tacoma SR5 V6
    I can't seem to find a specific dash install kit for my 2001 tacoma. Do you remember which one you bought? Also did you need an antenna extender? Thanks.
     
  18. May 24, 2014 at 6:38 AM
    #18
    zacharypaul89

    zacharypaul89 [OP] Eat right, be fit, die anyway

    Joined:
    Sep 15, 2010
    Member:
    #43297
    Messages:
    12,569
    Gender:
    Male
    First Name:
    Zach
    Georgia
    Vehicle:
    2019 Quicksand Trd Offroad
    From what I remember, the dash kit fits a bunch of different Toyota makes from around the 90's to the mid-2000's. I got mine at Best Buy. No need for an antenna extender
     
  19. May 24, 2014 at 7:58 PM
    #19
    Bren

    Bren Well-Known Member

    Joined:
    Nov 16, 2013
    Member:
    #116709
    Messages:
    269
    Gender:
    Male
    CT
    Vehicle:
    01 Tacoma SR5 V6
    Thanks. I ended up finding a scosche combo with the dash kit and wire harness for $8 shipped on ebay. I got a great deal at best buy for an alpine unit for $60 shipped.
     
    This site contains affiliate links for which the site may be compensated.
    #19
  20. Jun 15, 2015 at 6:36 AM
    #20
    zacharypaul89

    zacharypaul89 [OP] Eat right, be fit, die anyway

    Joined:
    Sep 15, 2010
    Member:
    #43297
    Messages:
    12,569
    Gender:
    Male
    First Name:
    Zach
    Georgia
    Vehicle:
    2019 Quicksand Trd Offroad
    Forewarning: I just took out my cd player and put it into my new 2003 and, after installing it, my truck wouldn't idle without choking out and eventually dying. Naturally, I freaked the f**k out, but did a quick TW search and found out that, when disconnecting the battery, the ECU restarts and it takes a few days for it to adjust, so don't fear if you're truck acts crazy after installing your new cd player.
     

Products Discussed in

To Top