1. Welcome to Tacoma World!

    You are currently viewing as a guest! To get full-access, you need to register for a FREE account.

    As a registered member, you’ll be able to:
    • Participate in all Tacoma discussion topics
    • Communicate privately with other Tacoma owners from around the world
    • Post your own photos in our Members Gallery
    • Access all special features of the site

My LED Bed Lights

Discussion in '2nd Gen. Tacomas (2005-2015)' started by DolphinJohn, Feb 13, 2014.

  1. Feb 13, 2014 at 3:57 PM
    #1
    DolphinJohn

    DolphinJohn [OP] Well-Known Member

    Joined:
    Aug 2, 2012
    Member:
    #83954
    Messages:
    351
    Gender:
    Male
    Nature Coast, FL
    Vehicle:
    '13 Access Cab 4x4 SR5
    I've been wanting to light my bed somehow but don't really want to cut my truck to do a third brake light/cargo light mod.
    I came across a couple good write ups here so decided to do an LED strip with the switch in the dash.
    Got all the supplies, switch from OTRATTW, LED is a 5 meter spool of 5050, 60 light per meter from Yorktek on eBay.
    gu5uqepe_db6e36af71686aa54776d57646e178339b79a56d.jpg

    Took the kick plate and floor trim pieces off, starting with the footrest.
    6e6ahy6e_13b0858e788e3f8ab373f45a93836276e97aaea6.jpg
    The red cable is for my amp and sub.

    The switch blank came out real easy by starting a screw through the middle then pulling straight out.
    It did need to be trimmed out a bit with a dremel for the switch to fit.
    yhadunu8_5b1732cbee3938d4387bfe57573e2fd5ef061d45.jpg

    We ran the power wire through the existing grommet.
    ru7aju4a_81269b80860403550305ac4f18c3fc29d3449225.jpg

    We ran it out through the rail, took out the bed cubby for easy access and ran the ground to the body behind the cubby.
    uny3a4uz_5d6d21675f03f20261ea6da4711e067a8e0a291a.jpg
    ytupepah_3802d52e1aa4efd1c956ddbb1b972b5c3d4959b5.jpg
    qu7etu4y_312d2aea694675d25a669d6e1d80269d93473362.jpg

    My friend Steve is good with wiring.
    urazehuh_820632d32eaf8731edfab006d8c614184bcb92d1.jpg

    to be cont.

    ,
     
    This site contains affiliate links for which the site may be compensated.
    #1
  2. Feb 13, 2014 at 4:04 PM
    #2
    DolphinJohn

    DolphinJohn [OP] Well-Known Member

    Joined:
    Aug 2, 2012
    Member:
    #83954
    Messages:
    351
    Gender:
    Male
    Nature Coast, FL
    Vehicle:
    '13 Access Cab 4x4 SR5
    We ran the wires out and down one of the drain holes for a nice neat look.
    ajypebuv_b2355adb5edd72b27cedeb6c90e7b2d9598adfc6.jpg

    Used some dielectric grease, shrink tubing and a small torch to seal it up good.
    a2ysabad_6d2b83ad81286235fde6877b0f400282eecbfda5.jpg
    ujyneby8_6bc32ef74bf69695d9e8b16f21f0419214a0a528.jpg
    ymupy2um_487561cd99be8bd1d03bc5448b9eb238427ceb25.jpg
    hagype5u_a13f6305ae973c5203abc17851424412950023b2.jpg

    cont.

    .
     
  3. Feb 13, 2014 at 4:11 PM
    #3
    DolphinJohn

    DolphinJohn [OP] Well-Known Member

    Joined:
    Aug 2, 2012
    Member:
    #83954
    Messages:
    351
    Gender:
    Male
    Nature Coast, FL
    Vehicle:
    '13 Access Cab 4x4 SR5
    I washed, dried, and then wiped the underside of the rails with alcohol
    y7asaga9_7bc70d98e7e67d1884fa01189e6c3c4d8577b161.jpg

    Got the switch wired up and installed.
    8ejatu5e_734ba802984c055943d4fa20995a143e142610f1.jpg

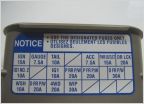
    We used an add-a-circuit and put it in the door lock fuse slot for use without the key on.

    Stuck the strip on and that's pretty much it.

    uquqahe3_81d9b819f972d25d47a0f03f6866a12083776fbd.jpg
    2a5e8a4e_11508356f3dc9da75cd7c1b4ca6ff35f0f9c0c1a.jpg
    egagetan_58609e083d855187d9a169929da1472e72e893f6.jpg
    5u9e8ary_ff095ed91f2da1e9c3912d873e15439dcb6b1d12.jpg

    .
     
  4. Feb 13, 2014 at 4:16 PM
    #4
    DolphinJohn

    DolphinJohn [OP] Well-Known Member

    Joined:
    Aug 2, 2012
    Member:
    #83954
    Messages:
    351
    Gender:
    Male
    Nature Coast, FL
    Vehicle:
    '13 Access Cab 4x4 SR5
    I used plastic flexible conduit in the corners.
    The 3M adhesive didn't want to stick very well at the corners so I got some heavy duty double-sided tape and it seems to be sticking well now.

    ba8y3y7a_d75a0a1b9d8d2acdd35fb924e74fbe73ee241a36.jpg
    zyqeseda_eb68f6ba193370be2daa5dd69e4dc371d006fa8a.jpg
    su5e3uza_cfe4104062f29e752397eafba789eeadd89fc280.jpg
    3ydaty4a_5f768e99505057e28f21517706f72a39cb972e38.jpg

    .
     
  5. Feb 13, 2014 at 4:25 PM
    #5
    Kidlatj

    Kidlatj Member

    Joined:
    Jul 22, 2013
    Member:
    #108803
    Messages:
    14
    Gender:
    Male
    Vegas
    Vehicle:
    11' TRD 4x4 Off Road Double Cab
    Inverter mod Toytec Ultimate 3" lift 285/75 General Grabber AT2's
    Looks great, -love the light output. Is there a way to make those LED 'stickers' weather resistant?
     
  6. Feb 13, 2014 at 4:27 PM
    #6
    TRSAndrew

    TRSAndrew Well-Known Member Vendor

    Joined:
    Jan 3, 2012
    Member:
    #69858
    Messages:
    3,258
    Gender:
    Male
    ATL
    Vehicle:
    22 T4R Sport 6V7
    I'm going to do something similar with Nichia LEDs. Any tips for mounting other than what you mentioned previously?
     
  7. Feb 13, 2014 at 4:27 PM
    #7
    DolphinJohn

    DolphinJohn [OP] Well-Known Member

    Joined:
    Aug 2, 2012
    Member:
    #83954
    Messages:
    351
    Gender:
    Male
    Nature Coast, FL
    Vehicle:
    '13 Access Cab 4x4 SR5

    Maybe Gorilla Glue?

    I'll see how they hold up. I saw on someone else's thread that they had the strips with 3M adhesive and they've been on his truck for two years....

    The LED's themselves are waterproof, it's just the adhesive that might be an issue.

    .
     
  8. Feb 13, 2014 at 4:29 PM
    #8
    DolphinJohn

    DolphinJohn [OP] Well-Known Member

    Joined:
    Aug 2, 2012
    Member:
    #83954
    Messages:
    351
    Gender:
    Male
    Nature Coast, FL
    Vehicle:
    '13 Access Cab 4x4 SR5

    Not that I can think of right now. If any issues arise I'll update.

    .
     
  9. Feb 13, 2014 at 5:24 PM
    #9
    InTheRough

    InTheRough Well-Known Member

    Joined:
    Jan 29, 2013
    Member:
    #96438
    Messages:
    3,001
    Gender:
    Male
    First Name:
    Kolt
    Gig Harbor, WA
    Vehicle:
    '20 Tundra Platinum
    Rock Warrior wheels
    Do you have any specifics on cutting and splicing the strip? I am thinking about doing this also but have never cut and spliced this type of LED strip before. Was 5 meters enough?
     
  10. Feb 13, 2014 at 6:53 PM
    #10
    DolphinJohn

    DolphinJohn [OP] Well-Known Member

    Joined:
    Aug 2, 2012
    Member:
    #83954
    Messages:
    351
    Gender:
    Male
    Nature Coast, FL
    Vehicle:
    '13 Access Cab 4x4 SR5

    5 meters was perfect, had about a foot to cut off.

    I left it in one strip, covering the exposed corner areas with the plastic conduit, so I only had to cut once, the leftover foot. Didn't have to do any splicing that way. I've seen others that cut three separate strips and spliced wire in for the corners. I wasn't that ambitious.

    I just wrapped the cut end with electrical tape for now but will probably put a dab of silicone on there to make sure it is sealed.

    .
     
  11. Feb 13, 2014 at 7:19 PM
    #11
    AZDesertTRD

    AZDesertTRD Well-Known Member

    Joined:
    Apr 30, 2012
    Member:
    #77969
    Messages:
    302
    Gender:
    Female
    First Name:
    Pamela
    Arizona
    Vehicle:
    2012 PreRunner Sport
    Nice job! :thumbsup: Looks clean! Nice write up too!
     
  12. Feb 13, 2014 at 10:04 PM
    #12
    thebaker

    thebaker Well-Known Member

    Joined:
    Feb 14, 2009
    Member:
    #13597
    Messages:
    2,473
    Gender:
    Male
    First Name:
    Byron
    NorCal
    Vehicle:
    Upgraded to a 3rd gen
    Never ending......$$$
    Sub'd for future reference
     
  13. Feb 14, 2014 at 6:51 AM
    #13
    InTheRough

    InTheRough Well-Known Member

    Joined:
    Jan 29, 2013
    Member:
    #96438
    Messages:
    3,001
    Gender:
    Male
    First Name:
    Kolt
    Gig Harbor, WA
    Vehicle:
    '20 Tundra Platinum
    Rock Warrior wheels
    I just ordered a set. I already have the wiring in place for my canopy LEDs so this should be easy. Depending on how these turn out I may just replace my canopy LEDs too. Thanks again.
     
  14. Feb 14, 2014 at 6:52 AM
    #14
    Yakoma

    Yakoma Well-Known Member

    Joined:
    Jan 24, 2014
    Member:
    #121350
    Messages:
    496
    Gender:
    Male
    First Name:
    Randy
    ATL-ish
    Vehicle:
    '14 DCSB TRD Sport 4x4 - White
    Black APS Bull Bar Black Westin Step Bars Black ARE camper top with Yakima J-cradles (replaced Roll-X Tonneau) Black AMP HD Bed Extender
    Well done, John & Steve...(I couldn't find the smiley doing the golf clap so you get this trio of dancing tacos instead)...:taco::taco::taco:

    Question for you...what do you figure this cost in parts and how much time did it take you (ballpark)?

    Cheers.
    Randy
     
  15. Feb 14, 2014 at 9:17 AM
    #15
    DolphinJohn

    DolphinJohn [OP] Well-Known Member

    Joined:
    Aug 2, 2012
    Member:
    #83954
    Messages:
    351
    Gender:
    Male
    Nature Coast, FL
    Vehicle:
    '13 Access Cab 4x4 SR5

    The LED strip I used was $15.96 with free shipping from eBay.
    http://www.ebay.com/itm/White-Water...379326?pt=US_Car_Lighting&hash=item2a2780ce7e

    The adhesive backing is 3M but it's not sticking very well. It may be my fault for not really cleaning the underside of the rails thoroughly enough.
    I'm going to have to either glue it or do it all with double sided tape.

    The switch is from http://otrattw.com/

    It was $18.50 shipped.
    It said on the site when ordering you can change the text on the switch, I wanted it to say "BED LIGHTS" but they didn't change it. Not a big deal

    The fuse tap I got from Advance Auto locally for $7.
    The ATM fits in our fusebox but our fuses are low profile so the 20 amp I pulled from the door lock slot would not fit in the slots on top of the fuse tap. Fortunately I had bought some 10 amp ATM fuses so I put two of those in the two slots on the fuse tap. Hope that's not confusing.

    I bought a 40 foot spool of 18 gauge wire for around 7 or 8 bucks.

    I (Steve) already had the connectors, shrink wrap tubing, and torch.

    Also had the dielectric grease, zip ties, etc.

    Oh, the plastic conduit was under $10, I only used a few inches on each corner.

    It took the two of us around 2 hours.

    Also, don't forget to disconnect your battery before you do anything. You wouldn't want to accidentally short something out.

    .
     
    This site contains affiliate links for which the site may be compensated.
    #15
  16. Feb 17, 2014 at 9:17 AM
    #16
    Oregon TRD

    Oregon TRD "GO DUCKS" Edition

    Joined:
    Oct 16, 2007
    Member:
    #3081
    Messages:
    15,316
    Gender:
    Male
    First Name:
    Ross
    Steel Panthers bathroom floor!
    Vehicle:
    2005 Mall Krawler
    6" Fabtech Lift, 35" Fierce M/T 17" Eagle Alloy Sim bead locks Naked girls in the bed 10.1" DVD head unit Two 7" Headrest Monitors PS2 in glove box
    After a couple years of washing it, then summer heat, then winter rain cold n snow, etc.......the 3m backing came off and my lights started sagging.

    I ripped them down and cleaned underneath of railing and put a new strip on. Took 15 minutes and it's back to amazing again.

    [​IMG]

    [​IMG]
     
  17. Feb 17, 2014 at 6:54 PM
    #17
    ericf

    ericf Well-Known Member

    Joined:
    Jan 7, 2013
    Member:
    #94698
    Messages:
    95
    Gender:
    Male
    First Name:
    Eric
    Texas Gulf Coast, Houston
    Vehicle:
    2020 TRD offroad 4x4 silver sky.
    lomax tonneau, amp bed extender , bed rug
    My LED strips came with a 3M tape that held for about two hours then began to release (yes I cleaned the rails). I took the time to remove the residue from the light strip and then applied a good hot glue to the back of the lights. Since I couldn't effectively be fast enough to place them back onto the bottom of the rail before the glue cooled, I used a Harbor Freight heat gun to heat the rails, allowing me to position light strip with the glue melting to the rail. It seems to be holding extremely well. However, those rails do get awful hot with that heat gun. But no complaints.
    Not hot "hobby" glue. a good glue from the depot or lowes (450*)
     

Products Discussed in

To Top