1. Welcome to Tacoma World!

    You are currently viewing as a guest! To get full-access, you need to register for a FREE account.

    As a registered member, you’ll be able to:
    • Participate in all Tacoma discussion topics
    • Communicate privately with other Tacoma owners from around the world
    • Post your own photos in our Members Gallery
    • Access all special features of the site

Line X'd Bushwackers Installed (with pics and a fix for loose fit)

Discussion in '2nd Gen. Tacomas (2005-2015)' started by Punintentional, May 28, 2014.

  1. May 28, 2014 at 7:58 PM
    #1
    Punintentional

    Punintentional [OP] Well-Known Member

    Joined:
    Aug 31, 2013
    Member:
    #111588
    Messages:
    99
    Gender:
    Male
    First Name:
    Josh
    Northern California
    Vehicle:
    2013 TRD Off Road Double Cab
    -265/70/16 on 16" Worx 803 Beast. -Pocketed fender flares with Linex. -Relentless Fabrication front and rear bumpers with Linex. -Smittybuilt 9k lb winch -Relentless Fab sliders -Weathertech mats -Wet Okoles -Icon Stage 1 front and rear -Icon AAL -SPC LR UCAs
    Bought em. Had a local Line X shop encapsulate them (less than $200). Installed them myself. Wasn't happy with how they felt loose and flapped at the top. Solutions:

    1. Front Flares: On my 2013, the holes in the flares lined up with the factory fender flare holes. I replaced all the hardware with 1/4" X 1.25" stainless hex heads. Those were long enough to reach the inside of the fender. I used a flat washer on the outside of the flare, a 5/16" spacer nut and 1/4" fender washer (in that order) between the flare and fender, and then a fender washer, lock nut, and nut on the inside of the fender to secure the bolts nicely (it was a bit of a pain reaching some of the inner fender spaces, but it's doable). The result is rock solid. No screws or clips used or needed on the bottom side of the flare.

    Rear Flares: The factory fender holes only line up with the flare holes at the front and rear of the flare (very easy access on these 2 for the rear flares), leaving everything between loose. A local shop drilled new holes in my fenders to match the flare hole locations. I had them seal the holes with a rust barrier and install a nut set in each hole, allowing me to screw my 1/4" bolt right into the nut set. I still used the 5/16" spacer nut and fender washer between the flare and the fender. I only asked for 2 nut sets, but you could do one for each hole. 2 seems plenty to make the flare solid.

    * Didn't try nut sets on the front flares. If you have the skill/desire, you might use nut sets all around. If not, the fix I used works fine.

    * Pay close attention to your rubber stripping when tightening your bolts. Keep it aligned properly.

    * I painted some of the bolts. Still need to paint the rest.

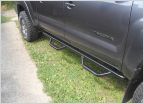
    Here's the hardware I used and the results:

    20140527_181543.jpg
    20140527_181641.jpg
    20140527_135743.jpg
    20140527_135747.jpg
    20140527_193303.jpg
    20140527_193317.jpg
    20140527_193342.jpg
     
    lo2hi likes this.
  2. May 28, 2014 at 8:07 PM
    #2
    zmonzter

    zmonzter Member

    Joined:
    Apr 21, 2014
    Member:
    #128163
    Messages:
    12
    Gender:
    Male
    Very nice!
     
  3. May 28, 2014 at 8:17 PM
    #3
    wgreenlee1021

    wgreenlee1021 Off the Meds Again...

    Joined:
    Apr 23, 2014
    Member:
    #128340
    Messages:
    571
    Gender:
    Male
    Lookin' good!:thumbsup:
     

Products Discussed in

To Top