

-
Welcome to Tacoma World!
You are currently viewing as a guest! To get full-access, you need to register for a FREE account.
As a registered member, you’ll be able to:- Participate in all Tacoma discussion topics
- Communicate privately with other Tacoma owners from around the world
- Post your own photos in our Members Gallery
- Access all special features of the site
 New rims decision help
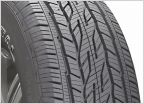 265/70r17 all season tires
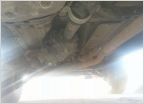 Went to Fluid Film my frame and noticed...
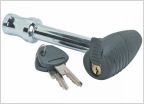 Recommendations for a locking hitch pin
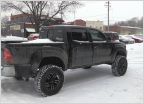 Exhaust........
 Need shock help
Rigid Duallys in stock fog light location - all done..
Discussion in '2nd Gen. Tacomas (2005-2015)' started by ChiefManyWrenches, Jul 24, 2014.
Page 1 of 3
Page 1 of 3


