

-
Welcome to Tacoma World!
You are currently viewing as a guest! To get full-access, you need to register for a FREE account.
As a registered member, you’ll be able to:- Participate in all Tacoma discussion topics
- Communicate privately with other Tacoma owners from around the world
- Post your own photos in our Members Gallery
- Access all special features of the site
 Installation/upgrade to navigation in a base model reg. cab
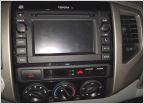 New Joying 7" Android Head Unit JY-UM128P2 Octacore 2GB/32GB
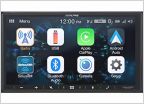 Radio constant power wire size
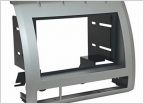 Toyota Tacoma double din dash kit
 Looking for some help
 Door Speaker Upgrade
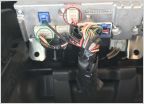
**2005+ Tacoma Double Cab Complete Audio Install Tutorial**
Discussion in 'Audio & Video' started by Mr Marv, Oct 11, 2008.
Page 1 of 10
Page 1 of 10


