

-
Welcome to Tacoma World!
You are currently viewing as a guest! To get full-access, you need to register for a FREE account.
As a registered member, you’ll be able to:- Participate in all Tacoma discussion topics
- Communicate privately with other Tacoma owners from around the world
- Post your own photos in our Members Gallery
- Access all special features of the site
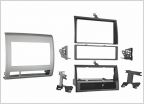 Please help---cannot find dash kit
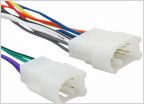 Pioneer AVIC 920bt Install Questions
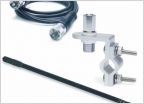 HELP with cb radio needed
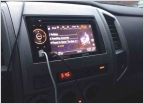 BEST IN-DASH UNDER 250
 The elusive jbl amp wiring diagram
 New Joying Android Unit
CB Radio (Cobra 29) Mod & Mount in Center Console
Discussion in 'Audio & Video' started by DDD, Aug 25, 2009.
Page 1 of 6
Page 1 of 6


