1. Welcome to Tacoma World!

    You are currently viewing as a guest! To get full-access, you need to register for a FREE account.

    As a registered member, you’ll be able to:
    • Participate in all Tacoma discussion topics
    • Communicate privately with other Tacoma owners from around the world
    • Post your own photos in our Members Gallery
    • Access all special features of the site

Yaesu FT-8800R Install on 05+ Tacoma

Discussion in 'Audio & Video' started by barlowrs, Feb 14, 2010.

  1. Feb 14, 2010 at 2:10 AM
    #1
    barlowrs

    barlowrs [OP] Well-Known Member

    Joined:
    Feb 12, 2010
    Member:
    #31230
    Messages:
    612
    Gender:
    Male
    First Name:
    Robert
    So Cal
    Vehicle:
    06 Toyota Tacoma Sport 4x4
    Build Thread: http://www.tacomaworld.com/forum/builds/74926-barlowrs-06-taco-expo-build-thread.html OME Lift, FJ SE Wheels, 255/85 KM2, Allpro Plate Bumper, 8K Winch, Synthetic Line, Yaesu FT-8800R, Custom Sliders Sockmonkey bedside decals, BHLM, base model grille, TRD offroad (black) trim
    Well it is time to tackle communications, and what better to reach out and touch someone than a FT-8800?

    The following are the parts I am using:

    Yaesu FT-8800R
    Yaesu YSK-8900 (Remote mounting kit)
    Diamond NR770HB Antenna
    Cheap HRO $12.00 external speaker

    The location I chose to install the radio is underneath the driver’s seat. This was the easiest part of my install, so I will not get into much detail on this. Just run the wires, mount it and you’re good to go.

    IMG_1954_2e55d98c927830782347cc61fc18791e9c87c0b1.jpg

    The head unit was a bit more difficult. First of all, I want to give credit to Wil for the idea on this install. Because I like having things look as stock as I can and clean as I can, I decided to recess the head unit into the headliner.

    To do this, I first had to remove the headliner (meaning I had to take out practically every piece of plastic from the truck!)

    IMG_1941_06db2ba902f556c696ad2293fab4288e76c65a85.jpg

    In order to secure the head unit, I made a bracket out of some 18 gage stainless steel. This bracket spans the hole I will cut and has tabs that match the angle of the ceiling of my truck. This SHOULD secure the radio (I hope).

    IMG_1940_c13299bb8a242978c99e67a4b41af5c4dff6da18.jpg
    IMG_1946_c14354ce92025729b35754b6c702a973b5179ab7.jpg

    Next was to cut a the hole….MEASURE FOUR TIMES CUT ONCE

    IMG_1944_47cb261e75b10f9de17773c8f0d1b5cfecbf90c6.jpg

    …..we have reached the point of no return.

    I cut the hole slightly small, and then used a very high temp heat gun to heat up the headliner and mold it up. Then I used spray adhesive and rolled the grey lining around so you wouldn’t see the white crap on top.

    IMG_1945_0b5abccc02162aabe8a433b433ec0e8ae1e07029.jpg

    I then used some 2 part epoxy to glue the bracket to the headliner and then fibreglasses over it just to be safe (the bracket is also sandwiched between the roof of the cab and headliner when installed, so it shouldn’t go anywhere)

    And here is with all the wires routed.

    IMG_1957_91db0fc33d5f6c7e2f204eb69e1d2d4837ca1346.jpg

    You will notice that there are two wires coming from it, and the remote kit only has one. This is because I also wanted to relocate the hand control. I did not want to have it dangling from my roof, so one wire is from the radio to the head unit, and the other is from the head unit to the hand control.

    And here is the head unit when everything is put back together:

    IMG_1960_8966e0280243cc8fdc645ad47ec9985090214dc4.jpg
    IMG_1961_b495211851a0e814f12ae01d1a02fa45ae598815.jpg

    Next up, installing the hand control and external speaker.


    Yaesu FT-8800R Remote and External Speaker Install on 05+ Tacoma

    Because I never like to leave things the way they come and have an obsession with making installs harder than they need to be, I decided I didn’t want to just mount the speaker; I wanted to try to conceal it and make it look as if it came from the factory that way.

    To do this I decided to try to recess the speaker so that the grill was all that was showing and so that it was flush with the rest of the interior panels. I chose the center consol around my shifter. This gives it a low and discrete location, as well as allowing me to do one speaker per side (one for HAM and one for CB if I get one).

    First step was to CUT A HOLE…..once again, measure MANY times, then cut.

    IMG_1948_b0ca23ade1b0f3604dc1d3089e057ff87c5a02ff.jpg

    Then it was a lot of filing and exacto knifing to get it to fit. Once I got the hole cut. I took the bracket that came with the speaker and cut it in half. This allowed me to flip it upside-down and use it to mount the speaker flush.

    IMG_1953_28ca38fd3fef3d3345a07def8036c8946bd1767f.jpg

    Once again, some 2 part epoxy and some fiberglass to be safe and here is the result:

    IMG_1949_af5fbb1873a7ec227512e0a9dc04dd106a58ee20.jpg
    IMG_1956_819ee70c9411c630c67dde7b7ad6aabb96296e6e.jpg

    I also decided to make a quick disconnect for the hand controller. This will allow me to disconnect it when not in use so I do not have a cord and stuff laying around.

    To do this I got a simple 6 pin comm. Connection (female-female). I machined a bracket out of some aluminum so that I have a large flange and surface to glue and expoy too.

    IMG_1861-1_ad5a94d141ad4ec702c3beaeeb3433763160d8bf.jpg

    Then all that was left was to cut a hole, epoxy and fiberglass into place.

    And here is the remote plug location and the speaker.

    IMG_1955_6eba69a782aad91c6981a4d4e26525256b6c0c35.jpg

    And inside the truck

    IMG_1958_80364cdda8be69efebbbcec77267d8b2aaad9ce1.jpg
    IMG_1959_8c573ed1101bf9c407e82dd22c9b6c0032cec569.jpg
     
    ThisSideofSane likes this.
  2. Feb 14, 2010 at 12:11 PM
    #2
    MattN03

    MattN03 Well-Known Member

    Joined:
    Jan 14, 2009
    Member:
    #12571
    Messages:
    736
    Gender:
    Male
    First Name:
    Matt
    Bluegrass State
    Vehicle:
    SOLD: 07 DC 4x4 TRD Off-Road
    20% window tint, beep mod, hardwired V1, TSB springs, AVS Bugshield-21803, USA Spec PA15, OEM Tacoma scuff plates, Weathertech mats, Truxedo LoPro, TRD skid, GY Duratrac's 265/75/16 C Range, locker mod (switch method)
    Very nice install, but what is this exactly? lol CB radio?
     
  3. Feb 14, 2010 at 12:28 PM
    #3
    SACTOWN

    SACTOWN ???????????????????????

    Joined:
    Jun 7, 2009
    Member:
    #18143
    Messages:
    22,931
    Gender:
    Male
    First Name:
    Greg
    Vehicle:
    '18 ZR2, 04 Rubicon, &19 lx570
    nice install
     
  4. Feb 14, 2010 at 6:44 PM
    #4
    azTRD

    azTRD Well-Known Member

    Joined:
    Sep 8, 2009
    Member:
    #22486
    Messages:
    224
    Gender:
    Male
    Looks great man... I REALLY like how you integrated it the truck... very clean install.
     
  5. Feb 14, 2010 at 8:33 PM
    #5
    barlowrs

    barlowrs [OP] Well-Known Member

    Joined:
    Feb 12, 2010
    Member:
    #31230
    Messages:
    612
    Gender:
    Male
    First Name:
    Robert
    So Cal
    Vehicle:
    06 Toyota Tacoma Sport 4x4
    Build Thread: http://www.tacomaworld.com/forum/builds/74926-barlowrs-06-taco-expo-build-thread.html OME Lift, FJ SE Wheels, 255/85 KM2, Allpro Plate Bumper, 8K Winch, Synthetic Line, Yaesu FT-8800R, Custom Sliders Sockmonkey bedside decals, BHLM, base model grille, TRD offroad (black) trim
    A HAM radio is essentially a CB on steroids. CB are line of sight only. HAMs operate on a MUCH larger frequency band and have MUCH further reach.

    To give you an idea, back in my high school station, we talked to the space shuttle while it was at the station. It is common to talk across the world (you can actually use the moon as a repeater and bounce signals off of it).

    Do a quick Google search for HAM or Amateur Radio. Essentially, you have to be licensed to use it (take a class and pass test, etc), but the doors of communication open up a LOT. You can even use your radio (using certain repeaters) as a phone and make calls from it when you do not have cell reception. No matter how far out in the middle of nowhere you are, you will almost always be able to communicate with someone in case of an emergency, world wide.
     
  6. Feb 14, 2010 at 8:42 PM
    #6
    HBMurphy

    HBMurphy Ban Pending

    Joined:
    Jun 27, 2009
    Member:
    #18993
    Messages:
    6,555
    Gender:
    Male
    First Name:
    Paul
    So California Coast
    Vehicle:
    09 Off Road Delete Model
    None
    Very sweet. I have a 7900 that I have yet to mount. I was going to mount on the floor under the seat and I was thinking what if I have a bad river crossing some day! :eek: I like the way you mounted under the seat - at least I'd be able to take on a little more water with out making it an additional $300 in damage.

    Good job!
     
  7. Mar 13, 2011 at 11:43 PM
    #7
    bjmoose

    bjmoose Bullwinkle J. Moose

    Joined:
    Aug 31, 2010
    Member:
    #42529
    Messages:
    6,009
    Gender:
    Male
    First Name:
    Steve
    San Jose CA
    Vehicle:
    '11 Std Cab 4x4 5sp
    OME suspension, ARB Air Lockers, CBI/Relentless/Pelfrey armor, HAM radio
  8. Mar 28, 2014 at 12:05 AM
    #8
    VE7OSR

    VE7OSR нет войне

    Joined:
    Dec 12, 2011
    Member:
    #68608
    Messages:
    5,777
    Gender:
    Male
    First Name:
    Rob II
    Okanagan, Canada
    Vehicle:
    05 DCLB TRD Sport
    Armour: All-Pro Skid plates - IFS, transmission, and transfer case. Pelfreybilt rear standard plate bumper, Metal Tech Sliders w/ kickout and dimple die filler plates. Front Suspension: OME 885 + NitroCharger 9000 shocks + 1/2" spacers for a 3" lift. Superbumps replacing stock bumpstops. Camburg ball joint UCA SS braid brake lines Future: ADS Extended length, extended length UCA BJ to increase droop capability Rear Suspension: All-Pro Expedition rear leafs, Walker Evans 27" rear shocks, extended rear brake lines (Wheelers Offroad), U -bolt flip kit, rear Timbren bumpstops. Future: Hammer Hangers, Shock relocate, ADS 12" or 14" shock. Interior: Weatherteck floor liners - front, Wet Okoles- front, ScanGauge, LED interior & map lights. Power moonroof. Exterior: Raider Cobra canopy, retrofit headlight by Insight, LED bulbs all around, modified flasher unit for LEDs. Rear diff breather mod. Front diff vibe problem, driver's side needle bearing replaced with ECGS bushing. yet to install: HID Blazer Fog Retrofit, LED Flood & Spot, + switches, fuse panel. swaybar relocate blocks (build my own)
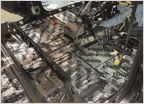
    Adding a couple of pics of my mobile install in progress here on this thread to show a different method for mounting. This is the main unit mounted to the floor under the passenger seat, with DC wiring and control cable wire routed under carpet into console area.

    I did not drill holes into the floor pan, rather used a generous quantity of velcro. Slit the carpet to accept the two vertical portions of the bracket, and affixed the industrial velcro material to the bracket. The bracket now goes under the carpet. Had to hold/push the carpet up with my hand while I lined up the bracket with the slots I made in the carpet. removed the paper backing from the adhesive side of the velcro and pushed the assembly down to the floor. The bracket is now sandwiched between velcroed to the metal floor, and the carpet laying on top of the bracket. I don't think the radio is going to move at all.

    [​IMG]

    [​IMG]

    Have yet to receive dual band antenna, and will likely route it into the rocker sill space. Remote head will be in the console in front of the cupholders on a slide, such that i can pull it forward to use it, and slide it back down into cubby hole to minimize its prominent view from curious eyes with nefarious intentions. Design still being worked on. Mic connection will use similar jack mounted in the side of the console as shown in this thread.
     
  9. Mar 28, 2014 at 12:20 AM
    #9
    tony2018

    tony2018 Well-Known Member

    Joined:
    Feb 24, 2014
    Member:
    #123866
    Messages:
    5,288
    Gender:
    Male
    DAmn thats good to know. Now to find one and install in my car.
     
  10. Jul 16, 2015 at 4:56 PM
    #10
    Pcyc

    Pcyc Self Proclaimed Leader

    Joined:
    Sep 10, 2012
    Member:
    #86603
    Messages:
    1,233
    Gender:
    Male
    First Name:
    Fritz
    Concord, CA
    Vehicle:
    09 DCSB TRD OR - Supercharged - Dual Cased - Twin Sticked
    https://www.tacomaworld.com/threads/pcyc-fj40-build.444289/ https://www.tacomaworld.com/threads/pcycs-2nd-gen-build.308160/
    Forgive my ignorance. But will this also pick up and transmit cb channels?
     
  11. Jul 18, 2015 at 10:12 AM
    #11
    orangeglo

    orangeglo ¯\_(ツ)_/¯

    Joined:
    Jul 31, 2014
    Member:
    #135144
    Messages:
    177
    Gender:
    Male
    Los Angeles, CA
    Vehicle:
    2011 DCSB OR
    No. These will not work on CB frequencies.
    https://www.radioreference.com/apps/db/?aid=7731

    The FT-8800 operates on 2m/70cm frequencies. CB frequencies do not fall within these bands.
    http://www.arrl.org/band-plan

    You also need at least a technician license to operate a ham radio. A CB does not require a license.
     
  12. Jul 18, 2015 at 12:16 PM
    #12
    Pcyc

    Pcyc Self Proclaimed Leader

    Joined:
    Sep 10, 2012
    Member:
    #86603
    Messages:
    1,233
    Gender:
    Male
    First Name:
    Fritz
    Concord, CA
    Vehicle:
    09 DCSB TRD OR - Supercharged - Dual Cased - Twin Sticked
    https://www.tacomaworld.com/threads/pcyc-fj40-build.444289/ https://www.tacomaworld.com/threads/pcycs-2nd-gen-build.308160/
    Yeah. I was hoping that I could have one device that could do both. Understanding I would need a cert for ham. Thank
     
  13. Jul 19, 2015 at 9:29 AM
    #13
    HBMurphy

    HBMurphy Ban Pending

    Joined:
    Jun 27, 2009
    Member:
    #18993
    Messages:
    6,555
    Gender:
    Male
    First Name:
    Paul
    So California Coast
    Vehicle:
    09 Off Road Delete Model
    None
    Once you go HAM, you will not miss CBs at all! You can also 'monitor' FRS radios too. :)
     
  14. Jul 19, 2015 at 9:54 AM
    #14
    Pcyc

    Pcyc Self Proclaimed Leader

    Joined:
    Sep 10, 2012
    Member:
    #86603
    Messages:
    1,233
    Gender:
    Male
    First Name:
    Fritz
    Concord, CA
    Vehicle:
    09 DCSB TRD OR - Supercharged - Dual Cased - Twin Sticked
    https://www.tacomaworld.com/threads/pcyc-fj40-build.444289/ https://www.tacomaworld.com/threads/pcycs-2nd-gen-build.308160/
    Yeah I think the big thing for me is that the guys I ride with have cb's so it's a challenge. I guess I'll get a handheld cb and call it a day.
     
  15. Jul 19, 2015 at 6:07 PM
    #15
    HBMurphy

    HBMurphy Ban Pending

    Joined:
    Jun 27, 2009
    Member:
    #18993
    Messages:
    6,555
    Gender:
    Male
    First Name:
    Paul
    So California Coast
    Vehicle:
    09 Off Road Delete Model
    None
    Sorry to Tell you this but handheld cbs are weak. If you do you may want to get an external ant.
     
  16. Jul 19, 2015 at 6:12 PM
    #16
    Pcyc

    Pcyc Self Proclaimed Leader

    Joined:
    Sep 10, 2012
    Member:
    #86603
    Messages:
    1,233
    Gender:
    Male
    First Name:
    Fritz
    Concord, CA
    Vehicle:
    09 DCSB TRD OR - Supercharged - Dual Cased - Twin Sticked
    https://www.tacomaworld.com/threads/pcyc-fj40-build.444289/ https://www.tacomaworld.com/threads/pcycs-2nd-gen-build.308160/
    Yeah. I agree. But the less crap I have to perm install the better:)
     
    HBMurphy likes this.

Products Discussed in

To Top