

-
Welcome to Tacoma World!
You are currently viewing as a guest! To get full-access, you need to register for a FREE account.
As a registered member, you’ll be able to:- Participate in all Tacoma discussion topics
- Communicate privately with other Tacoma owners from around the world
- Post your own photos in our Members Gallery
- Access all special features of the site
 Am i on the right track?
 This amp can power...
 Pop N Lock Which One?
 Where to put Hideaway Subwoofer - Passenger or Driver Side ?
 Another "I want to keep my stock h/u thread"
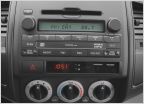 Factory Radio
New head unit install notes, wiring a TR7 module and Axxess ASWC
Discussion in 'Audio & Video' started by Techno Duck, Aug 19, 2012.
