1. Welcome to Tacoma World!

    You are currently viewing as a guest! To get full-access, you need to register for a FREE account.

    As a registered member, you’ll be able to:
    • Participate in all Tacoma discussion topics
    • Communicate privately with other Tacoma owners from around the world
    • Post your own photos in our Members Gallery
    • Access all special features of the site

Information about rock chip guard or rear fender clear decal

Discussion in 'Detailing' started by FramerKat, Aug 11, 2012.

  1. Aug 11, 2012 at 5:07 PM
    #1
    FramerKat

    FramerKat [OP] Well-Known Member

    Joined:
    Jun 4, 2012
    Member:
    #80089
    Messages:
    290
    Gender:
    Female
    First Name:
    kAt
    Fort Lauderdale, Florida
    Vehicle:
    2004 PreRunner TRD Limited DC
    Wheeler's five pack leaf springs, Bilstein 5100s (rear), front tint, windshield top tint, Century Camper Shell/Cap/Topper, Wade window visors, Wade bug shield, cassette adaptor (so I can play Slacker Radio via my phone!), Sunday Blues with Dar sticker, Wounded Warrior Project sticker, no NRA sticker 'cause I don't wanna advertise ;-)
    Hello! I'm sorry if this subject has been approached before, but I could not find anything about it in the forums (just one post about a bad paint job over the chip guard).

    Anyway, my 1st gen has these chip guards in front of the rear wheel wells. They started out as a clear and I'm assuming flexible decal. They are completely rotted and brown and cracked and look like poop on my lunar mist colored truck.

    My questions about them are: 1. Can they removed without damaging the paint underneath (and by what means)? and 2. Are they replaceable? and 3. Should I even bother replacing them?

    Thank you in advance for any input you can provide!
     
    GQ7227 likes this.
  2. Aug 11, 2012 at 8:28 PM
    #2
    Dadic 78

    Dadic 78 Well-Known Member

    Joined:
    Sep 16, 2010
    Member:
    #43373
    Messages:
    453
    Gender:
    Male
    First Name:
    Fil
    Edmonton, AB CANADA
    Vehicle:
    08 Double cab TRD
    They're definitely replaceable. The film is called "3M Film" most often, and as the name states, it's manufactured by 3M. It's just a sticker, really. The older 3M film was prone to yellowing, and cracking. The newer formula is much less prone to these issues.

    Take the old film off by hand, just peel it off. But peel it off the right way, to ensure the adhesive comes off with the film, and doesn't stick to the panel. When removing, pick up a corner as a starting point, then when you start pulling the film, pull it up, and towards you. Do not pull it so that the film overlaps itself. If you do this, the adhesive will tend to stick to the panel, which is not the end of the world, but a pain in the butt to clean off.

    You can purchase that exact piece of film directly from your local Toyota dealer. Or just buy a roll of 3M film from your local autobody supply store, and cut your own custom piece.

    Hope that helps!
     
  3. Aug 12, 2012 at 7:53 AM
    #3
    FramerKat

    FramerKat [OP] Well-Known Member

    Joined:
    Jun 4, 2012
    Member:
    #80089
    Messages:
    290
    Gender:
    Female
    First Name:
    kAt
    Fort Lauderdale, Florida
    Vehicle:
    2004 PreRunner TRD Limited DC
    Wheeler's five pack leaf springs, Bilstein 5100s (rear), front tint, windshield top tint, Century Camper Shell/Cap/Topper, Wade window visors, Wade bug shield, cassette adaptor (so I can play Slacker Radio via my phone!), Sunday Blues with Dar sticker, Wounded Warrior Project sticker, no NRA sticker 'cause I don't wanna advertise ;-)
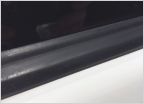
    I wish it was that easy...as I said, they are cracked, so I'm not sure if they'll come off in one piece. Here's a shot of the passenger side one...it appears the last owner attempted to start removing it...they didn't get far :eek:

    [​IMG]
     
    I married my tacoma likes this.
  4. Aug 12, 2012 at 7:13 PM
    #4
    Dadic 78

    Dadic 78 Well-Known Member

    Joined:
    Sep 16, 2010
    Member:
    #43373
    Messages:
    453
    Gender:
    Male
    First Name:
    Fil
    Edmonton, AB CANADA
    Vehicle:
    08 Double cab TRD
    Oh WOW, that's really bad! I've been in auto body for over a decade, and never seen that. Must be a truck from the south... Yep, Ft. Lauderdale... haha

    Well, I'd start picking away at it. It'll be tedious, but worth it. You may also want to try a 3M "eraser wheel." It's basically a rubber wheel that attaches to a drill. It's ideal for removing decals, etc... Not sure about this mess, but it sure can't hurt to try.

    EDIT: Since the bottom is in such good shape, I'd start down there, and start pulling on it. The loose cracked bits at the top are gonna be a pain, but they will come off. Just gonna need some elbow grease.
     
  5. Aug 12, 2012 at 7:17 PM
    #5
    afcivmedic

    afcivmedic Well-Known Member

    Joined:
    Jan 15, 2011
    Member:
    #49319
    Messages:
    483
    Gender:
    Male
    First Name:
    Tim
    Tehachapi, Ca
    Vehicle:
    '05 DCSB TRD Sport 4x4
    ICON CO W RESI, ICON RES 2.0 Rear ICON UCA Snug Top Rebel Borla Cat Back DAKAR Leafs Timbren Bumpstops Distinct Offroad Sliders Black HL LED Tailights ARB Bumper with Warn Winch CBI Rear Bumper Tech Deck MaxTrax Lights by @caliraisedled
    What about a hair dyer to warm the adhesive then use a plastic tool of some sort? We used to use that with decals when I detailed for a car dealership. We used plastic razor blades.
     
    Cocolocobean likes this.
  6. Aug 12, 2012 at 7:25 PM
    #6
    Dirty Jersey

    Dirty Jersey Rich

    Joined:
    Jun 24, 2012
    Member:
    #81262
    Messages:
    168
    Gender:
    Male
    First Name:
    Rich
    South Jersey
    Vehicle:
    2012 Access Cab - White
    Wet Okole Seat Covers, Debadged, Custom Fit Bed Mat, Cargo Net for Long Bed, All Weather OEM Floor Mats, MX Grillcraft Grill, Bully Tailgate Lock, Mini Mag Center Console Mod, SockMonkey 3rd Brakelight Cover, Lots of Love
    Try using a heat gun. It should soften up the adhesive and plastic enough to come right off. Obviously technique is critical not to hurt the paint but you shouldn't need a lot of heat to soften the adhesive. Just set on low and keep it moving making sure not to hold in one place at anytime. They're $20 at Home Depot. Whatever residue or adhasive is left on the fender, use Goo Gone just like you would if debadging and clean it all off with auto wash. Wax it up or follow the instructions in the 3m clear tape. Hope this helps
     
  7. Aug 12, 2012 at 7:28 PM
    #7
    Dirty Jersey

    Dirty Jersey Rich

    Joined:
    Jun 24, 2012
    Member:
    #81262
    Messages:
    168
    Gender:
    Male
    First Name:
    Rich
    South Jersey
    Vehicle:
    2012 Access Cab - White
    Wet Okole Seat Covers, Debadged, Custom Fit Bed Mat, Cargo Net for Long Bed, All Weather OEM Floor Mats, MX Grillcraft Grill, Bully Tailgate Lock, Mini Mag Center Console Mod, SockMonkey 3rd Brakelight Cover, Lots of Love
    How'd it get so brown. Looks like someone used the fender like a piece of TP. When that's off you're gonna be so happy. Good luck
     
    I married my tacoma likes this.
  8. Aug 12, 2012 at 8:23 PM
    #8
    FramerKat

    FramerKat [OP] Well-Known Member

    Joined:
    Jun 4, 2012
    Member:
    #80089
    Messages:
    290
    Gender:
    Female
    First Name:
    kAt
    Fort Lauderdale, Florida
    Vehicle:
    2004 PreRunner TRD Limited DC
    Wheeler's five pack leaf springs, Bilstein 5100s (rear), front tint, windshield top tint, Century Camper Shell/Cap/Topper, Wade window visors, Wade bug shield, cassette adaptor (so I can play Slacker Radio via my phone!), Sunday Blues with Dar sticker, Wounded Warrior Project sticker, no NRA sticker 'cause I don't wanna advertise ;-)
    Yeah, it's a really nasty mess...and really bugs me to look at it since the truck's so clean otherwise. I'm sure it's this powerful south Florida sun that did it...severe UV damage. Thanks for the input...I'll try a blow dryer set to hot and see if it loosens enough...and I have a friend with a real heat gun if I need to go that route. And I have several plastic spackle knives around...maybe one of those would work...or maybe and old hotel key card :)

    Will update if I can get it to work...just in case anyone else have this mess to deal with. ;)

    Then it's a matter of whether to put new ones on or not. I'll make a template from the one that's intact before I remove it in case I want to make new ones from the 3m film.
     
  9. Aug 13, 2012 at 5:16 PM
    #9
    Dirty Jersey

    Dirty Jersey Rich

    Joined:
    Jun 24, 2012
    Member:
    #81262
    Messages:
    168
    Gender:
    Male
    First Name:
    Rich
    South Jersey
    Vehicle:
    2012 Access Cab - White
    Wet Okole Seat Covers, Debadged, Custom Fit Bed Mat, Cargo Net for Long Bed, All Weather OEM Floor Mats, MX Grillcraft Grill, Bully Tailgate Lock, Mini Mag Center Console Mod, SockMonkey 3rd Brakelight Cover, Lots of Love
    Good luck. Let us know how you did ;)
     
  10. Aug 25, 2012 at 10:07 PM
    #10
    4TH TACOMA

    4TH TACOMA New Member

    Joined:
    May 13, 2012
    Member:
    #78709
    Messages:
    2
    Gender:
    Male
    Houston,TX
    Vehicle:
    2010 PreRunner
    MFG leveling kit, Pioneer Radio
    i would try an eraser wheel that you can pick up from a local automotive paint supply and attach it to a drill. don't hold it in one spot for to long as it can burn through the paint. hope this helps good luck
     
  11. Aug 26, 2012 at 10:40 AM
    #11
    Dirty Jersey

    Dirty Jersey Rich

    Joined:
    Jun 24, 2012
    Member:
    #81262
    Messages:
    168
    Gender:
    Male
    First Name:
    Rich
    South Jersey
    Vehicle:
    2012 Access Cab - White
    Wet Okole Seat Covers, Debadged, Custom Fit Bed Mat, Cargo Net for Long Bed, All Weather OEM Floor Mats, MX Grillcraft Grill, Bully Tailgate Lock, Mini Mag Center Console Mod, SockMonkey 3rd Brakelight Cover, Lots of Love
    Hey OP, how did you make out? What technique did you use? Pic???
     
    Sfcmcmahon likes this.
  12. Apr 22, 2014 at 11:55 AM
    #12
    cdavi060

    cdavi060 Well-Known Member

    Joined:
    Mar 21, 2011
    Member:
    #53421
    Messages:
    244
    Gender:
    Male
    First Name:
    Chris
    Virginia Beach, VA
    Vehicle:
    2016 TRD Sport 4X4 DCSB
    Full OME Lift (887), 275/70/17 BFG KO2
    ever get it off? I have the same issue with mine and want it off!!!
     
    Sfcmcmahon likes this.
  13. Apr 22, 2014 at 12:48 PM
    #13
    cheeseit

    cheeseit Well-Known Member

    Joined:
    Apr 10, 2013
    Member:
    #101824
    Messages:
    1,587
    Gender:
    Male
    Vancouver B.C.
    Vehicle:
    2005 SR5/TRD OR Tacoma
    3 inch toytec lift
    The 3m wheel rips paint right off of plastic.... Ask me how I know.
     
    Mannydc5 likes this.
  14. Aug 23, 2014 at 12:04 PM
    #14
    swamp rat

    swamp rat Well-Known Member

    Joined:
    Aug 9, 2014
    Member:
    #135774
    Messages:
    50
    Gender:
    Male
    augusta ga we call "discusta"
    Vehicle:
    09 dbl cab sr5
    westin bull bar w/ driving lights
    there is a spray on protector that is used on the hood to protect it from rock chips this might work for you. don't remember its exact name its at most any auto store fairly cheap.
     
  15. Aug 24, 2014 at 8:58 AM
    #15
    FramerKat

    FramerKat [OP] Well-Known Member

    Joined:
    Jun 4, 2012
    Member:
    #80089
    Messages:
    290
    Gender:
    Female
    First Name:
    kAt
    Fort Lauderdale, Florida
    Vehicle:
    2004 PreRunner TRD Limited DC
    Wheeler's five pack leaf springs, Bilstein 5100s (rear), front tint, windshield top tint, Century Camper Shell/Cap/Topper, Wade window visors, Wade bug shield, cassette adaptor (so I can play Slacker Radio via my phone!), Sunday Blues with Dar sticker, Wounded Warrior Project sticker, no NRA sticker 'cause I don't wanna advertise ;-)
    I did find out that the eraser wheel takes paint right off of plastic...so that didn't work for me. I also tried assorted solvents at my work like one called "Un Stik" adhesive remover and nothing even really touched it. So, there it sits to this day on my fender...one with a big black notch out of it from where I tried the eraser wheel...just to taunt me.

    And @Swamp Rat, that spray on protector would be great once I could remove the ugly mess that is the original protectors ;-)
     
  16. Sep 16, 2014 at 11:14 PM
    #16
    Sgt Jmack

    Sgt Jmack Well-Known Member

    Joined:
    Aug 2, 2014
    Member:
    #135306
    Messages:
    452
    Gender:
    Male
    First Name:
    Jeremiah
    New Orleans, LA
    Vehicle:
    14 Sport Dbl cab L/B
    3" Revtech, Undercover flex.
    I would try a little WD-40, or paint thinner on a rag. Find a small section and spray the WD-40 or press the rag on the plastic area for a few minutes. Then try to remove the stuff. You might have to go back a few times before you get all of the glue off. Goof off/un-stik are good for newer glue, but don't have the penetrating power that paint thinner or WD-40 does.

    Believe me, I've seen this happen before and it is a tedious process to remove it, but it can be done.

    And I would highly recommend putting something back in that location once you get it cleaned.
     
    I married my tacoma likes this.
  17. Sep 16, 2014 at 11:17 PM
    #17
    Sgt Jmack

    Sgt Jmack Well-Known Member

    Joined:
    Aug 2, 2014
    Member:
    #135306
    Messages:
    452
    Gender:
    Male
    First Name:
    Jeremiah
    New Orleans, LA
    Vehicle:
    14 Sport Dbl cab L/B
    3" Revtech, Undercover flex.
    The only obvious other cure would be to get some fine grit sand paper and slowly start removing it. But you will need a lot of paper as it will gum up quickly. I'd probably wet sand it.

    But at least you will be able to correct the paint under this area once you get it off.

    In fact, you'll probably have to do a lot of correction (sanding/compounding/polishing/buffing) after you remove the plastic and glue.
     
  18. Jan 28, 2017 at 5:06 AM
    #18
    parfleet

    parfleet Well-Known Member

    Joined:
    May 16, 2007
    Member:
    #1594
    Messages:
    63
    Gender:
    Male
    First Name:
    Rex
    Pensacola, FL.
    Vehicle:
    05 PreRunner, SR5 Package, 4.0 Engin
    Front Bush Guard with 100 Watt Driving Lights, Color Match Tonel Cover. Cold Air Intake By True Flow,added an additional 26 HP.
    Here's what I know for sure. I tried a hair dryer and a heat gun on low heat and still I couldn't get the clear decal to break loose. I could peel it by hand for a short distance and it would break off. Next I tried the heat gun with a razor blade. Bad decision! I cut into the paint. So in-the-end, here's exactly what happened: 1) I removed both fender flares and took them to a paint and boy shop and the repair bill was $324. 2) When I removed the both rear flares, the plastic clips or pins where no longer usable. There are 3 orange and 7 blue clips per side and the cost for these was $33. 3) The paint and body shop explained that the black rubber strip that slides onto the flares was not reusable because it would have to be removed for paint and reinstalling the used ones would be impossible. The cost for these was $20 per side 4) The clear decal shields were $34 per side. So as you can see, this was a pricey experience for me. No really sure what I could have done differently. I was hoping the heat would do it sufficiently so that I could have simply peeled it off. If heat is the solution, then you really have to get it pretty hot. The rubber wheel solution: I wasn't aware and it and didn't try it. I was told by the paint and body shop not to attempt to apply the new shield for a couple of weeks to allow the new paint to fully cure. So now how do I apply the new decals? Just peel and apply? Wet the area that I going to apply the new decals with warm soapy water; peel of the adhesive backing off the new shield and then apply? I'm kinda lost at this point.
     
  19. Apr 19, 2017 at 10:34 PM
    #19
    Wakzacky

    Wakzacky Member

    Joined:
    Apr 19, 2017
    Member:
    #216768
    Messages:
    11
    Gender:
    Male
    First Name:
    Dave
    Vehicle:
    2004 Tacoma Doublecab Prerunner TRD Lunar Mist
    I like Original Stock except I added 2017 TRD silver painted 5 spoke TRD Wheels 225/75R16 and BF Goodrich KO's not KO2's and nice Led lighting.
    Hello, I had the exact same issue with my Texas Tacoma. You have to be super patient and it will come off. It took me approximately 5 solid hours on each side to slowly pick it off by heating with hair dryer and using ( I should say sacrificing) all of my fingernails. In fact after I did 1 side I had to wait a week to allow my fingers to heal b4 doing the other side. They came out perfect. I purchased 2 new protectors from Toyota dealer and now it looks new again. Nothing else would work without taking a risk. I love my Taco.
     
  20. Apr 21, 2017 at 10:11 AM
    #20
    killerken

    killerken Well-Known Member

    Joined:
    Sep 15, 2008
    Member:
    #9243
    Messages:
    166
    Philadelphia
    Vehicle:
    09 toyota tacoma dbl cab trd
    Access LE Cover Toyota Factory Nerf Bars Dynolock Tail Gate Lock
    DubfromGA likes this.
To Top