

-
Welcome to Tacoma World!
You are currently viewing as a guest! To get full-access, you need to register for a FREE account.
As a registered member, you’ll be able to:- Participate in all Tacoma discussion topics
- Communicate privately with other Tacoma owners from around the world
- Post your own photos in our Members Gallery
- Access all special features of the site
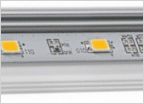 Small LED Module
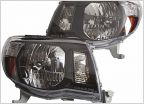 Recommendation for new headlights
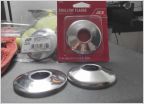 7x6 Mini H1 7.0 retrofit (EASY: no cutting/jbweld)
 2nd Gen Retrofit Headlight suggestion
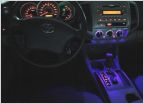 LED Interior Accent Lighting for '05-'11
 Different headlight bulbs?
HOW TO: REMOVING AND REPLACING 3RD BRAKELIGHT
Discussion in 'Lighting' started by PreRunning, Aug 26, 2012.


