1. Welcome to Tacoma World!

    You are currently viewing as a guest! To get full-access, you need to register for a FREE account.

    As a registered member, you’ll be able to:
    • Participate in all Tacoma discussion topics
    • Communicate privately with other Tacoma owners from around the world
    • Post your own photos in our Members Gallery
    • Access all special features of the site

breaking down retrofits for new paint and halos

Discussion in 'Lighting' started by Artruck, Jan 28, 2015.

  1. Jan 28, 2015 at 3:20 PM
    #1
    Artruck

    Artruck [OP] Well-Known Member

    Joined:
    Jun 27, 2013
    Member:
    #107173
    Messages:
    1,688
    Gender:
    Male
    Lawrence, KS
    Vehicle:
    '09 Super Basic
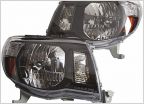
    I just got a set of second gen retrofits, and I want to change the halos and paint all the chrome. I have the head lights apart, the bowls out, and everything broken down. But..... I can't get the old projectors out.

    I have them down to the nut on the back, but it won't spin off. Does is there a lock on it? Where do I go from here. I seem to have gotten all the way past the hard parts and fallen down on what seemed to be the easiest part.

    Any help would be great.
     
  2. Jan 28, 2015 at 3:45 PM
    #2
    Artruck

    Artruck [OP] Well-Known Member

    Joined:
    Jun 27, 2013
    Member:
    #107173
    Messages:
    1,688
    Gender:
    Male
    Lawrence, KS
    Vehicle:
    '09 Super Basic
  3. Jan 28, 2015 at 6:30 PM
    #3
    Artruck

    Artruck [OP] Well-Known Member

    Joined:
    Jun 27, 2013
    Member:
    #107173
    Messages:
    1,688
    Gender:
    Male
    Lawrence, KS
    Vehicle:
    '09 Super Basic
    Has anyone ever taken retros off to change halos?
     
  4. Jan 29, 2015 at 10:00 AM
    #4
    kingz10fan

    kingz10fan Active Member

    Joined:
    Mar 24, 2014
    Member:
    #126053
    Messages:
    43
    Gender:
    Male
    First Name:
    Tony
    So Cal
    Vehicle:
    2005 PreRunner
    So someone else put the retros together you are saying? That back nut is on there extremely tight and you will need some heavy duty pliers or something to get it going. Also possible they used some clear epoxy to keep the nut on there even tighter. Good Luck!
     
  5. Jan 29, 2015 at 4:12 PM
    #5
    TRSJimmy

    TRSJimmy All I Do Is Nguyen

    Joined:
    Jul 10, 2012
    Member:
    #82308
    Messages:
    3,088
    Gender:
    Male
    First Name:
    Jimmy
    Gainesville, GA
    Vehicle:
    12' Mall Crawlin Peerunner
    Can you take a picture of it?
     
  6. Jan 29, 2015 at 5:49 PM
    #6
    itzyoboipaul

    itzyoboipaul Well-Known Member

    Joined:
    Jul 18, 2013
    Member:
    #108518
    Messages:
    2,921
    Gender:
    Male
    First Name:
    Paul
    PFville, TX
    Vehicle:
    2020 TRD OR Cement
    might be glued somehow. I've done to retro and i always use JB weld after i get the output perfectly aligned that way the projectors don't move at all.
     
  7. Jan 29, 2015 at 6:04 PM
    #7
    Artruck

    Artruck [OP] Well-Known Member

    Joined:
    Jun 27, 2013
    Member:
    #107173
    Messages:
    1,688
    Gender:
    Male
    Lawrence, KS
    Vehicle:
    '09 Super Basic
    yeah, someone else did the converson. I found a socket that fits it, i might try it.

    Second question: if i cut the nut off, can I find a replacment?
     
  8. Jan 29, 2015 at 8:58 PM
    #8
    TRSJimmy

    TRSJimmy All I Do Is Nguyen

    Joined:
    Jul 10, 2012
    Member:
    #82308
    Messages:
    3,088
    Gender:
    Male
    First Name:
    Jimmy
    Gainesville, GA
    Vehicle:
    12' Mall Crawlin Peerunner
    If there is no jb weld, you can push the projector towards the bowl with one hand and unscrew it with other. If you still can't and cut it off, TRS sells replacements.
     
  9. Feb 3, 2015 at 1:59 PM
    #9
    Artruck

    Artruck [OP] Well-Known Member

    Joined:
    Jun 27, 2013
    Member:
    #107173
    Messages:
    1,688
    Gender:
    Male
    Lawrence, KS
    Vehicle:
    '09 Super Basic
    Orderd replacment nuts today, found that they were superglued in. TRS was very helpful with all my questions too. Now I just need to decide on halos and test all the parts before I button the housings back up.

    maybe I will add a before and after set of pics. I went with two different shades of black on the paint. The bowl is satin black and the housing and shrouds are flat black. I hope it all looks as good done as it does now.

    I also have to address a peeling clear coat? on the lenses and some scuffed up areas. Anyone have ideas on that? I was thinking polishing compound and then some kind of clear coat, but I have never worked on headlight lenses, so any ideas or experience would be helpful.
     

Products Discussed in

To Top