1. Welcome to Tacoma World!

    You are currently viewing as a guest! To get full-access, you need to register for a FREE account.

    As a registered member, you’ll be able to:
    • Participate in all Tacoma discussion topics
    • Communicate privately with other Tacoma owners from around the world
    • Post your own photos in our Members Gallery
    • Access all special features of the site

2010 Tacoma Morimoto Mini D2S Retrofit

Discussion in 'Lighting' started by blawrie, Apr 16, 2011.

  1. Apr 16, 2011 at 12:05 PM
    #1
    blawrie

    blawrie [OP] Well-Known Member

    Joined:
    Mar 14, 2010
    Member:
    #33222
    Messages:
    83
    Gender:
    Male
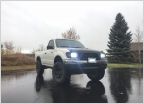
    Friday afternoon I got started on my Morimoto Mini D2S retrofit. I ordered the Mini D2S Stage III Kit from Matt @ TRS back at the end of February. Here is what I ordered: Mini D2S Projectors, Morimoto 3Five Ballasts, Apollo Shrouds and Osram 66240 Bulbs. First things first I removed the headlights off of my truck and proceeded to install the H4 wiring harness and Morimoto Ballasts. The overall appearance I was going for was an OEM look to everything. I mounted the relay in a position that seemed like it would be the most protected and out of the way. I also decided to mount my ballasts off the side of my radiator supports. I have never seen anyone else do it like this, I think it looks better and is more supported then using velcro to attach the ballast to the side of the headlight itself.

    Once the headlights were off the truck I baked one at a time at 300F for 10mins and they came apart easily enough. Mounting the projectors was very simple, everyone knows if you have an H4 headlight these projectors are plug and play, which they were. Once I installed both projectors I took them out to my truck for a quick test fire and sure enough they started up no problem. The Osram bulbs fire up a brilliant bluish-white and turn to the 4300K color in about 15 seconds. I can't wait until they colorshift a bit as brand new they are a bit on the yellowish side.

    Once I knew everything was ok it was time to seal the headlights back up. I placed my lens on my headlight and put them back in the oven to heat up the butyl. Once they were warm enough I used my hands and spring clamps to get them back together. Then it was time to reinstall all the plastic pieces from the headlight and get them back on the truck.

    All I have left to do now is wait for nightfall so I can properly aim the projectors and take some nighttime beam shots. Overall this was a very easy retrofit, I took my time doing everything and I think it came out perfect. I believe it looks very OEM which was exactly what I was going for. I would like to thank Matt @ TRS once again for all his help over the past few months getting me exactly what I wanted. If anyone has any questions regarding anything please feel free to ask...thanks...now on to the pics...

    All Parts.jpg
    Osram Bulbs.jpg
    Front Truck (No Lights).jpg
    Headlights Before.jpg
    Relay.jpg
    LS Ballast.jpg
    RS Ballast.jpg
    Projector In Headlight 1.jpg
    Projector With Shroud.jpg
    Headlight After.jpg
    Headlights After.jpg
    Dust Cover.jpg
    Driver Headlight.jpg
    Passenger Headlight.jpg
    Front After.jpg
    Shroud Close-Up.jpg
     
    KTM753 and taco_chaser like this.
  2. Apr 16, 2011 at 12:11 PM
    #2
    Who Dat Popcorn

    Who Dat Popcorn Dafuq

    Joined:
    Feb 28, 2008
    Member:
    #4992
    Messages:
    1,439
    Gender:
    Male
    First Name:
    Ricky
    Richmond, VA
    Vehicle:
    Sold :/
    SOLD
    Looks awesome!

    Do the projectors fit in with no work required?
     
  3. Apr 16, 2011 at 12:14 PM
    #3
    ppham444

    ppham444 Well-Known Member

    Joined:
    Mar 28, 2010
    Member:
    #34175
    Messages:
    2,385
    Gender:
    Male
    First Name:
    Phuong
    Portland, OR
    Vehicle:
    2023 White TRD Off-Road doublecab
    Wow, looks real nice! Good job.
     
  4. Apr 16, 2011 at 12:22 PM
    #4
    Slimwood Shady

    Slimwood Shady I love your mom!

    Joined:
    Jul 12, 2009
    Member:
    #19585
    Messages:
    11,693
    Gender:
    Male
    First Name:
    Linwood
    San Antonio, TX
    Vehicle:
    '23 TRD Pro Tundra; 996TT; '16 Odyssey
    #nomods
    Great Job!!!
     
  5. Apr 16, 2011 at 12:28 PM
    #5
    Chris(NJ)

    Chris(NJ) Well-Known Member

    Joined:
    Jan 21, 2010
    Member:
    #29777
    Messages:
    4,869
    Gender:
    Male
    First Name:
    Chris
    Usually in Central Jersey
    Vehicle:
    08 Indigo 4x4 DC OR
    Mods are currently being changed .....
  6. Apr 16, 2011 at 1:04 PM
    #6
    blawrie

    blawrie [OP] Well-Known Member

    Joined:
    Mar 14, 2010
    Member:
    #33222
    Messages:
    83
    Gender:
    Male
    Yep, you simply remove the stock H4 bulb shield and the Mini's slide right in and clamp down from the other side.
     
  7. Apr 17, 2011 at 8:53 AM
    #7
    MGMGRAND

    MGMGRAND Well-Known Member

    Joined:
    Jul 11, 2010
    Member:
    #40058
    Messages:
    81
    Gender:
    Male
    WPB, FL
    Vehicle:
    PreRunner TRD Sport
    Nice. I just got the same setup from the group buy. I have seen a lot of retros and like the look of your smoked oem lights the best. I just don't want to ruin my stock lights b/c the smoked ones are so rare. Did you have to do anything to your lights that would keep you from putting them back to stock?

    *I know you said above no work required but I just want to be sure.
     
  8. Apr 17, 2011 at 9:10 AM
    #8
    blawrie

    blawrie [OP] Well-Known Member

    Joined:
    Mar 14, 2010
    Member:
    #33222
    Messages:
    83
    Gender:
    Male
    Hey man, I agree I didn't want to mess with my oem smoked headlights because I prefer the look of them and I wanted to keep my retrofit as oem looking as possible. Everyone has their own preference as to what look they are going for. But I could easily change these lights back to stock. All I would do is open the lights up again, remove the D2S projectors and reinstall the stock H4 bulb shield and Im done. The only thing I had to do was trim the black dust cover in order to clear the D2S bulb adapter, so I would require new dust covers but thats not big deal. Hope that helps ya out.
     
  9. Apr 17, 2011 at 9:15 AM
    #9
    Poot Klopp

    Poot Klopp Well-Known Member

    Joined:
    Apr 10, 2010
    Member:
    #34986
    Messages:
    581
    Gender:
    Male
    First Name:
    Ben
    New Jersey
    Vehicle:
    2024 Lurker
    yes just got the same set up as you, I am very glad it was this easy to install. Can not wait... hey where are the night shots!?!?
     
  10. Apr 17, 2011 at 9:20 AM
    #10
    blawrie

    blawrie [OP] Well-Known Member

    Joined:
    Mar 14, 2010
    Member:
    #33222
    Messages:
    83
    Gender:
    Male
    There coming...when I put them back on the truck the projectors were aimed waayy low like 20ft infront of my truck..haha..I still have to adjust them to exactly where I want them but man its hard to find a nice level surface with a flat wall with no other cars around...lol...but as soon as I get them aimed Ill take some shots. One thing I was surprised with which I wasn't expecting was the color at the cutoff, every picture I have ever seen of the minis looked to lack color. I don't know if its the Osram bulbs but my color has the perfect amount of blue and purple to it. Anyway Im going to try and get them aimed properly tonight or tomorrow then Ill take some pics and post em up.
     
  11. Apr 17, 2011 at 9:23 AM
    #11
    Poot Klopp

    Poot Klopp Well-Known Member

    Joined:
    Apr 10, 2010
    Member:
    #34986
    Messages:
    581
    Gender:
    Male
    First Name:
    Ben
    New Jersey
    Vehicle:
    2024 Lurker
    sounds good eagerly awaiting pics : )
     
  12. Apr 17, 2011 at 9:24 AM
    #12
    jblaze805

    jblaze805 Well-Known Member

    Joined:
    Nov 20, 2009
    Member:
    #26253
    Messages:
    1,128
    Gender:
    Male
    Ventura/Fresno, CA
    Vehicle:
    04 trd pre-runner
    2.5" king coilovers, caburg uca, magnaflow exhaust, aem intake
    sub'ed for some night shots. i wonder whats the difference with the phillips vs. the osram...good stuff op cant wait to do mine also got in on the GB
     
  13. Apr 17, 2011 at 9:33 AM
    #13
    blawrie

    blawrie [OP] Well-Known Member

    Joined:
    Mar 14, 2010
    Member:
    #33222
    Messages:
    83
    Gender:
    Male
    According to Matt @ TRS the Philips will not colorshift and will remain at 4300K whereas the Osrams should start to colorshift to around 4800K after a couple months use. I knew I wanted to use an OEM bulb and the Osrams seemed to fit the bill perfectly. Ill try to get on those night shots tonight Im hoping my camera picks up the color at the cutoff ok because its definitely nice to look at. Anyways I'll keep ya updated because I hate when other people say they'll post pics and they never do. I hold my word just give me a day or two to aim them and snap some shots.
     
  14. Apr 17, 2011 at 9:35 AM
    #14
    jblaze805

    jblaze805 Well-Known Member

    Joined:
    Nov 20, 2009
    Member:
    #26253
    Messages:
    1,128
    Gender:
    Male
    Ventura/Fresno, CA
    Vehicle:
    04 trd pre-runner
    2.5" king coilovers, caburg uca, magnaflow exhaust, aem intake
    good info thanks op...
     
  15. Apr 18, 2011 at 6:20 AM
    #15
    MGMGRAND

    MGMGRAND Well-Known Member

    Joined:
    Jul 11, 2010
    Member:
    #40058
    Messages:
    81
    Gender:
    Male
    WPB, FL
    Vehicle:
    PreRunner TRD Sport
    Thanks for the info...mine shipped out today :woot:
     
  16. Apr 18, 2011 at 11:28 AM
    #16
    krans

    krans Well-Known Member

    Joined:
    Feb 28, 2009
    Member:
    #14173
    Messages:
    416
    Gender:
    Male
    First Name:
    Kenny
    Huntington beach/ West min duh
    Vehicle:
    09 Sport mall crawler
    Icon extended travel with resi front and rear,Camburg UCA, All pro standard leaf pack, Fogs anytime, General grabbers AT2,Custom stainless steel brake lines,bed box, Bestop soft top,50' light bar, amber rigid pods,CBI ditch mounts with LED pods,TRD intake,Anti dark hoodlights/rock light/LED whip,FX-R retros and Gibson catback..more mods to come
    Very nice! i though there was more to retro fitting projectors, like drilling into the reflector bowl to hold down the actually projector but i guess not. Very clean install!

    This might be a dumb question but what are the red and black wires sticking out for?
    How does the shrouds stay on? twist on or clip on?
     
  17. Apr 18, 2011 at 11:36 AM
    #17
    jblaze805

    jblaze805 Well-Known Member

    Joined:
    Nov 20, 2009
    Member:
    #26253
    Messages:
    1,128
    Gender:
    Male
    Ventura/Fresno, CA
    Vehicle:
    04 trd pre-runner
    2.5" king coilovers, caburg uca, magnaflow exhaust, aem intake
    from what others have told me epoxied on.....and X2 on the red/blk wires
     
  18. Apr 18, 2011 at 11:41 AM
    #18
    memario1214

    memario1214 Hotshot Offroad Moderator Vendor

    Joined:
    Oct 1, 2009
    Member:
    #23628
    Messages:
    19,777
    Gender:
    Male
    First Name:
    Colton
    Missoula, MT
    Vehicle:
    SOLD - 05 Dub Cab TRD Sport 4x4, CURRENT - '21 Tundra MGM Limited
    Leads for Halos maybe???
     
  19. Apr 18, 2011 at 12:03 PM
    #19
    Muy Grande

    Muy Grande Well-Known Member

    Joined:
    Feb 26, 2009
    Member:
    #14111
    Messages:
    1,400
    Gender:
    Male
    First Name:
    John
    Dallas, TX; RGV, TX
    Vehicle:
    06 DC TRD
    Suspension: DHoes up front, Dakar and OME out back. Audio: Alpine w205 w/ pair of Alpine Amps, Image Dynamic 6.5 Component Speakers up front and Image Dynamic Subs in the Back. Armor: ARB Bull Bar, Rocktek rear bumper and custom rock sliders. Other: Rigid Industries LED Light Bar, Platinum DieHard Battery, BlueSea Fuse Block, rear lights, bed lights, leds inside.
    No, they are for Hi/Lo beam. The projector is motorized.
     
  20. Apr 18, 2011 at 12:04 PM
    #20
    Muy Grande

    Muy Grande Well-Known Member

    Joined:
    Feb 26, 2009
    Member:
    #14111
    Messages:
    1,400
    Gender:
    Male
    First Name:
    John
    Dallas, TX; RGV, TX
    Vehicle:
    06 DC TRD
    Suspension: DHoes up front, Dakar and OME out back. Audio: Alpine w205 w/ pair of Alpine Amps, Image Dynamic 6.5 Component Speakers up front and Image Dynamic Subs in the Back. Armor: ARB Bull Bar, Rocktek rear bumper and custom rock sliders. Other: Rigid Industries LED Light Bar, Platinum DieHard Battery, BlueSea Fuse Block, rear lights, bed lights, leds inside.
    Clean install looks great and very factory, I was leaning towards doing mine again with some clean headlights.
     

Products Discussed in

To Top