

-
Welcome to Tacoma World!
You are currently viewing as a guest! To get full-access, you need to register for a FREE account.
As a registered member, you’ll be able to:- Participate in all Tacoma discussion topics
- Communicate privately with other Tacoma owners from around the world
- Post your own photos in our Members Gallery
- Access all special features of the site
 The EXPO TRON Build
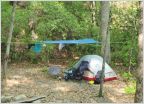 Jlemmonds 06' GX470 "The Adventure Wagon" build, bs and trip report thread.
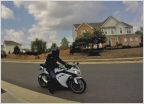 (SOLD) CanisLupus Ninja 300 Build
 Kamp-Rite Tent Cot RTT for my overly crowded short bed
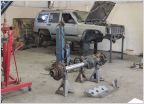 Cheroturd on 40's
 What's Happening at BVO This week?
Zuk on 38's
Discussion in 'Other Builds' started by Tan Zuk, Mar 4, 2012.
Page 5 of 6
Page 5 of 6


