

-
Welcome to Tacoma World!
You are currently viewing as a guest! To get full-access, you need to register for a FREE account.
As a registered member, you’ll be able to:- Participate in all Tacoma discussion topics
- Communicate privately with other Tacoma owners from around the world
- Post your own photos in our Members Gallery
- Access all special features of the site
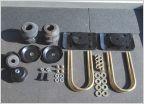 Timbren Industries Bump Stop Install **PIC HEAVY**
 Turbogauge, like Scangauge but 1/2 the cost, any good?
 Your favorite tie down straps...?
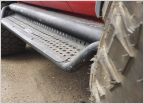 Review Request: Go Rhino Dominator Xtreme D1
 Pioneer AVH-4200NEX
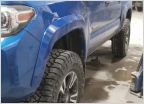 2018 Tacoma TRD Sport Magnaflow Stainless - Falken AT3W - Dobinson GTS 2" Lift
Blue Magic Pure Rubber Coating - Redoing Bumper Finish
Discussion in 'Product Reviews' started by Manlaan, Oct 28, 2010.


