

-
Welcome to Tacoma World!
You are currently viewing as a guest! To get full-access, you need to register for a FREE account.
As a registered member, you’ll be able to:- Participate in all Tacoma discussion topics
- Communicate privately with other Tacoma owners from around the world
- Post your own photos in our Members Gallery
- Access all special features of the site
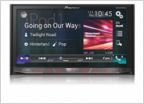 Pioneer AVH-4200NEX
 Turbogauge, like Scangauge but 1/2 the cost, any good?
 Official South Region DECKED Storage System Product Review For 2nd & 3rd Gen Tacomas
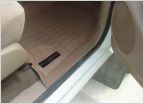 Weathertech Fitment Issue
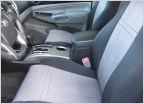 Cal-Trend Noprene Seat Cover Review
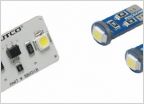 Putco 980751 Premium LED Dome Light/Map Light Replacements
Dynolock Automatic Tailgate Lock - Product Review
Discussion in 'Product Reviews' started by TomRnHT, Apr 12, 2013.

