

-
Welcome to Tacoma World!
You are currently viewing as a guest! To get full-access, you need to register for a FREE account.
As a registered member, you’ll be able to:- Participate in all Tacoma discussion topics
- Communicate privately with other Tacoma owners from around the world
- Post your own photos in our Members Gallery
- Access all special features of the site
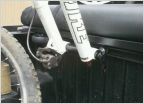 Mtb bed rail mount for 20mm maxle
 Looking at Drivers (Golf)
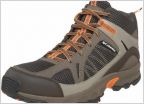 Mens Hiking Boots
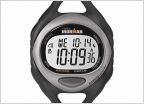 Sports/running watch?
 $100 --- what should i buy
 Pls help me buy a camera and lens
Plastic Model Kit Thread.
Discussion in 'Sports, Hobbies & Interests' started by Derpy Derek, Sep 8, 2011.
Page 8 of 22
Page 8 of 22

