-
Welcome to Tacoma World!
You are currently viewing as a guest! To get full-access, you need to register for a FREE account.
As a registered member, you’ll be able to:- Participate in all Tacoma discussion topics
- Communicate privately with other Tacoma owners from around the world
- Post your own photos in our Members Gallery
- Access all special features of the site
 Lift/Suspension Parts Replacment Question
 DIY LCA Ball Joint Replacement 2005+ Tacoma
 UCA inquiry
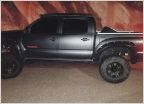 Install: ARB OME Dakar Leafs with D29XL AAL
 Struts?
 Extra Weight in bed - Need Suspension Advice
Light Racing UCA question
Discussion in 'Suspension' started by Eman5pt0, Dec 30, 2011.