

-
Welcome to Tacoma World!
You are currently viewing as a guest! To get full-access, you need to register for a FREE account.
As a registered member, you’ll be able to:- Participate in all Tacoma discussion topics
- Communicate privately with other Tacoma owners from around the world
- Post your own photos in our Members Gallery
- Access all special features of the site
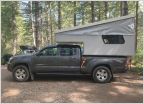 Need Suspension Advice Truck Bed Camper
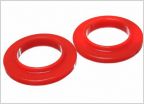 Rubber that goes between coil and shock?
 Bilstein 5100, not sufficient for 3" lift
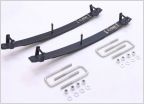 Icon Leaf Pack (Serial Number)
 Rear Shocks
 Leaf Springs that will give me 3" lift on a double cab?
Cut or Bend...Removing UCA Bolt
Discussion in 'Suspension' started by AllMountainToy, Jan 15, 2013.
Page 3 of 4
Page 3 of 4


