-
Welcome to Tacoma World!
You are currently viewing as a guest! To get full-access, you need to register for a FREE account.
As a registered member, you’ll be able to:- Participate in all Tacoma discussion topics
- Communicate privately with other Tacoma owners from around the world
- Post your own photos in our Members Gallery
- Access all special features of the site
 Finished front 5100 install but just noticed something... am I boned?
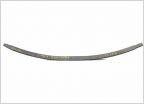 Ome progressive (7) leaf pack from dsm
 What else do i need?
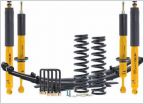 First Time Tacoma Owner Suspension Upgrade
 Pro Comp Pro Runner SS Height Adjustables
Adjusting Fox 2.5 Coilovers
Discussion in 'Suspension' started by FoxRacR17, Jul 16, 2009.
Page 2 of 7
Page 2 of 7