

-
Welcome to Tacoma World!
You are currently viewing as a guest! To get full-access, you need to register for a FREE account.
As a registered member, you’ll be able to:- Participate in all Tacoma discussion topics
- Communicate privately with other Tacoma owners from around the world
- Post your own photos in our Members Gallery
- Access all special features of the site
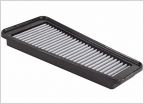 Air filter replacement
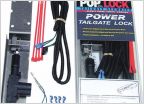 Which Pop & Lock?
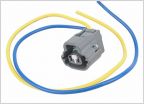 2015 Wiring
 Missing bracket
 Too many wires going to my battery or not? What would you do?
 Sirius Radio for 2009/2010 Tacoma
Pop & Lock Automatic 05+ Dbl Cab Mod
Discussion in 'Technical Chat' started by Addicted, Sep 1, 2008.


